读书笔记《hands-on-full-stack-development-with-spring-boot-2-0-and-react》使用JPA创建和访问数据库
本章介绍如何在 Spring Boot 中使用 JPA。我们将使用实体类创建一个数据库。在第一阶段,我们将使用 H2 内存数据库进行开发和演示。 H2 是一个内存 SQL 数据库,非常适合快速开发或演示目的。在第二阶段,我们将从 H2 迁移到使用 MariaDB。本章还介绍了 CRUD 存储库的创建以及数据库表之间的一对多连接。
在本章中,我们将看到以下内容:
- Basics and benefits of using JPA
- How to define a database by using entity classes
- How to create Spring Boot backend with a database
使用 Spring Boot 需要 Java SDK 版本 8 或更高版本 (http://www.oracle.com/technetwork/java/javase/downloads/index.html)。
MariaDB 安装对于创建数据库应用程序(https://downloads.mariadb.org/)。
对象-关系映射(ORM)是一种< span>允许您从获取和操作 使用面向对象的编程范例的数据库。 ORM 对程序员来说非常好,因为它依赖于面向对象的概念,而不是数据库结构。它还使开发速度更快,并减少了源代码的数量。 ORM 大多独立于数据库并且 开发人员不必担心特定于供应商的SQL 语句。
Java Persistent API (JPA) 提供对象-关系映射< span>适用于 Java 开发人员。 JPA 实体是表示数据库表结构的 Java 类。实体类的字段表示数据库表的columns。
Hibernate 是最流行的基于 Java 的 JPA 实现,它在 Spring Boot 中作为默认值使用。 Hibernate 是一个成熟的产品,在大规模应用中被广泛使用。
实体类是一个简单的 Java 类,使用 JPA 的 @Entity 注释进行注释。实体类使用标准的 JavaBean 命名约定并具有适当的 getter 和 setter 方法。类字段具有私有可见性。
JPA 在应用程序初始化时创建一个名为类名的数据库表。如果您想为数据库表使用其他名称,可以使用 @Table 注释。
为了能够使用 JPA 和 H2 数据库,我们必须将以下依赖项添加到 pom.xml 文件中:
以下是创建实体类的步骤:
- To create an entity class in Spring Boot, we will first create our own package for entities. The package should be created under the root package.
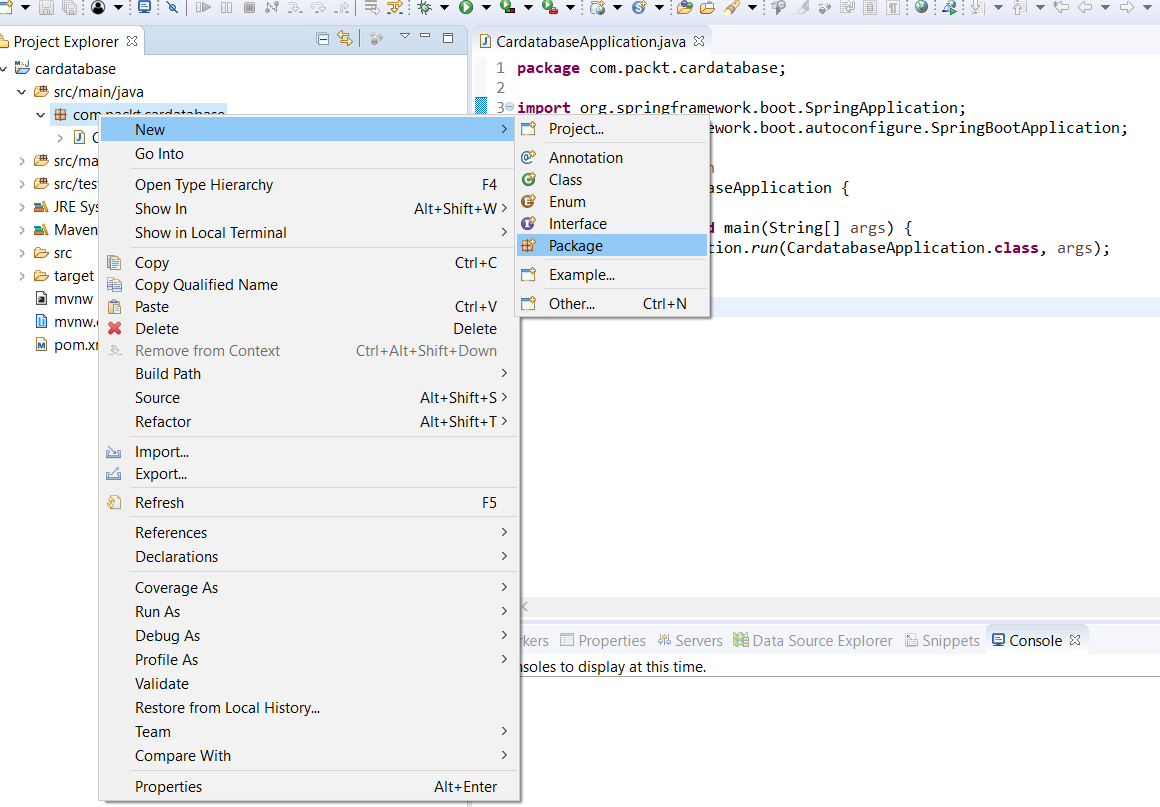
- Activate the root package in Eclipse
Project Explorerand right-click to show a menu. - From the menu, select
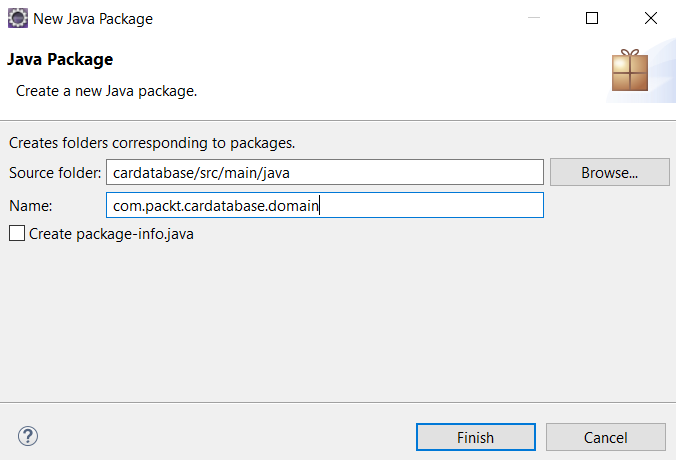
New|Package. The following screenshot shows the creation of package for entity classes:
- We name our package
com.packt.cardatabase.domain:
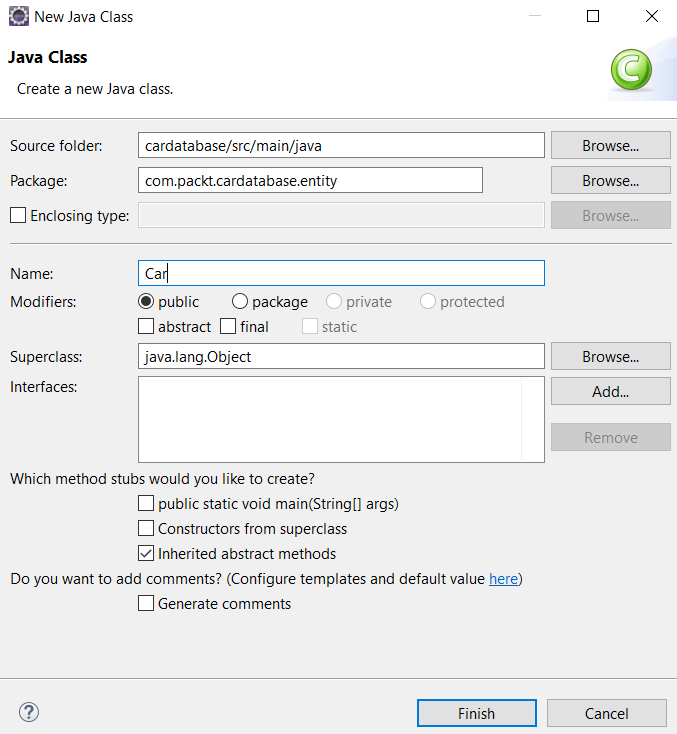
- Open the
Carclass file in the editor by double-clicking it in the project explorer. First, we have to annotate the class with the@Entityannotation. TheEntityannotation is imported from thejavax.persistencepackage:
主键是使用 @Id 注解定义的。 @GeneratedValue注解定义ID由数据库自动生成。我们还可以定义我们的密钥生成策略。类型 AUTO 表示 JPA 提供者为特定数据库选择最佳策略。您还可以通过使用 @Id 注释来注释多个属性来创建复合主键。
数据库列默认按照类字段命名。如果你想使用一些其他的命名约定 你可以使用 @Column注解。使用 @Column 注解,您还可以定义列的长度以及该列是否可以为空。以下代码显示了使用 @Column 注释的示例。有了这个定义,数据库中的列名是 desc ,列的长度是 512 并且不能为空:
最后,我们将具有属性的 getter、setter 和构造函数添加到实体类中。由于自动 ID 生成,我们的构造函数中不需要 ID 字段。
Car实体类构造函数源码如下:
Note
Eclipse 提供了 getter、setter 和构造函数的自动添加。在类中激活光标并右键单击。从菜单中,选择 Source | 生成 Getter 和 Setter... or Source | 使用字段生成构造函数...
以下是Car实体类getter和setter的源码:
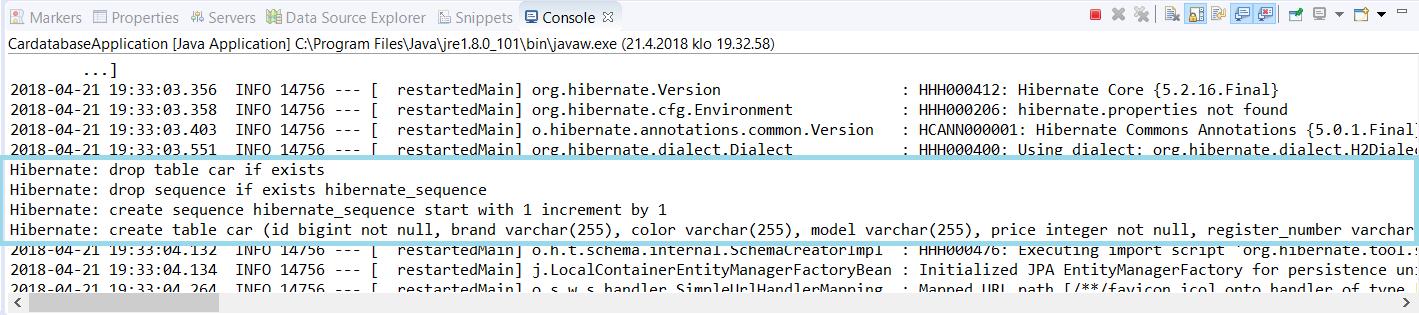
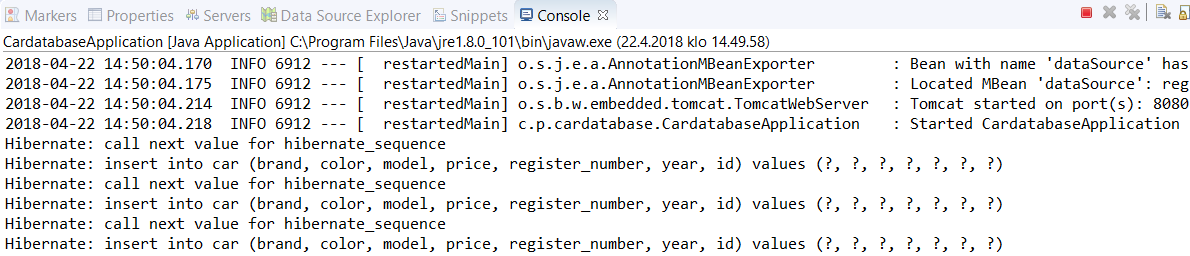
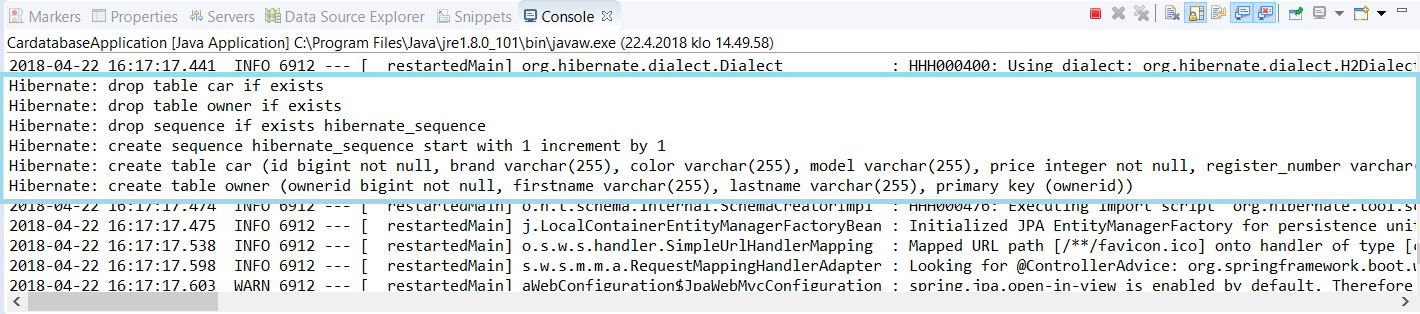
当我们运行应用程序时,必须在数据库中创建名为 car 的表。为确保这一点,我们将在 application.properties 文件中添加一个新属性。这启用将SQL语句记录到控制台:
我们现在可以在运行应用程序时看到创建表的语句:
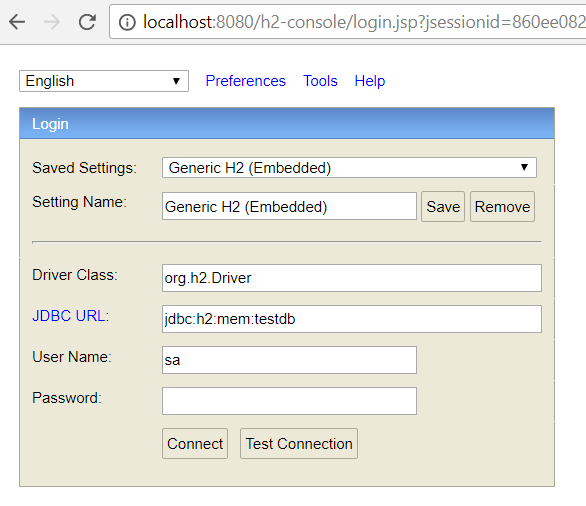
H2 提供了一个基于 Web 的控制台,可用于探索数据库和执行 SQL 语句。要启用控制台,我们必须将以下行添加到 application.properties 文件中。第一个设置启用 H2 控制台,第二个设置定义我们可以用来访问控制台的端点:
您可以通过使用 Web 浏览器导航到 localhost:8080/h2-console 来访问 H2 控制台。使用 jdbc:h2:mem:testdb 作为 JDBC URL 并保留 Password 字段为空。按 Connect按钮登录控制台:
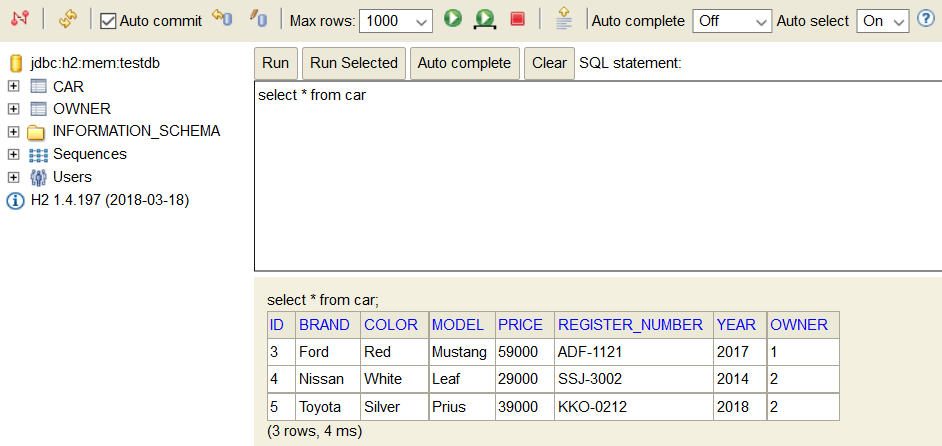
现在您可以在数据库中看到我们的 car 表。您可能 注意到 注册号在单词之间有一个下划线。这是由于属性 (registerNumber) 的驼峰式命名:

Spring Boot Data JPA 为 CRUD 操作提供了一个 CrudRepository 接口。它为我们的实体类提供了 CRUD 功能。
我们现在将在 domain 包中创建我们的 repository,如下所示:
- Create a new class called
CarRepositoryin thedomainpackage and modify the file according to the following code snippet:
我们的 CarRepository 现在扩展了 Spring Boot JPA CrudRepository 接口。 <Car, Long> type 参数定义这是 Car实体类的存储库和类型ID 字段很长。
CrudRepository 提供了多种我们现在可以开始使用的 CRUD 方法。下表列出了最常用的方法:
方法 |
说明 |
|
返回实体的数量 |
|
返回给定类型的所有项目 |
|
按 id 返回一项 |
|
删除实体 |
|
删除存储库的所有实体 |
|
保存实体 |
如果该方法只返回一项,则返回 Optional<T> 而不是T。 Optional 类在 Java 8 SE 中被引入。 Optional 是一种单值容器,有值或没有值。通过使用Optional,我们可以防止空指针异常。
- Now we are ready to add some demonstration data to our H2 database. For that, we will use the Spring Boot
CommandLineRunner. TheCommandLineRunnerinterface allows us to execute additional code before the application has fully started. Therefore, it is a good point to add demo data to your database.CommandLineRunneris located inside the main class:
- Next, we have to inject our car repository into the main class into be able to save new car objects to the database. An
@Autowiredannotation is used to enable dependency injection. The dependency injection allows us to pass dependencies into a object. After we have injected the repository class, we can use the CRUD methods it provides. The following sample code shows how to insert a few cars to the database:
Insert 语句可以在应用程序执行后在 Eclipse 控制台中看到:
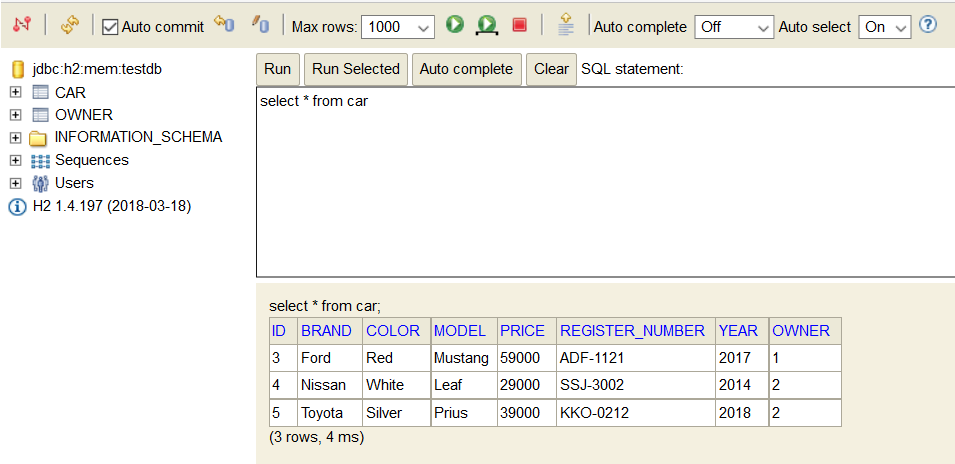
您还可以使用 H2 控制台从数据库中获取汽车,如以下屏幕截图所示:
您可以在 Spring Data 存储库中定义自己的查询。查询必须以前缀开头,例如 findBy。在前缀之后,您定义查询中使用的 entity 类字段。以下是三个简单查询的示例代码:
By 关键字后可以有多个字段,与 And 或 Or 连接 关键字:
可以使用查询方法中的 OrderBy关键字对查询进行排序:
您还可以通过@Query 注释使用 SQL 语句创建查询。 以下示例显示了 CrudRepository 中 SQL 查询的用法:
您还可以使用带有 @Query注解的更高级的表达式,例如, like。以下示例显示了 CrudRepository 中 like 查询的用法:
Spring Data JPA 还提供了PagingAndSortingRepository,它扩展了CrudRepository。它提供了使用分页和排序来获取实体的方法。 如果您要处理大量数据,这是一个不错的选择。 PagingAndSortingRepository 的创建方式与我们对 CrudRepository 所做的类似:
在这种情况下,您现在拥有存储库提供的两个新的附加方法:
方法 |
说明 |
|
返回按给定选项排序的所有实体 |
|
根据给定的分页选项返回所有实体 |
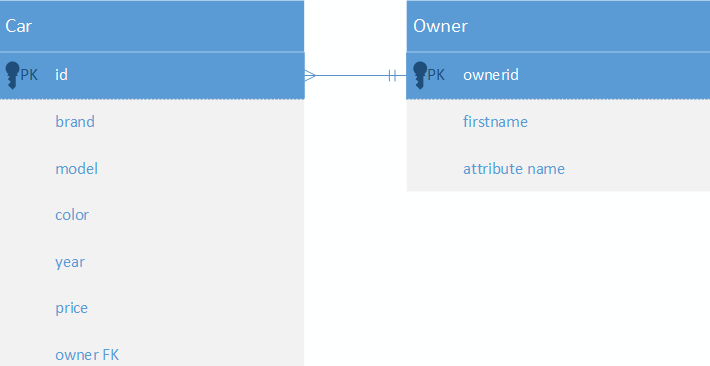
接下来,我们创建一个名为 owner 的新表,它具有一对多 relationship 与 car 表。车主可以拥有多辆汽车,但一辆汽车只能拥有一个车主。下面的 UML 图显示了表之间的关系:
以下是创建新表的步骤:
- First, we create the
Ownerentity and repository in thedomainpackage. TheOwnerentity and repository are created similarly to what we did with theCarclass. The following is the source code of theOwnerentity class andOwnerRepository:
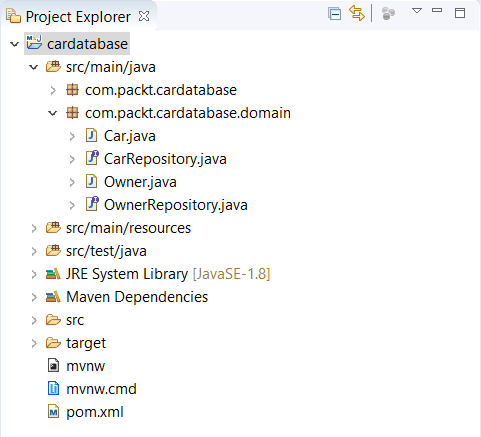
现在,我们的域包包含两个实体类和存储库:
- The one-to-many relationship can be added by using the
@ManyToOneand@OneToManyannotations. In the car entity class, which contains a foreign key, you will define the relationship with the@ManyToOneannotation. Also, add the getter and setter for the owner field. It is recommended usingFetchType.LAZYfor all associations. FortoManyrelationships, that is the default value, but fortoOnerelationships, you should define it.FetchTypedefines the strategy for fetching data from the database. The value can be eitherEAGERorLAZY. In our case, the lazy strategy means that when the owner is fetched from the database, all the cars associated with the owner will be fetched when needed.Eagermeans that the cars will be fetched immediately with the owner. The following source code shows how to define a one-to-many relationship in theCarclass:
在所有者实体站点中,关系是使用 @OneToMany 注释定义的。该字段的类型是 List<Car> 因为车主可能有多辆汽车。还为此添加 getter 和 setter:
@OneToMany 注释有两个我们正在使用的属性。 cascade 属性定义了级联如何影响实体。属性设置 ALL 意味着如果所有者被删除,则与该所有者关联的汽车也将被删除。 mappedBy="owner"属性设置告诉我们 Car类有owner字段,也就是外键对于这段关系。
- Now, we can add some owners to the database with
CommandLineRunner. Let's also modify theCarentity classes constructor and add an owner there:
- We first create two owner objects and save these to the database. For saving the owners, we also have to inject the
OwnerRepositoryinto the main class. Then we connect the owners to the cars by using theCarconstructor. The following is the source code of the application main classCardatabaseApplication:
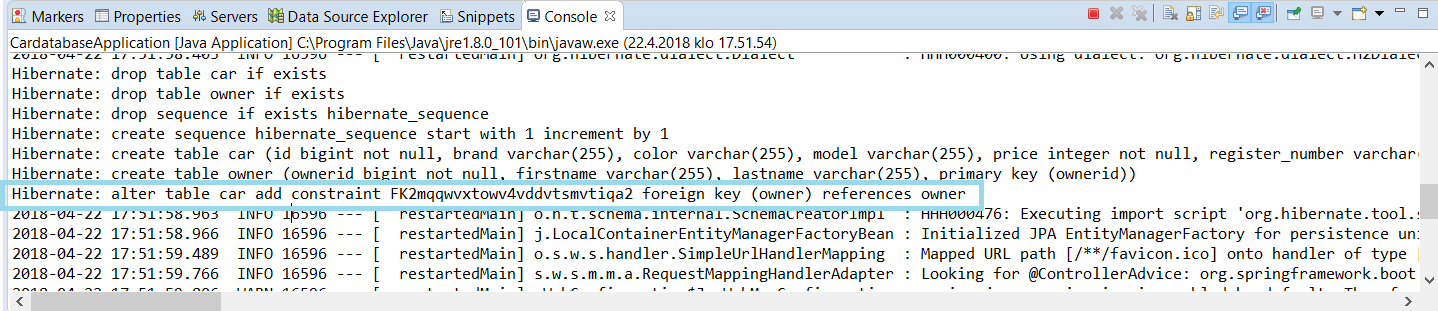
如果您现在运行应用程序并从数据库中获取汽车,您可以看到车主现在已链接到汽车:
如果您想改为创建多对多关系,这意味着,实际上,一个车主可以拥有多辆汽车 一辆汽车可以有多个车主,你应该使用 @ManyToMany注解。在我们的示例应用程序中,我们将使用一对多关系,但下面是一个如何将关系更改为多对多的示例。在多对多关系中,建议使用 Set代替List with hibernate:
- In the
Carentity class many-to-many relationship, define the getters and setters in the following way:
在所有者实体中,定义如下:
- Now, if you run the application, there will be a new join table that is created between the
carandownertables. The join table is defined by using the@JoinTableannotation. With the annotation, we can set the name of the join table and join columns. The following is a screenshot of the database structure when using a many-to-many relationship:

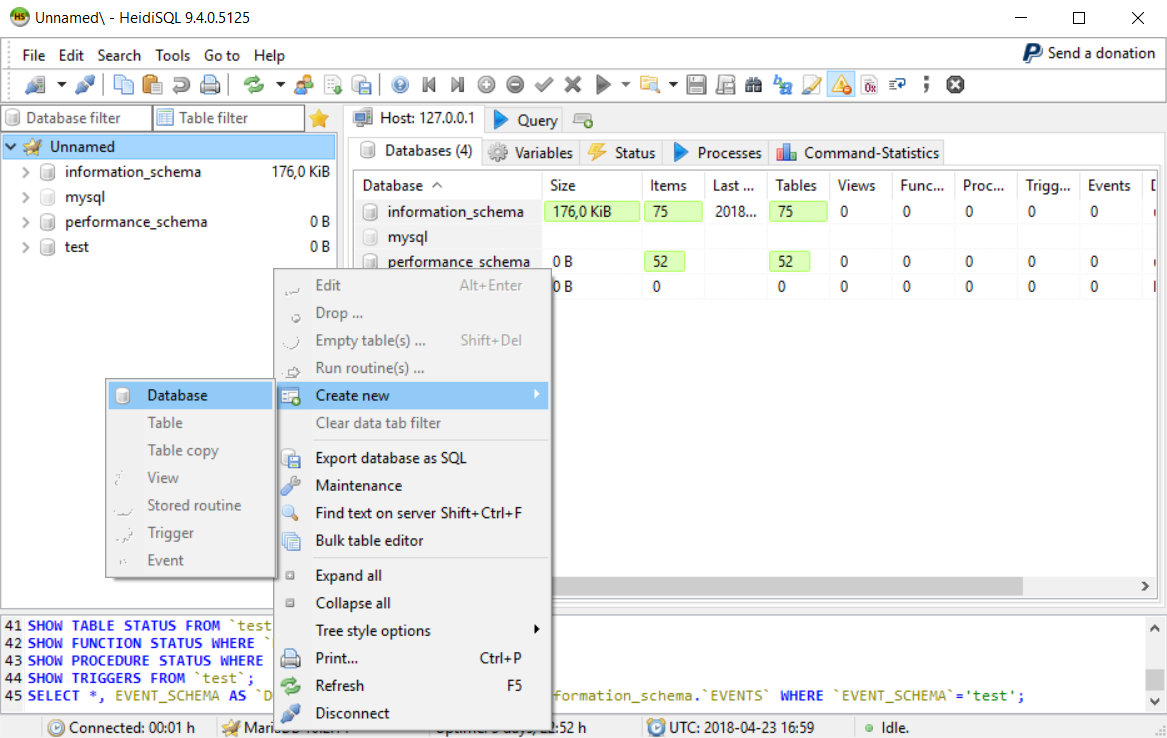
现在,我们将数据库从 H2 切换到 MariaDB。 database 表仍然由 JPA 自动创建。但是在我们运行我们的应用程序之前,我们必须为它创建一个数据库。可以使用 HeidiSQL 创建数据库。打开 HeidiSQL,然后按照以下步骤操作:
- Right-click your mouse inside the database list.
- Then, select
New | Database:
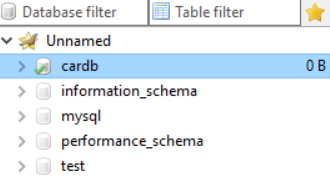
- Let's name our database
cardb. After you pressOK, you should see the newcardbin the database list:
- In the application, we add a MariaDB dependency to the
pom.xmlfile and remove the H2 dependency that we don't need any more:
- In the
application.propertiesfile, you define the database connection. First, you will define the database'surl,username,passwordand database driver class. Thespring.jpa.generate-ddlsetting defines whether JPA should initialize the database (true/false). Thespring.jpa.hibernate.ddl-autosetting defines the behavior of the database initialization. The possible values arenone,validate,update,create, andcreate-drop. Create-drop means that the database is created when an application starts and it is dropped when the application is stopped. Create-drop is also a default value if you don't define any. Create value only creates the database when the application is started. Update value creates the database and updates the schema if it is changed:
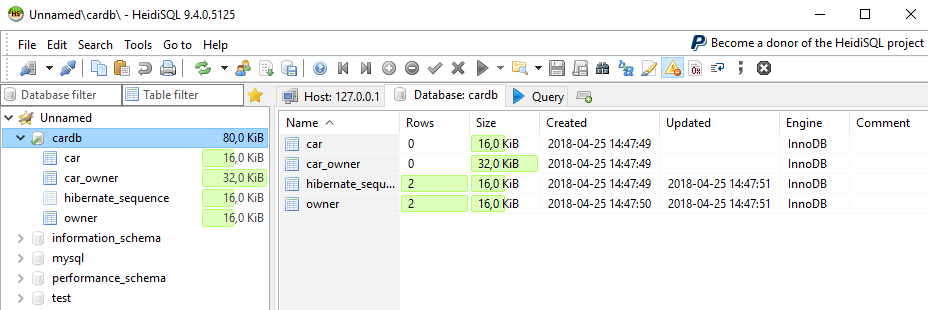
- Now, after running the application, you should see the tables in MariaDB. The following screenshot shows the HeidiSQL UI after the database has been created. Your application is now ready to be used with MariaDB:
- What are ORM, JPA, and Hibernate?
- How can you create an entity class?
- How can you create
CrudRepository? - How does the
CrudRepositoryprovide for your application? - How can you create a one-to-many relationship between tables?
- How can you add demo data to a database with Spring Boot?
- How can you access the H2 console?
- How can you connect your Spring Boot application to MariaDB?
Packt 还有其他很好的学习 Spring Boot 的资源: