读书笔记《developing-java-applications-with-spring-and-spring-boot-ebook》Java快速入门
使用 Spring Boot 就像与 Spring 开发人员结对编程。
– Josh Long @starbuxman
也许您听说过 Spring Boot?它培养了多年来软件开发中最受欢迎的爆炸式增长。 每月的下载量达到数百万,自 2013 年首次亮相以来,该社区已呈爆炸式增长。
我希望您已经准备好享受乐趣,因为我们将在使用 Spring Boot 构建社交媒体平台时将事情提升到一个新的水平。我们将探索它的许多有价值的功能,从旨在加快开发工作的工具到生产就绪支持以及云原生功能。
尽管您可能已经在 YouTube 上看到了一些快速演示,但 Spring Boot 不仅仅用于快速演示。 Spring Boot 基于 Java 的事实标准工具包 Spring 框架构建,将帮助我们以闪电般的速度和稳定性构建这个社交媒体平台。
此外,本书还将探讨 Spring Framework 5 中引入的新范式,响应式编程。在当今时代,随着我们构建更大的系统、更快地迭代并托管分布式 微服务,它变得至关重要我们从经典的阻塞编程风格切换。正如 Josh Long 所指出的,这并不是什么新鲜事。当今操作系统的网络堆栈本质上是异步的,但 JVM 不是。直到最近几年,人们才意识到需要以异步、非阻塞的方式分割任务。然而,处理可能在波动时间到来的无限数据流的编程范式需要一个新的编程模型,我们将在 Spring Boot 本身的强大功能的同时仔细探索它。
在本章中,我们将使用 Java 编程语言快速入门 Spring Boot。也许这会让你发笑?多年来,人们一直认为 Java 速度慢、体积庞大,而且对于敏捷商店来说不是一种好的语言。在本章中,我们将看到不是的情况。
在本章中,我们将介绍以下主题:
- Creating a bare project using the Spring Initializr found at http://start.spring.io
- Exploring Spring Boot's management of third-party libraries
- Seeing how to run our app straight inside our Integrated Development Environment (IDE) with no standalone containers
- Using Spring Boot's property support to make external adjustments
- Packaging our app into a self-contained, runnable JAR file
- Deploying our app into the cloud
- Adding out-of-the-box production-grade support tools
当我们开始一个项目时,第一步是什么?我们访问 Stack Overflow 并寻找一个示例项目来帮助我们构建我们的项目!
说真的,适应另一个项目的构建文件、挑选依赖项和填写其他细节所花费的时间加起来很多的浪费时间。
不再。
在 Spring Initializr ( https://start.spring.io),我们可以输入minimal关于我们的应用程序的详细信息,选择我们最喜欢的构建系统和我们希望使用的 Spring Boot 版本,然后然后选择我们的依赖项关闭菜单。点击 Generate Project 按钮,我们就有了一个独立的、可以运行的应用程序。
在本章中,我们将进行一次快速测试,并构建一个小型 Web 应用程序。我们可以从下拉菜单中选择 Gradle 开始。然后选择 2.0.0.M5 作为我们希望使用的 Spring Boot 版本。
接下来,我们需要选择应用程序的坐标,如下所示:
- Group -
com.greglturnquist.learningspringboot - Artifact -
learning-spring-boot
有趣的来了。我们为我们的应用程序挑选配料,就像挑选一份美味的菜单一样。如果我们开始在 Dependencies 框中输入,比如 Web,我们会看到几个出现选项。要查看所有可用选项,请单击底部的 切换到完整版本 链接。
Note
有很多覆盖,例如从 JAR 切换到 WAR,或者使用旧版本的 Java。您还可以选择 Kotlin 或 Groovy 作为应用程序的主要语言。对于初学者来说,在这个时代,没有理由使用比 Java 8 更早的任何东西。JAR 文件是要走的路。仅在将 Spring Boot 应用于旧容器时才需要 WAR 文件。
要构建我们的社交媒体平台,我们需要以下几个要素:
- Reactive Web (embedded Netty + Spring WebFlux)
- Reactive MongoDB (Spring Data MongoDB)
- Thymeleaf template engine
- Lombok (to simplify writing POJOs)
以下屏幕截图显示了我们选择这些选项:

选择这些项目后,单击 Generate Project。
Note
还有 很多 的其他工具可以利用这个网站。例如,IntelliJ IDEA 允许您在 IDE 中创建一个新项目,为您提供此处显示的相同选项。它调用网站的 REST API,并导入您的新项目。您还可以通过 curl 或任何其他基于 REST 的工具与站点进行交互。
现在,让我们解压那个 ZIP 文件,看看我们有什么。您会发现以下内容:
- A
build.gradlebuild file - A Gradle wrapper, so there's no need to install Gradle
- A
LearningSpringBootApplication.javaapplication class - An
application.propertiesfile - A
LearningSpringBootApplicationTests.javatest class
我们构建了一个空的 Spring Boot 项目。怎么办?在我们开始编写代码之前,让我们看一下构建文件。它非常简洁,但带有一些关键位。
让我们看一下,从顶部开始:
前面的构建文件包含我们项目的基础:
springBootVersionshows us we are using Spring Boot 2.0.0.M5- The Maven repositories it will pull from are listed next (Maven central plus Spring's snapshot and milestone repositories)
- Finally, we see the
spring-boot-gradle-plugin, a critical tool for any Spring Boot project
第一部分,Spring Boot 的版本,很重要。这是因为 Spring Boot 附带了 140 个第三方库版本的精选列表,远远超出了 Spring 产品组合,并扩展到了 Java 生态系统中一些最常用的库。通过简单地更改 Spring Boot 的版本,我们可以将所有这些库升级到已知可以协同工作的新版本。 (见 https://github.com/spring-projects/spring-boot/blob/master/spring-boot-project/spring-boot-dependencies/pom.xml 对于一个完整的列表。)
Note
还有一个额外的项目,Spring IO Platform (http://platform.spring .io/platform/),其中包括额外的 134 个精选版本,使总数达到 274 个。
存储库并不重要,但如果获取尚未发布到 Maven 中心或托管在某些供应商本地存储库上的库,则添加里程碑和快照很重要。值得庆幸的是,Spring Initializr 根据网站上选择的 Spring Boot 版本为我们完成了这项工作。
最后,我们有 spring-boot-gradle-plugin(Maven 也有对应的 spring-boot-maven-plugin用户)。这个插件负责将 Spring Boot 的精选版本列表与我们在构建文件中选择的库链接起来。这样,我们就不必指定版本号。
此外,这个插件 hooks 到 build 阶段并将我们的应用程序捆绑到 一个可运行的über JAR,也称为阴影或胖JAR。
Note
Java 没有提供将嵌套 JAR 文件加载到类路径中的标准化方法。 Spring Boot 提供了将第三方 JAR 捆绑在一个封闭的 JAR 文件中的方法,并在运行时正确加载它们。阅读更多信息 http://docs.spring.io/spring-boot/docs/2.0.0.M5/reference/htmlsingle/#executable-jar。
有了 über JAR,我们只需要把它放在 U 盘上。我们可以将它带到另一台机器、云中的一百个虚拟机、我们的数据中心或其他任何地方。它在我们能找到 JVM 的任何地方运行。
再往下看build.gradle,我们可以看到默认启用的插件:
- The
javaplugin indicates the various tasks expected for a Java project - The
eclipseplugin helps generate project metadata for Eclipse users - The
org.springframework.bootplugin is where the actualspring-boot-gradle-pluginis activated - The
io.spring.dependency-managementplugin supports Maven Bill of Materials (BOM) manifests, allowing usage of libraries that manage the sets of library versions in our Gradle build. (Because Maven supports this natively, there is no Maven equivalent plugin.)
如果没有指定 依赖项,任何应用程序都是不完整的。 Spring Boot 的一个有价值的特性是它的虚拟包。这些是已发布的包,不包含任何代码,而只是列出了其他依赖项。
以下代码显示了我们在 Spring Initializr 站点上选择的所有依赖项:
您可能已经注意到,这些包中的大多数都是 Spring Boot 启动器:
spring-boot-starter-data-mongodb-reactivepulls in Spring Data MongoDB with the reactive bits enabledspring-boot-starter-thymeleafpulls in the Thymeleaf template enginespring-boot-starter-webfluxpulls in Spring WebFlux, Jackson JSON support, and embedded Netty
这些入门软件包使我们能够快速获取启动和运行所需的部分。 Spring Boot 启动器已经变得如此流行,以至于许多其他第三方库开发人员都在制作自己的启动器。
除了初学者之外,我们还有以下三个额外的库:
- Project Lombok (https://projectlombok.org) makes it dead simple to define POJOs without getting bogged down in getters, setters, and other details.
- Flapdoodle is an embedded MongoDB database that allows us to write tests, tinker with a solution, and get things moving before getting involved with an external database.
spring-boot-starter-testpulls in Spring Boot Test, JSONPath, JUnit, AssertJ, Mockito, Hamcrest, JSONassert, and Spring Test, all within test scope.
最后一个启动器 spring-boot-starter-test 的价值怎么强调都不过分。只需一行代码,最强大的测试工具就在我们的指尖,允许我们编写单元测试、切片测试和成熟的 our-app-inside-embedded-Netty 测试。这就是为什么这个启动器包含在所有项目中,而没有在 Spring Initializr 站点上选中一个框。
现在,为了让事情顺利进行,我们需要将注意力转移到 Spring Initializr 为我们编写的一小段代码上。
精彩的 https://start.spring.io 网站 < span>创建了一个小类,LearningSpringBootApplication,如下所示:
这个前面的小类实际上是一个完全可操作的 Web 应用程序!
- The
@SpringBootApplicationannotation tells Spring Boot, when launched, to scan recursively for Spring components inside this package and register them. It also tells Spring Boot to enable autoconfiguration, a process where beans are automatically created based on classpath settings, property settings, and other factors. We'll see more of this throughout the book. Finally, it indicates that this class itself can be a source for Spring bean definitions. - It holds
public static void main(), a simple method to run the application. There is no need to drop this code into an application server or servlet container. We can just run it straight up, inside our IDE. The amount of time saved by this feature, over the long haul, adds up fast. SpringApplication.run()points Spring Boot at the leap-off point--in this case, this very class. But it's possible to run other classes.
这个小类是可运行的。马上!事实上,让我们试一试:
- The banner at the top gives us a read-out of the version of Spring Boot. (By the way, you can create your own ASCII art banner by creating either
banner.txtorbanner.pngand putting it in thesrc/main/resources/folder.) - Embedded Netty is initialized on port
8080, indicating that it's ready for web requests. - It's slightly cut off, but there are signs that Flapdoodle, our embedded MongoDB data store, has come up.
- And the wonderful
Started LearningSpringBootApplication in 3.617 secondsmessage can be seen too.
Spring Boot 使用嵌入式 Netty,因此无需在我们的目标机器上安装容器。非网络应用程序甚至不需要。 JAR 本身是新的容器,它使我们能够停止思考老式的 servlet 容器。相反,我们从应用程序的角度思考。所有这些因素共同构成了应用程序部署的最大灵活性。
Spring Boot 如何使用嵌入式 Netty?如前所述,它具有自动配置,这意味着它根据不同的条件定义了 Spring bean。当 Spring Boot 在类路径上看到 Netty 时,它会创建一个嵌入式 Netty 实例以及几个支持它的 bean。
当它在类路径上发现 Spring WebFlux 时,它会创建视图 resolution 引擎、处理程序映射器和大量其他所需的 bean帮助我们编写一个 Web 应用程序。这让我们可以专注于编写路由,而不是在配置基础设施方面游手好闲。
借助类路径上的 Flapdoodle 以及 Reactive MongoDB 驱动程序,它启动了一个内存中的嵌入式 MongoDB 数据存储,并通过其最先进的驱动程序连接到它。
Spring Data MongoDB 将导致 Spring Boot 制作一个 MongoOperations bean 以及开始使用 Mongo 查询语言并在我们需要时使其可用的所有其他内容,让我们专注于定义存储库。
在这个阶段,我们有一个正在运行的 Web 应用程序,尽管它是一个空的。没有自定义路由,也没有处理数据的方法。但是我们可以添加一些真正的快速。
让我们从起草一个简单的 REST 控制器开始,如下所示:
让我们详细检查一下这个微型 REST 控制器:
- The
@RestControllerannotation indicates that we don't want to render views, but write the results straight into the response body instead. @GetMappingis Spring's shorthand annotation for@RequestMapping(method = RequestMethod.GET). In this case, it defaults the route to/.
- Our
greeting()method has one argument--@RequestParam(required=false, defaultValue="") String name. It indicates that this value can be requested via an HTTP query (?name=Greg)--the query isn't required, and in case it's missing, it will supply an empty string. - Finally, we return one of two messages depending on whether or not the
nameis an empty string, using Java's ternary operator.
如果我们在 IDE 中重新启动 LearningSpringBootApplication,我们将在控制台中看到这个新条目:
然后,我们可以在浏览器中的 http://localhost:8080 和 http ping 我们的新路由://localhost:8080?name=Greg。试试看!
(顺便说一句,如果系统能够检测到这种变化并自动重新启动,那肯定会很方便,对吧?查看第 14 章,Spring Boot 应用程序的开发人员工具< /span> 了解如何。)
很好,但是既然我们选择了 Spring Data MongoDB,那么加载一些示例数据并从另一个中检索它会有多难路线? (剧透警告——一点也不难。)
我们可以从定义一个简单的 Chapter 实体开始来捕获书籍的详细信息,如下所示:
前面这个小POJO让我们看一下一本书的章节细节如下:
- The
@Dataannotation from Lombok generates getters, setters, atoString()method, anequals()method, ahashCode()method, and a constructor for all required (that is,final) fields - The
@Documentannotation flags this class as suitable for storing in a MongoDB data store - The
idfield is marked with Spring Data's@Idannotation, indicating this is the primary key of our Mongo document - Spring Data MongoDB will, by default, create a collection named
chapterswith two fields,idandname - Our field of interest is
name, so let's create a constructor call to help insert some test data
为了与 MongoDB 中的这个实体及其对应的集合进行交互,我们可以深入研究并开始使用 Spring Boot 提供的自动配置的 MongoOperations。但是,当我们可以声明基于存储库的解决方案时,为什么要这样做呢?
为此,我们将创建一个接口来定义我们需要的操作。看看这个简单的界面:
最后一个声明性接口创建了一个 Spring Data 存储库,如下所示:
ReactiveCrudRepositoryextendsRepository, a Spring Data Commons marker interface that signals Spring Data to create a concrete implementation based on the reactive paradigm while also capturing domain information. It also comes with some predefined CRUD operations (save,delete,deleteById,deleteAll,findById,findAll, and more).- It specifies the entity type (
Chapter) and the type of the primary key (String). - We could also add custom finders, but we'll save that for Chapter 3, Reactive Data Access with Spring Boot.
Spring Data MongoDB 会自动连接这个接口的具体实现。
Note
Spring Data 不参与代码生成。代码生成有一段肮脏的历史,在一些最糟糕的时候已经过时了。相反,Spring Data 使用代理和其他机制来支持这些操作。永远不要忘记——你不写的代码没有错误。
定义好 Chapter 和 ChapterRepository 后,我们现在可以预加载数据库,如下代码所示:
前面的这个类会被 Spring Boot 自动扫描并以如下方式运行:
@Configurationmarks this class as a source of beans.@Beanindicates that the return value ofinit()is a Spring Bean--in this case, aCommandLineRunner(utility class from Spring Boot).- Spring Boot runs all
CommandLineRunnerbeans after the entire application is up and running. This bean definition requests a copy ofChapterRepository.
- Using Java 8's ability to coerce the
args → {}lambda function intoCommandLineRunner, we are able to gather a set ofChapterdata, save all of them and then print them out, preloading our data.
Note
我们不会深入研究 Flux、flatMap 和 subscribe< /code> 还没有。我们将把它保存到第 11 章, Reactive Web with Spring Boot和第12章, 使用 Spring Boot 进行响应式数据访问。
有了这一切,剩下的就是编写一个 REST 控制器来提供数据!
前面的控制器能够按如下方式提供我们的数据:
@RestControllerindicates that this is another REST controller.- Constructor injection is used to automatically load it with a copy of
ChapterRepository. With Spring, if there is only one constructor call, there is no need to include an@Autowiredannotation. @GetMappingtells Spring that this is the place to route/chapterscalls. In this case, it returns the results of thefindAll()call found inReactiveCrudRepository. Again, if you're curious whatFlux<Chapter>is, we'll tackle that at the top of the next chapter. For now, think of it being like aStream<Chapter>.
如果我们重新启动我们的应用程序并访问 http://localhost:8080/chapters,我们可以看到我们的预加载数据以格式良好的 JSON 文档的形式提供,如此屏幕截图所示:
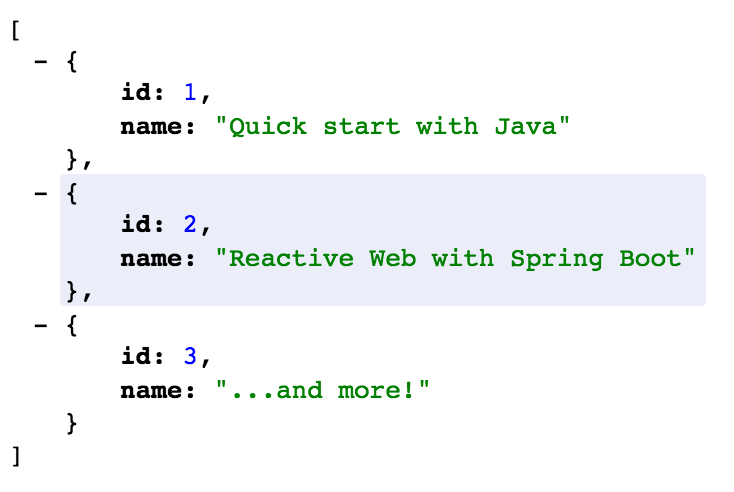
这可能不是很详细,但是这个小类集合帮助我们快速定义了一部分功能。而且,如果您注意到的话,我们在配置 JSON 转换器、路由处理程序、嵌入式设置或任何其他基础设施方面花费了零精力。
Spring Boot 旨在让我们专注于功能需求,而不是低级管道。
我们刚刚通过一个可操作的应用程序实现了ground,但这并不是 Spring Boot 的唯一杀手级特性。
Spring Boot 带有大量预构建的属性。事实上,几乎每个自动配置的组件都有一些 property 设置(http://docs.spring.io/spring -boot/docs/2.0.0.M5/reference/htmlsingle/#common-application-properties) 允许您只覆盖您喜欢的部分。
如果 Boot 发现我们创建了我们自己的,许多这些自动配置的 bean 将退出。例如,当 Spring Boot 在类路径中发现响应式 MongoDB 驱动程序时,它会自动创建响应式 MongoClient。但是,如果我们定义自己的 MongoClient bean,那么 Spring Boot 将退出并接受我们的。
这可能导致其他组件关闭。但有时,我们不需要换掉整个 bean。相反,我们可能希望仅调整其中一个自动配置的 bean 的单个 property。
让我们尝试对 src/main/resources/application.properties 进行一些调整,如下所示:
上述更改将导致 Spring Boot 在端口 9000 上启动 Netty,如下所示:
它还将包 com.greglturnquist 的日志级别提升到 DEBUG。
虽然将配置设置外部化到属性文件中很方便,但如果它们只能嵌入到我们应用程序的 JAR 文件中,那将不是一个很大的优势。
这就是为什么 Spring Boot 带有属性覆盖支持的原因。以下列表显示了我们可以覆盖属性的所有位置,第一个是最高优先级:
- The
@TestPropertySourceannotation on test classes - Command-line arguments
- The properties found inside
SPRING_APPLICATION_JSON(inline JSON embedded in anenvvariable or system property) - The
ServletConfiginit parameters - The
ServletContextinit parameters - The JNDI attributes from
java:comp/env - The Java System properties (
System.getProperties()) - The OS environment variables
- A
RandomValuePropertySourcethat only has properties inrandom.* - Profile-specific properties outside the packaged JAR file (
application-{profile}.propertiesand YAML variants) - Profile-specific properties inside the packaged JAR file (
application-{profile}.propertiesand YAML variants) - Application properties outside the package JAR file (
application.propertiesand YAML variants) - Application properties inside the packaged JAR file (
application.propertiesand YAML variants) - The
@PropertySourceannotation on any@Configurationclasses - Default properties (specified using
SpringApplication.setDefaultProperties)
对于与我们的 application.properties 文件相同的 YAML 格式覆盖的示例,我们可以将以下内容放入 application.yml在 src/main/resources 中:
这将与我们在 application.properties 中看到的完全相同。唯一的区别是格式。
YAML 相对于属性有什么好处?如果我们需要覆盖很多设置,它可以避免各种键的重复。
Spring 属性也可以引用其他属性,如下片段所示:
在前面的示例中,第二个属性 app.description 引用第一个属性 app.name。
这不是 property 覆盖选项的结束。这仅仅是个开始。在本书中,我们将扩展 Spring Boot 的属性支持提供的选项。
现在,让我们专注于将我们的应用程序投入生产!
我们已经破解了一个合适的应用程序。现在是时候将其投入生产了。正如 Spring Developer Advocate Josh Long 所说,生产是地球上最快乐 的地方。
好的 ol' spring-boot-gradle-plugin 有内置的钩子来为我们处理这个问题。通过调用 Gradle 的 build 任务,它将自己插入到构建过程中,并创建一个 JAR 文件。
如果我们查看输出,我们会发现原始 JAR 文件(非 FAT)以及重新打包的包含我们的应用程序代码以及第三方依赖项的文件,如下所示:
Note
如果您想查看新生成的 JAR 的内容,请输入 jar tvf build/libs/learning-spring-boot-0.0.1-SNAPSHOT.jar。由于篇幅限制,我们不会在这里展示。
über JAR 很好地加载了我们的自定义代码、我们所有的第三方依赖项以及一些 Spring Boot 代码以允许我们运行它。为什么不在这里试试呢?
通过使用 Java 的 -jar 选项调用 JAR,我们可以在机器上只使用 JVM 启动应用程序。
有了我们的 JAR 文件,我们可以将我们的应用程序带到任何地方。如果我们需要覆盖任何设置,我们可以在不打开它并进行更改的情况下做到这一点。
假设我们稍微改变我们的命令,像这样:
我们现在可以预期结果会有所不同,如下图所示:
在命令行中,我们使用另一种表示法 (SERVER_PORT) 覆盖 server.port 并在端口 8000。
这使我们能够将其部署到云中。
随着公司加速规范 class="indexterm"> 发布到生产环境的速率 (https://pivotal .io/云原生)。
Cloud Native 描述了高性能组织以更快、一致和可靠的方式大规模交付软件的模式。持续交付、DevOps 和微服务标记了云原生的原因、方式和内容。在这些概念的最高级表达中,它们交织在一起,以至于不可分割。在高度信任的文化中利用自动化提高人类绩效,以信心和卓越运营更快、更安全地行动。
许多云平台在发布自包含应用程序的情况下蓬勃发展。开源 Cloud Foundry 平台支持多种技术和可运行的 JAR 文件,是最受欢迎的平台之一。
首先,我们需要在数据中心安装 Cloud Foundry 的副本,或者在 帐户 "strong">Pivotal Web Services (PWS),Cloud Foundry 托管服务提供商(https://run.pivotal.io/)。假设我们有一个 PWS 帐户(读作 p-dubs),让我们安装 工具并部署我们的应用程序。
在 macOS X 上,我们可以输入:
对于 Linux,我们可以像这样获取 tarball:
上述代码将下载并启用基于 Linux 的 cf 工具。
更多安装详情,请访问https://docs.run.pivotal.io/cf-cli/install-go-cli.html 。
使用 cf 工具,让我们部署我们的应用程序。首先,我们需要登录 PWS,如下所示:
我们登录并定位组织内的逻辑空间。
是时候部署了!我们可以使用 cf push 命令来做到这一点。至少,我们使用 -p 选项指定我们的应用程序和工件的名称(并使用与 learning-spring- 不同的名称boot,因为它已经被这本书拿走了!):
我们已将 JAR 文件推送到 PWS,让 Java buildpack(自动选择)使用 URL 注册它,然后启动它。现在,我们可以在 http://learning-spring-boot.cfapps.io 访问它的注册 URL:
我们已经将我们的应用程序投入生产。
下一步是处理有时称为第 2 天的情况。这是我们现在必须监控和维护我们的应用程序的地方,Spring Boot 已经准备好为我们提供我们所需要的。
我们用最少的代码创建了一个 Spring Web 应用程序并将其发布到生产环境中。这是引入生产级 support 功能的最佳时机。
- What do we do when the system administrator wants to configure his or her monitoring software to ping our app to see if it's up?
- What happens when our manager wants to know the metrics of people hitting our app?
- What are we going to do when the ops center supervisor calls us at 2:00 a.m. and we have to figure out what went wrong?
我们将在本章节 中介绍的最后一个特性是Spring Boot 的Actuator 模块。该模块提供了一些在生产环境中非常有价值的面向 Ops 的超级流畅的功能。
我们首先将此依赖项添加到我们的 build.gradle 中,如下所示:
当您运行我们的这个版本的应用程序时,可以使用我们之前看到的相同的业务功能,但是还有额外的 HTTP 端点;这些列在下表中:
执行器端点 |
说明 |
|
|
|
|
|
|
|
|
|
|
|
|
|
|
|
|
|
|
|
默认情况下,端点被禁用。我们必须选择加入。这是通过在 src/main/resources/application.properties 中设置 endpoints.{endpoint}.enabled=true 来实现的,例如这个:
添加到 application.properties 的这一行提到了端点、运行状况并启用它。如果我们重新启动应用程序,我们可以 ping 它的运行状况,如下一节所示。
这些端点中的每一个都可以使用我们的浏览器或使用其他工具(如curl
:
上述健康状况为我们提供了以下信息:
- An overall
UPstatus - The status of MongoDB
- The status of the diskspace
添加其他组件时,它们可以选择添加自己的健康检查。
这立即解决了我们之前列出的第一个需求。我们可以通知系统管理员,他或她可以编写一个管理脚本来询问我们应用程序的健康状况。
请注意,这些端点中的每一个都提供一个紧凑的 JSON 文档。一般来说,命令行 curl 可能不是最好的选择。虽然它在 *nix 和 Mac 系统上很方便,但内容密集且难以阅读。拥有以下内容更实用:
- a JSON plugin installed in our browser (such as JSON Viewer at https://github.com/tulios/json-viewer)
- a script that uses a JSON parsing library if we're writing a management script (such as Groovy's JsonSlurper at http://docs.groovy-lang.org/latest/html/gapi/groovy/json/JsonSlurper.html or JsonPath at https://code.google.com/p/json-path)
为了真正投入使用,我们需要指标。大多数生产系统都有一种或另一种形式的指标。值得庆幸的是,我们不必从头开始。 Spring Boot Actuator 中有一个度量端点。如果我们将以下设置添加到 application.properties:
使用此属性设置,如果我们重新启动应用程序,我们可以快速读取事物。
假设我们安装了 JSON 查看器,很容易浏览到 http://localhost:9000/application/metrics 并获得各种列表指标。我们甚至有 counters 用于每个好/坏的网络点击,按页面细分,如下所示:
我们可以通过将其名称附加到指标 URL 来访问这些指标中的任何一个。例如,要查看 http.server.requests,请访问 http://localhost:9000/application/metrics/http.server.requests
:
这提供了 metrics 的基本框架来满足我们经理的需求。重要的是要了解 Spring Boot Actuator 收集的指标在应用程序重新启动时不会保持不变。为了收集长期数据,我们必须将它们写在别处(http://docs.spring.io/spring-boot/docs/2.0.0.M5/reference/htmlsingle/#production-ready-metrics )。
Note
如果您使用过 Spring Boot 1.x,那么这可能看起来非常不同。这是因为一个更新、更复杂的指标版本已经到来——Micrometer。它目前正在开发中,可能会发生很大变化,因此请继续关注 http://micrometer。 io/,并确保在 Twitter 上关注 @micrometerio,因为 Spring Boot 能够制作高度详细和高级的指标。