vlambda博客
学习文章列表

读书笔记《hands-on-full-stack-development-with-spring-boot-2-0-and-react》设置环境和工具-后端

Chapter 1. Setting Up the Environment and Tools – Backend

在本章中,我们将设置使用 Spring Boot 进行后端编程所需的环境和工具。 Spring Boot 是一个现代的基于 Java 的后端框架,它使开发速度比传统的基于 Java 的框架更快。使用 Spring Boot,您可以创建具有嵌入式应用程序服务器的独立 Web 应用程序。

在本章中,我们将研究以下内容:

  • Building the environment for Spring Boot development
  • The basics of Eclipse IDE and Maven 
  • Creating and running Spring Boot projects
  • Solving common problems of running Spring Boot applications

Technical requirements


使用 Eclipse IDE 需要 Java SDK 版本 8 或更高版本。

在本书中,我们使用的是 Windows 操作系统,但所有工具也可用于 Linux 和 macOS。

Setting up the environment and tools


有很多不同的 IDE 工具 您可以使用 开发 Spring Boot 应用程序。在本书中,我们使用的是 Eclipse,它是一个用于多种编程语言的开源 IDE。我们将使用 Spring Initializr 项目启动页面创建我们的第一个 Spring Boot 项目。然后将项目导入 Eclipse 并执行。阅读控制台日志是开发 Spring Boot 应用程序时的一项关键技能。

Installing Eclipse

Eclipse 是 Eclipse 基金会开发的一个开放source 编程IDE。安装包可以从 https://www.eclipse.org/downloads。 Eclipse 可用于 Windows、Linux 和 macOS。你应该下载最新版本的Eclipse 适用于 Java EE 开发人员的 IDE。

您可以下载 Eclipse 的 ZIP 包或执行安装向导的安装程序包。如果使用 ZIP 包,您只需将包解压到本地磁盘,它将包含一个可执行的 Eclipse.exe 文件,您可以通过双击运行该文件文件。

The basics of Eclipse and Maven

Eclipse 是一个适用于 多种编程语言(例如Java、C++ 和Python)的IDE。 Eclipse 包含不同的视角 您的需求。透视图是 Eclipse Workbench 中的一组视图和编辑器。以下屏幕截图显示了 common 观点 for Java 开发:

读书笔记《hands-on-full-stack-development-with-spring-boot-2-0-and-react》设置环境和工具-后端

在左侧,我们有 Project Explorer,我们可以在其中看到我们的项目结构和资源。 Project Explorer 也用于通过双击文件来打开文件。这些文件将在位于工作台中间的编辑器中打开。  Console 视图可以在工作台的下部找到。  Consoleview 真的很重要因为它显示应用程序日志消息。

您可以获得 Spring Tool Suite (STS) Eclipse 如果你想的话,但我们不会在本书中使用它,因为简单的 Eclipse 安装对于我们的目的来说已经足够了。 STS 是一组使 Spring 应用程序开发更容易的插件 (https://spring.io/tools )。

Apache Maven 是一个软件项目管理工具。 Maven 的基础是 项目对象模型 (pom )。 Maven让软件开发流程变得更简单,同时也统一了开发流程。你也可以在 Spring Boot 中使用另一个名为 Gradle 的项目管理工具,但在本书中,我们将专注于使用 Maven。

pom 是一个 pom.xml 文件,其中包含有关项目的基本信息。 Maven 还应该下载所有依赖项才能构建项目。

项目的基本信息可以在 pom.xml文件的开头找到,该文件定义了例如应用程序的版本、打包格式等。

 pom.xml 文件的最低版本应包含项目根目录、modelVersion groupIdartifactIdversion

依赖项在依赖项部分中定义,如下所示:

<?xml version="1.0" encoding="UTF-8"?>
<project xmlns="http://maven.apache.org/POM/4.0.0" xmlns:xsi="http://www.w3.org/2001/XMLSchema-instance" xsi:schemaLocation="http://maven.apache.org/POM/4.0.0 http://maven.apache.org/xsd/maven-4.0.0.xsd">
  <modelVersion>4.0.0</modelVersion>

  <groupId>com.packt</groupId>
  <artifactId>cardatabase</artifactId>
  <version>0.0.1-SNAPSHOT</version>
  <packaging>jar</packaging>

  <name>cardatabase</name>
  <description>Demo project for Spring Boot</description>

  <parent>
    <groupId>org.springframework.boot</groupId>
    <artifactId>spring-boot-starter-parent</artifactId>
    <version>2.0.1.RELEASE</version>
    <relativePath/> <!-- lookup parent from repository -->
  </parent>

  <dependencies>
    <dependency>
      <groupId>org.springframework.boot</groupId>
      <artifactId>spring-boot-starter-web</artifactId>
    </dependency>

    <dependency>
      <groupId>org.springframework.boot</groupId>
      <artifactId>spring-boot-starter-test</artifactId>
      <scope>test</scope>
    </dependency>
  </dependencies>
</project>

Maven 通常从命令行使用。 Eclipse 包含嵌入式 Maven,它处理我们需要的所有 Maven 操作。因此,我们在这里不关注 Maven 命令行的使用。最重要的是了解pom.xml文件的结构以及如何向其中添加新的依赖项。

Creating the project with Spring Initializr

我们将创建我们的 后端项目with Spring Intializr,这是一个基于 Web 的工具,用于创建 Spring Boot 项目。 Spring Intializr 可以在 https://start.spring.io找到:

读书笔记《hands-on-full-stack-development-with-spring-boot-2-0-and-react》设置环境和工具-后端

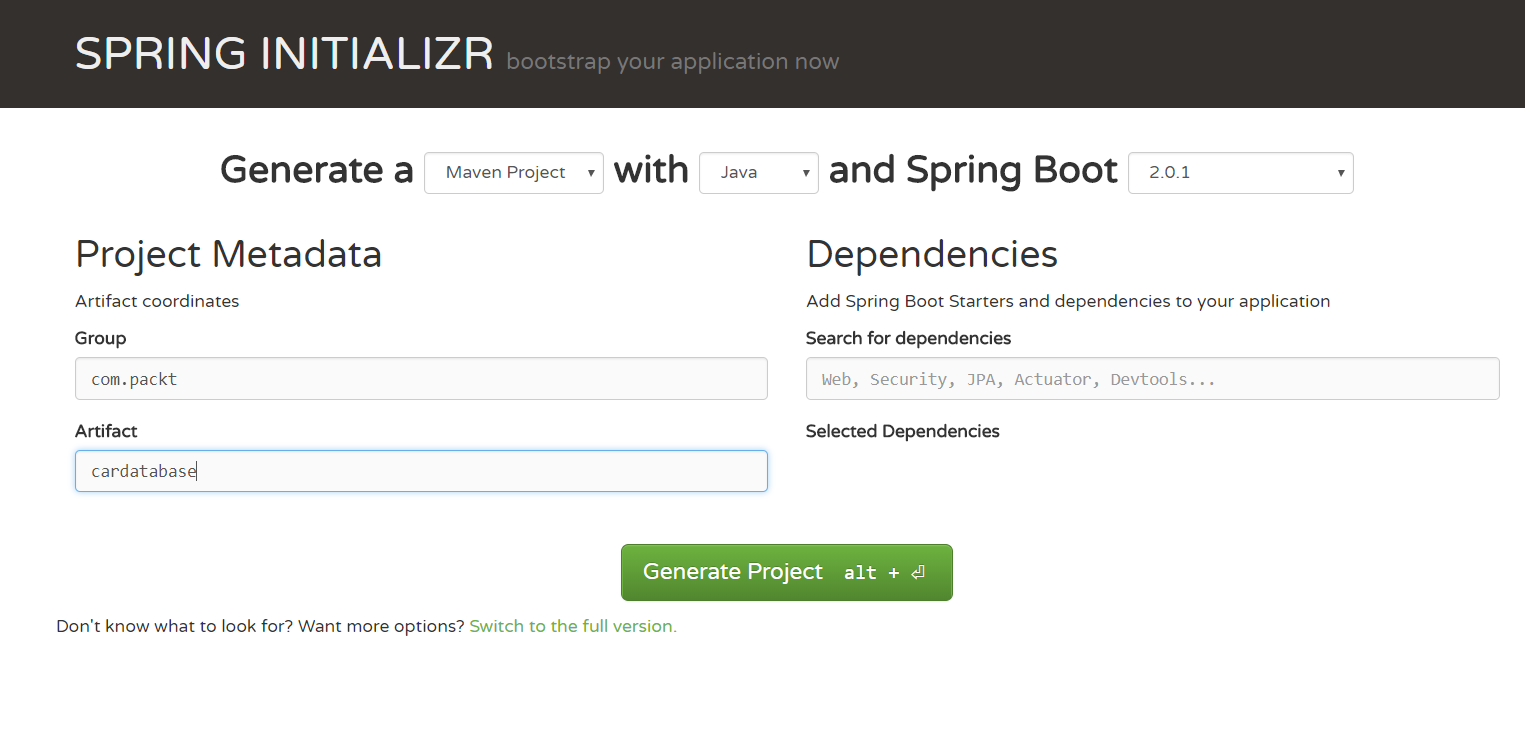
我们将使用 Java 和最新的 Spring Boot 版本生成一个 Maven 项目。在 Group 字段中,我们将定义我们的组 ID,这也将成为我们 Java 项目中的基础包。在 Artifact 字段中,我们将定义工件 ID,这也是我们在 Eclipse 中项目的名称。

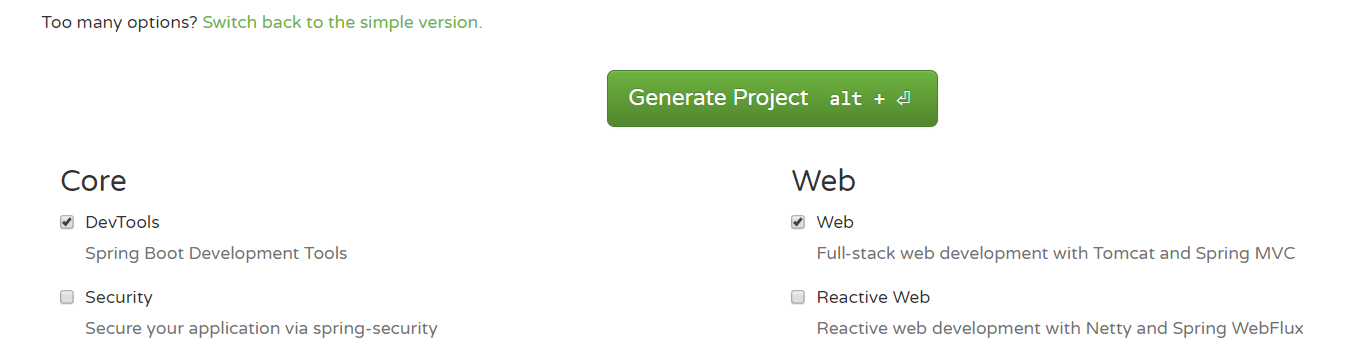
在 Dependencies部分,我们将选择项目中需要的启动器和依赖项。 Spring Boot 提供了简化 Maven 配置的入门包。 Spring Boot 启动器实际上是一组可以包含在项目中的依赖项。您可以在搜索字段中输入依赖项的关键字,也可以通过点击 切换到完整版查看所有可用的依赖项 链接。 我们将通过选择两个依赖项来启动我们的项目——WebDevTools。您可以在搜索字段中输入依赖项或切换到完整版本并查看所有可用的启动包和依赖项:

读书笔记《hands-on-full-stack-development-with-spring-boot-2-0-and-react》设置环境和工具-后端

DevTools 依赖项为我们提供了 Spring Boot 开发工具,提供自动重启功能。它使开发速度更快,因为在保存更改后应用程序会自动重新启动。 Web 入门包是全栈开发的基础,并提供嵌入式 Tomcat。

最后,您必须按下 Generate Project 按钮,然后为我们生成项目启动 ZIP 包。

How to run the project

  1. Extract the project ZIP package that we created in the previous topic and open Eclipse.
  2. We are going to import our project into Eclipse IDE. To start the import process, select the File | Import menu and the import wizard will be opened. The following screenshot shows the first page of the wizard:
读书笔记《hands-on-full-stack-development-with-spring-boot-2-0-and-react》设置环境和工具-后端

  1. In the first phase, you should select Existing Maven Projects from the list under the Maven folder, and then go to the next phase by pressing the Next button. The following screenshot shows the second step of the import wizard:
读书笔记《hands-on-full-stack-development-with-spring-boot-2-0-and-react》设置环境和工具-后端
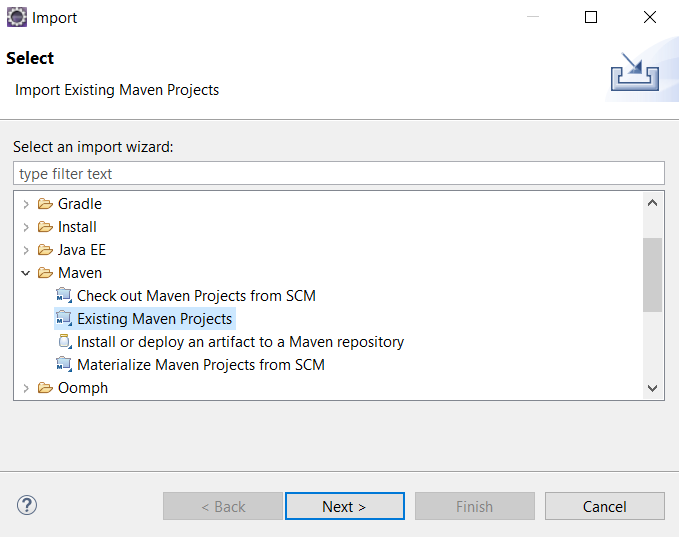
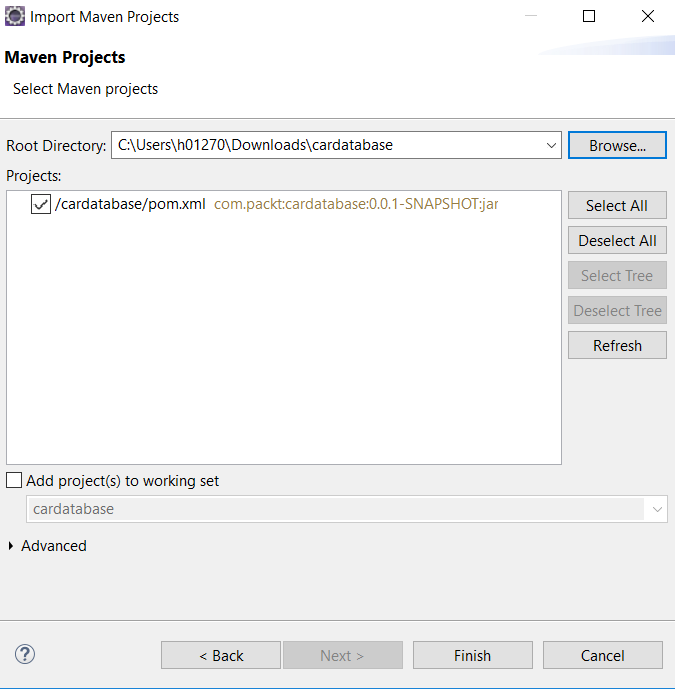
  1. In this phase, select the extracted project folder by pressing the Browse... button. Then, Eclipse finds the pom.xml file from the root of your project folder and shows it inside the Projects section of the window.


  1. Press the Finish button to finalize the import. If everything went correctly, you should see the cardatabase project in Eclipse Project Explorer. It takes a while when the project is ready because all dependencies will be loaded by Maven after import. You can see the progress of the dependency download at the bottom-right corner of Eclipse. The following screenshot shows Eclipse Project Explorer after successful import:
读书笔记《hands-on-full-stack-development-with-spring-boot-2-0-and-react》设置环境和工具-后端

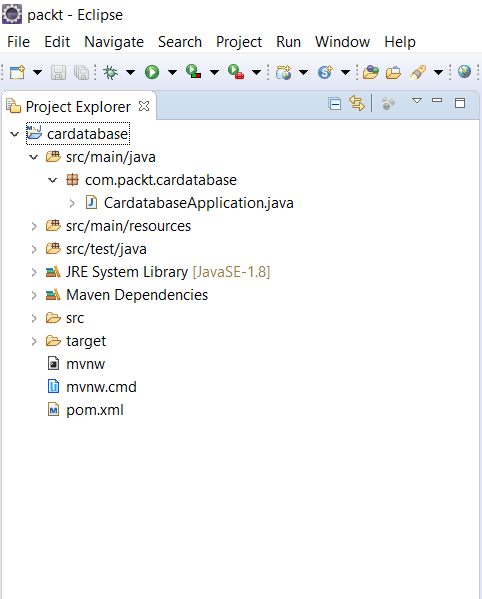
Project Explorer 也 显示了我们项目的包结构,现在一开始只有一个包叫 com.packt.cardatabase。在该包下是我们的主要应用程序类,称为CardatabaseApplication.java

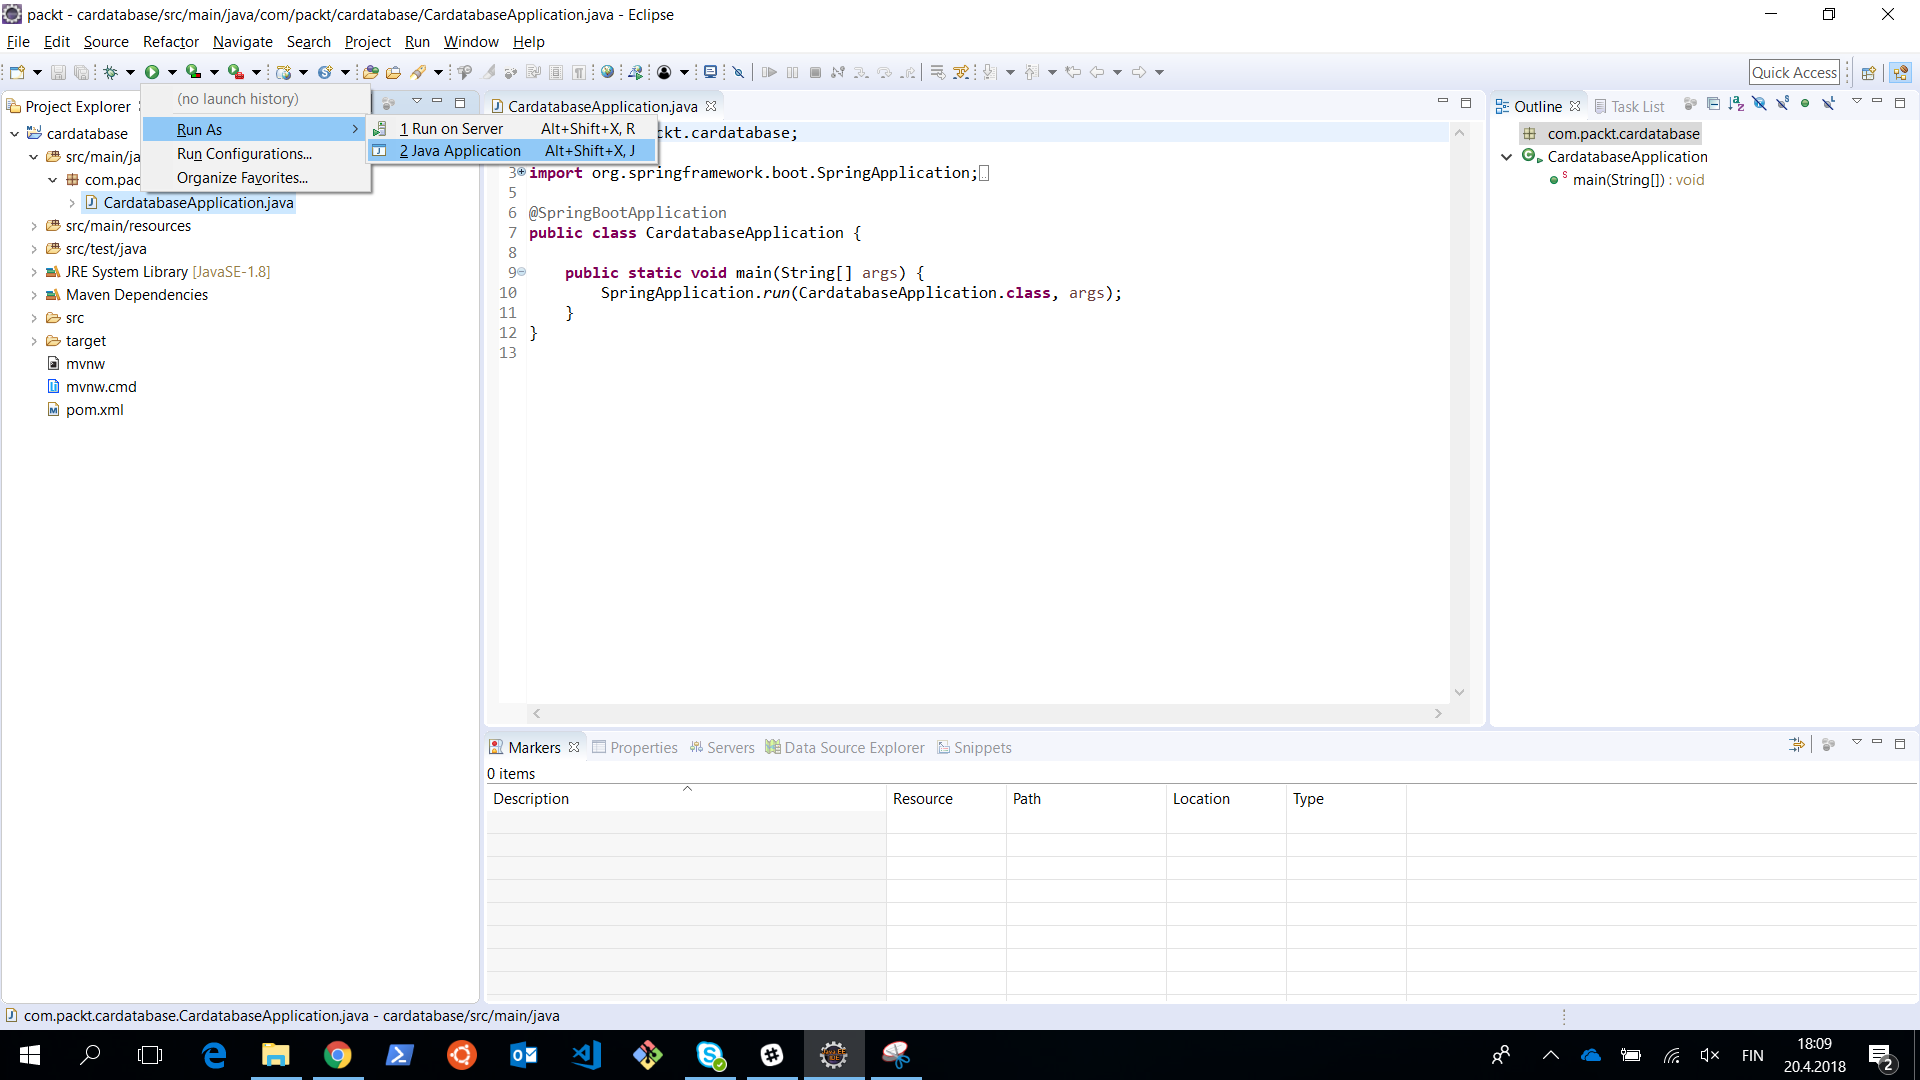
  1. Now, we don't have any functionality in our application, but we can run it and see whether everything has started successfully. To run the project, open the main class by double-clicking on it and then pressing the Run button in the Eclipse toolbar, or select the run menu and press Run as | Java Application:
读书笔记《hands-on-full-stack-development-with-spring-boot-2-0-and-react》设置环境和工具-后端

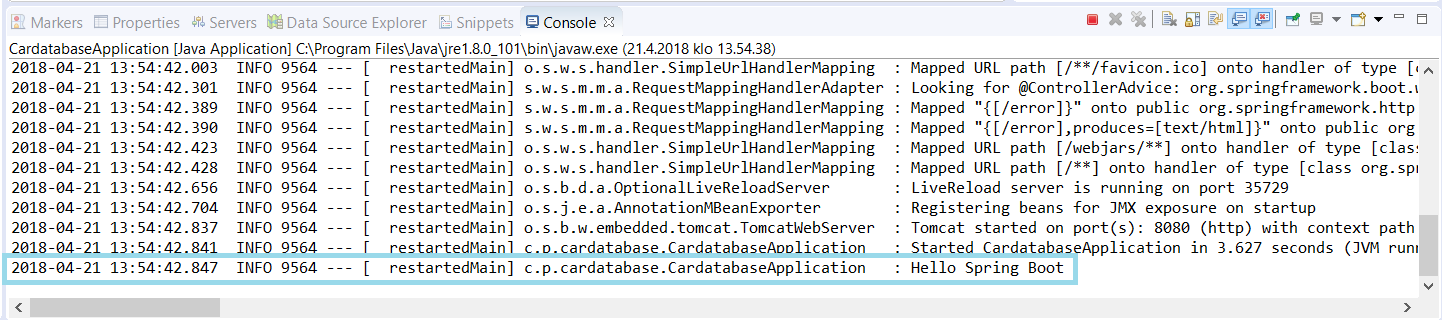
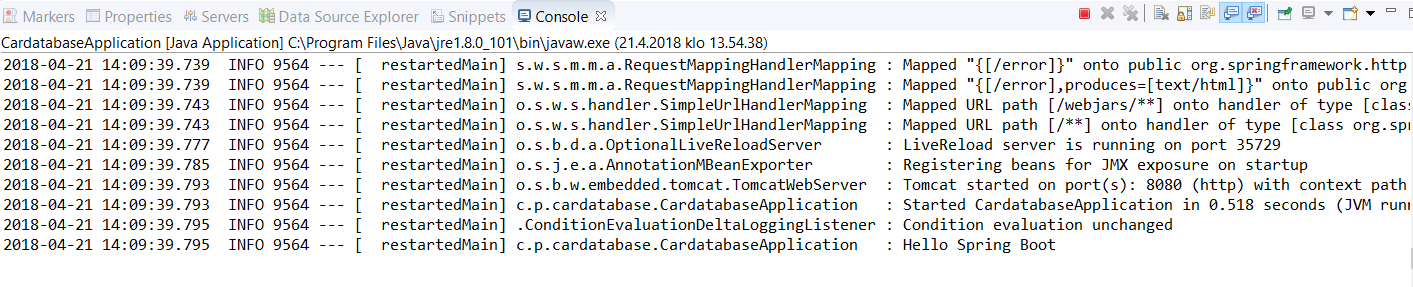
您可以看到 Console 视图在 Eclipse 中打开,其中包含有关项目执行的重要信息。这是显示所有日志文本和错误消息的视图,因此当出现问题时检查视图的内容非常重要。

现在,如果项目执行正确,您应该会在控制台末尾看​​到文本 Started CardatabaseApplication in... 。下面的截图显示了我们的Spring Boot项目启动后Eclipse控制台的内容:

读书笔记《hands-on-full-stack-development-with-spring-boot-2-0-and-react》设置环境和工具-后端

在我们项目的根目录下有 pom.xml 文件,即我们项目的Maven 配置文件。如果您查看文件中的依赖项,您可以看到我们现在在 Spring Initializr 页面上选择了依赖项。还有一个自动包含的测试依赖项,无需任何选择。在接下来的章节中,我们将为我们的应用程序添加更多功能,然后我们将手动添加更多依赖项到 pom.xml 文件中:

  <dependencies>
    <dependency>
      <groupId>org.springframework.boot</groupId>
      <artifactId>spring-boot-starter-web</artifactId>
    </dependency>
    <dependency>
      <groupId>org.springframework.boot</groupId>
      <artifactId>spring-boot-devtools</artifactId>
      <scope>runtime</scope>
    </dependency>
    <dependency>
      <groupId>org.springframework.boot</groupId>
      <artifactId>spring-boot-starter-test</artifactId>
      <scope>test</scope>
    </dependency>
  </dependencies>

让我们更仔细地看一下 Spring Boot 主类。在类的开头,有 @SpringBootApplication 注解。它实际上是多个注解的组合,例如:

注释

说明

@EnableAutoConfiguration

启用 Spring Boot 自动配置。 Spring Boot 将根据依赖项自动配置您的项目。例如,如果您有 spring-boot-starter-web 依赖项,Spring Boot 假定您正在开发一个 Web 应用程序并相应地配置您的应用程序。

@ComponentScan

启用 Spring Boot 组件扫描以查找应用程序中的所有组件。

@Configure

定义可用作 bean 定义源的类。


以下代码显示 Spring Boot 应用程序的main 类:

import org.springframework.boot.SpringApplication;
import org.springframework.boot.autoconfigure.SpringBootApplication;

@SpringBootApplication
public class CardatabaseApplication {

  public static void main(String[] args) {
    SpringApplication.run(CardatabaseApplication.class, args);
  }
}

与标准 Java 应用程序一样,应用程序的执行从 main 方法开始。

Note

建议将 main 应用程序类定位在根包中的其他类之上。应用程序无法正常工作的一个常见原因是 Spring Boot 找不到一些关键类。

Spring Boot development tools

Spring Boot 开发工具 make 应用程序 development 过程更容易。如果将以下依赖项添加到 Maven pom.xml 文件中,项目将包含开发人员工具:

    <dependency>
      <groupId>org.springframework.boot</groupId>
      <artifactId>spring-boot-devtools</artifactId>
      <scope>runtime</scope>
    </dependency>

当您创建应用程序的完整生产版本时,开发工具会被禁用。

当您更改项目类路径文件时,应用程序会自动重新启动。您可以通过向 main 类添加一个注释行来测试它。保存文件后,您可以在控制台中看到应用程序已重新启动:

package com.packt.cardatabase;

import org.springframework.boot.SpringApplication;
import org.springframework.boot.autoconfigure.SpringBootApplication;

@SpringBootApplication
public class CardatabaseApplication {

  public static void main(String[] args) {
    // After adding this comment the application is restarted
    SpringApplication.run(CardatabaseApplication.class, args);
  }
}

Logs and problem solving

Spring Boot 入门包提供了一个 logback,我们可以在没有任何配置的情况下使用它来进行日志记录。以下 sample 代码展示了如何使用日志记录:

import org.slf4j.Logger;
import org.slf4j.LoggerFactory;
import org.springframework.boot.SpringApplication;
import org.springframework.boot.autoconfigure.SpringBootApplication;

@SpringBootApplication
public class CardatabaseApplication {
  private static final Logger logger = LoggerFactory.getLogger(CardatabaseApplication.class);
  public static void main(String[] args) {
    SpringApplication.run(CardatabaseApplication.class, args);
    logger.info("Hello Spring Boot");
  }
}

运行项目后,可以在控制台中看到日志消息:

读书笔记《hands-on-full-stack-development-with-spring-boot-2-0-and-react》设置环境和工具-后端

有七种不同的日志记录级别——TRACEDEBUGINFOWARNERRORFATAL关闭 
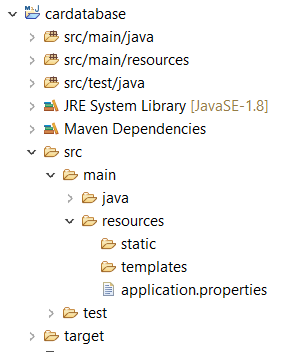
。您可以在 Spring Boot application.properties 文件中配置日志记录级别。该文件可以在项目内的 resources 文件夹中找到:

读书笔记《hands-on-full-stack-development-with-spring-boot-2-0-and-react》设置环境和工具-后端

如果我们将日志级别设置为 INFO,我们可以看到来自 INFO (INFOWARNERRORFATAL)。在以下示例中,我们为 root 设置了日志级别,但您也可以在包级别设置它:

logging.level.root=INFO

现在,当您运行项目时,您再也看不到TRACEDEBUG 消息了。对于您的应用程序的生产 version,这可能是一个很好的设置:

读书笔记《hands-on-full-stack-development-with-spring-boot-2-0-and-react》设置环境和工具-后端

Spring Boot 使用 Apache Tomcat (http://tomcat.apache.org/) 作为默认情况下,应用程序服务器。默认情况下,Tomcat 在端口 8080 中运行。您可以在application.properties 文件中更改端口。以下设置将在端口 8081 中启动 Tomcat:

server.port=8081

如果端口被占用,应用程序将无法启动,您将在控制台中看到以下消息:

读书笔记《hands-on-full-stack-development-with-spring-boot-2-0-and-react》设置环境和工具-后端

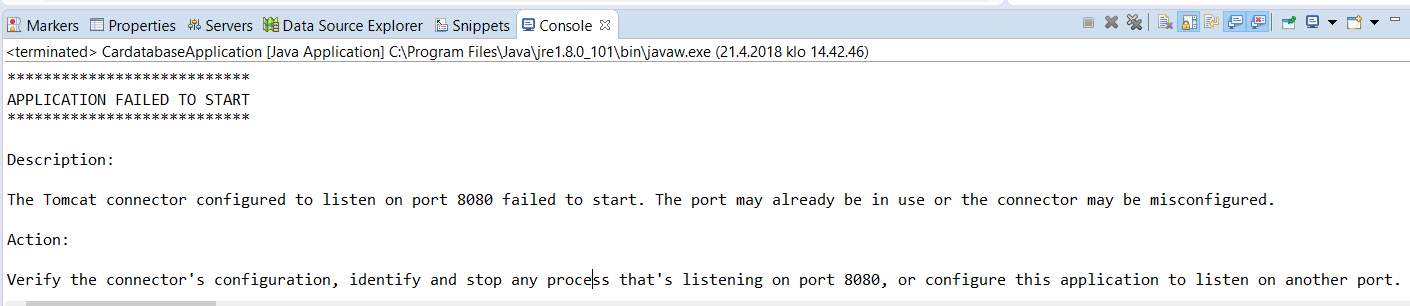
您必须停止正在侦听端口 8080 的进程或在 Spring Boot 应用程序中使用另一个端口。

Installing MariaDB

在下一章中,我们将开始 使用MariaDB,因此我们会将其安装到您的计算机本地。 MariaDB 是一个广泛使用的开源关系数据库。 MariaDB 适用于 Windows 和 Linux,您可以从 最新 稳定版本"https://downloads.mariadb.org/" target="_blank">https://downloads.mariadb.org/。 MariaDB 是在 GNU GPL 2 许可下开发的。

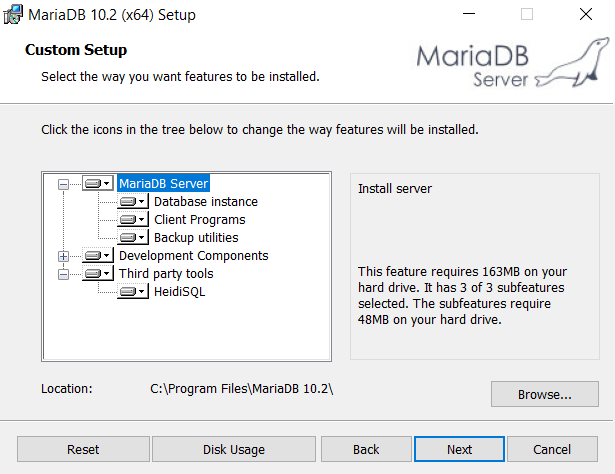
对于 Windows,我们将在此处使用 MSI 安装程序。下载安装程序并执行它。从安装向导安装所有功能:

读书笔记《hands-on-full-stack-development-with-spring-boot-2-0-and-react》设置环境和工具-后端

在下一步中,您应该提供 root 用户的密码。当我们使用应用程序连接到数据库时,下一章需要这个密码:

读书笔记《hands-on-full-stack-development-with-spring-boot-2-0-and-react》设置环境和工具-后端

next阶段,我们可以使用 默认设置:

读书笔记《hands-on-full-stack-development-with-spring-boot-2-0-and-react》设置环境和工具-后端

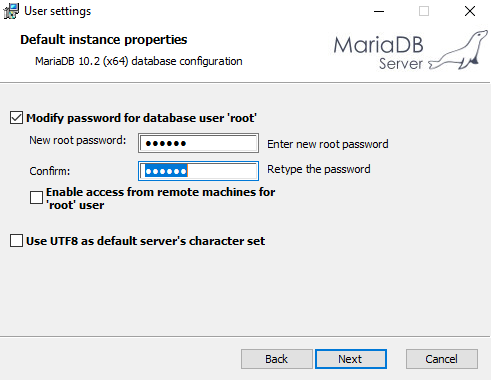
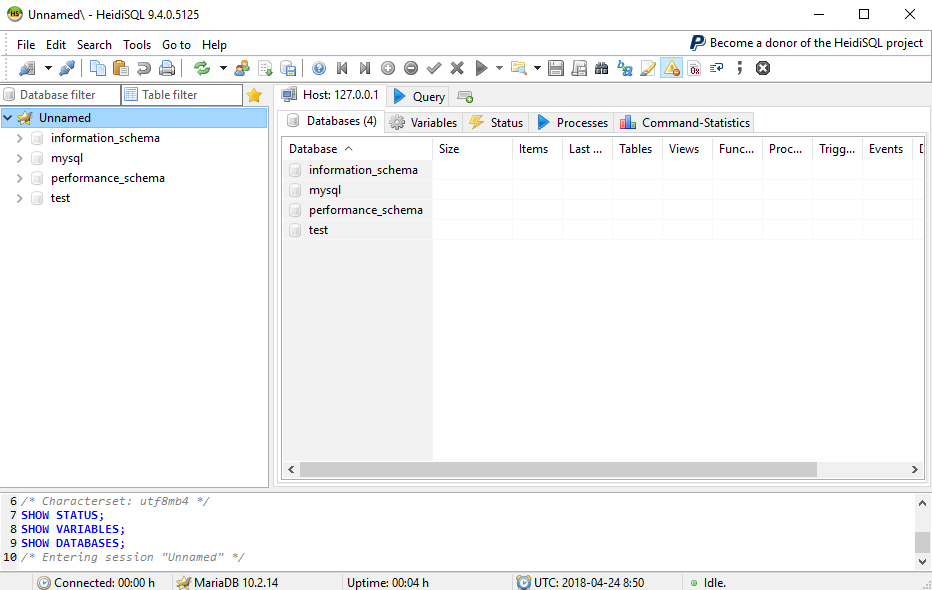
现在安装开始,MariaDB 将安装到您的本地计算机上。安装向导将为我们安装HeidiSQL。这是一个易于使用的图形数据库客户端。我们将使用它来添加一个新数据库并对我们的数据库进行查询。您还可以使用安装包中包含的命令提示符:

读书笔记《hands-on-full-stack-development-with-spring-boot-2-0-and-react》设置环境和工具-后端

Summary


在本章中,我们安装了使用 Spring Boot 进行后端开发所需的工具。对于 Java 开发,我们使用了 Eclipse IDE,这是一个广泛使用的编程 IDE。我们使用 Spring Initializr 页面创建了一个新的 Spring Boot 项目。创建项目后,将其导入 Eclipse 并最终执行。我们还介绍了如何解决 Spring Boot 的常见问题以及如何查找重要的错误和日志消息。最后,我们安装了一个 MariaDB 数据库,我们将在下一章中使用它。

Questions


  1. What is Spring Boot?
  2. What is Eclipse IDE?
  3. What is Maven?
  4. How do we create a Spring Boot project?
  5. How do we run a Spring Boot project?
  6. How do we use logging with Spring Boot?
  7. How do we find error and log messages in Eclipse?