读书笔记《building-distributed-applications-in-gin》第2章设置API端点
Chapter 2: Setting Up API Endpoints
Technical requirements
要学习本章,您将需要以下内容:
- A laptop (Windows, Linux, or macOS) with Golang version 1.15.6 set up so that you can easily execute the commands provided
- A general understanding of the RESTful API and the Go programming language
本章的代码包托管在 GitHub 上,地址为 https: //github.com/PacktPublishing/Building-Distributed-Applications-in-Gin/tree/main/chapter02
Exploring API functionality
为了说明如何构建 RESTful API,我们将构建一个烹饪应用程序。我们将介绍如何使用 Gin 框架集成、部署和测试应用程序。该应用程序将执行以下操作:
- Display the recipes that are submitted by the users, along with their ingredients and instructions.
- Allow anyone to post a new recipe.
应用架构和流程如下图所示:
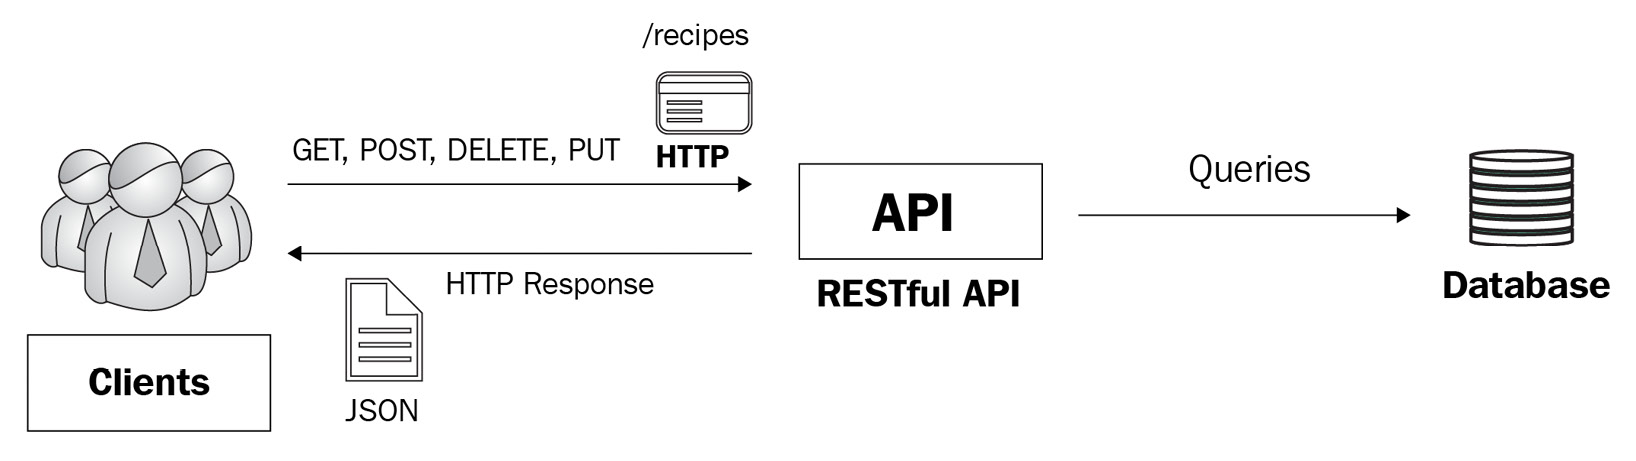
图 2.1 – 食谱应用架构
该架构由使用 Gin 框架编写的微服务和用于数据持久性的数据库组成。微服务公开了一个 RESTful API 来通过 HTTP 协议管理配方。
笔记
在本书的后面,我们将介绍如何使用 React Web 框架构建前端应用程序,以便我们可以使用 RESTful API。
在开始之前,我们需要创建一个 GitHub 存储库来存储代码源。为了在 Git 分支中构建代码,我们将使用 GitFlow 模型。这种方法由以下分支组成:
- master: This branch corresponds to the current production code. You can't commit directly, except for hotfixes. Git tags can be used to tag all the commits in the master branch with a version number (for instance, for using the semantic versioning convention, https://semver.org/, which has three parts: major, minor, and patch, so a tag with version 1.2.3 has 1 as its major version, 2 as its minor version, and 3 as its patch version).
- preprod: This is a release branch and is a mirror of production. It can be used to test all the new features that are developed on the develop branch before they are merged to the master branch.
- develop: This is the development integration branch, which contains the latest integrated development code.
- feature/X: This is an individual feature branch that's being developed. Each new feature resides in its own branch, and they're generally created for the latest develop branch.
- hotfix/X: When you need to solve something in production code, you can use the hotfix branch and open a pull request for the master branch. This branch is based on the master branch.
以下架构说明了 GitFlow 方法:
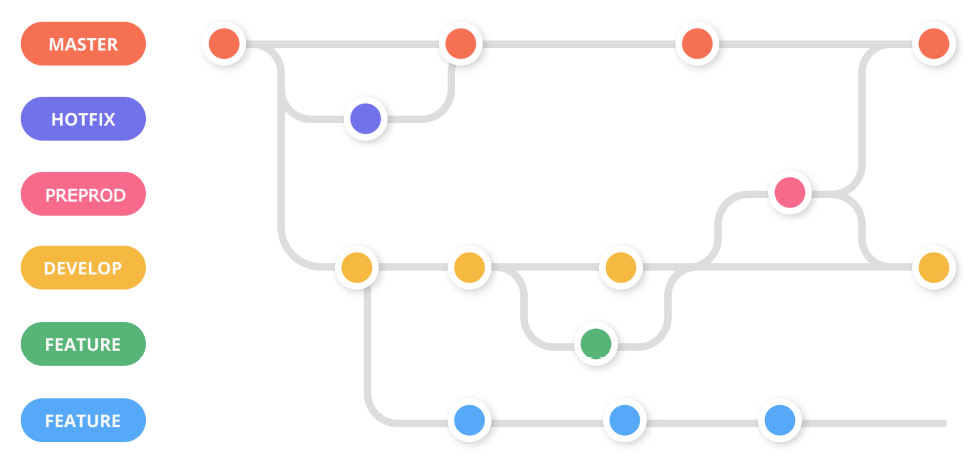
图 2.2 – GitFlow 模型 – 主要分支
创建 GitHub 存储库后,将其克隆到您的 Go 工作区并创建三个名为 develop、preprod 和 master 。这将帮助您组织项目并将开发中的代码与生产中运行的代码隔离开来。这种分支策略是 GitFlow 工作流分支模型的精简版本(不要忘记将 GitHub URL 替换为您的存储库的链接):
这将创建一个名为 recipes-api 的新目录。让我们通过执行以下命令将此目录设为模块的根目录。这将使我们能够使用 go.mod 和 go.sum 文件管理项目依赖项:
在 VSCode 上打开项目文件夹并使用以下代码创建一个 main.go 文件。 main 函数将初始化一个新的 Gin 路由器并通过调用 Run() 方法:
笔记
确保使用 go get 命令安装 gin 包。有关分步指南,请参阅上一章。
将更改推送到 Git 远程存储库。现在,我们将直接将更改推送到 develop 分支。我们将在下一节学习如何打开拉取请求:
更新后的存储库应如下所示:
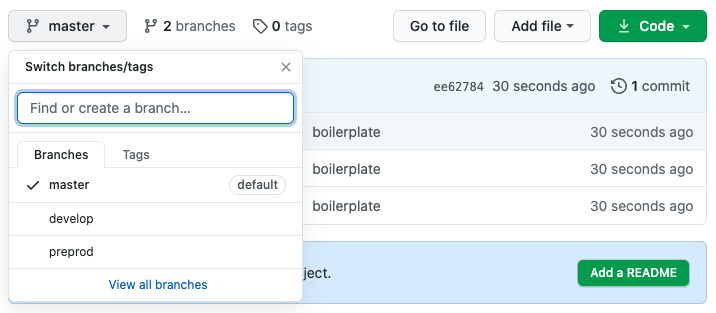
图 2.3 – GitHub 分支
笔记
如果您正在与开发人员团队合作,则需要在从 GitHub 克隆项目后发出 go mod download 命令来安装所需的依赖项。
Defining the data model
在深入了解路由定义之前,我们需要定义一个模型来保存有关配方的信息。我们可以通过定义一个 Go 结构来创建我们的模型。该模型将包含配方的属性/字段。在 main.go 文件中声明以下结构:
我们的 Recipe 模型是不言自明的。每个食谱都应该有一个名称、成分列表、说明或步骤列表以及发布日期。此外,每个食谱属于一组类别或标签(例如,素食、意大利、糕点、沙拉等),以及一个 ID,即用于区分数据库中每个配方的唯一标识符。我们还将使用反引号注释指定每个字段上的标签;例如,`json:"NAME"`。这允许我们在将每个字段作为响应发送时将它们映射到不同的名称,因为 JSON 和 Go 具有不同的命名约定。
定义结构后,将更改推送到基于 develop 分支的新分支:
将这些更改推送到存储库后,Compare & pull request 按钮将出现在 GitHub 中。单击它并通过单击 创建拉取请求 按钮打开拉取请求,以将 feature/datamodel 与 开发 分支:
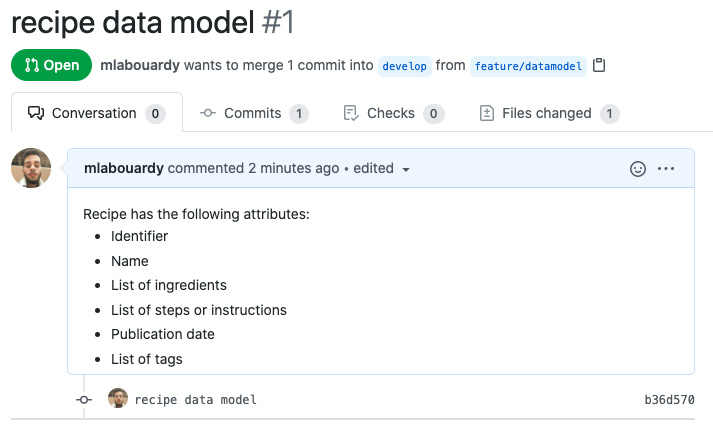
图 2.4 – GitHub 拉取请求
将 更改 合并到 develop 分支并删除 feature/datamodel 分支:
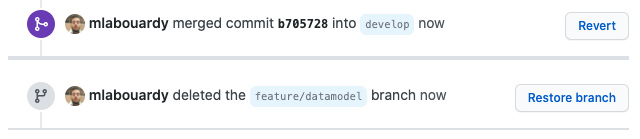
图 2.5 – 将拉取请求合并到开发分支
定义数据模型后,我们可以查看路由处理程序定义。 API 将公开各种端点。现在让我们来看看它们。
HTTP endpoints
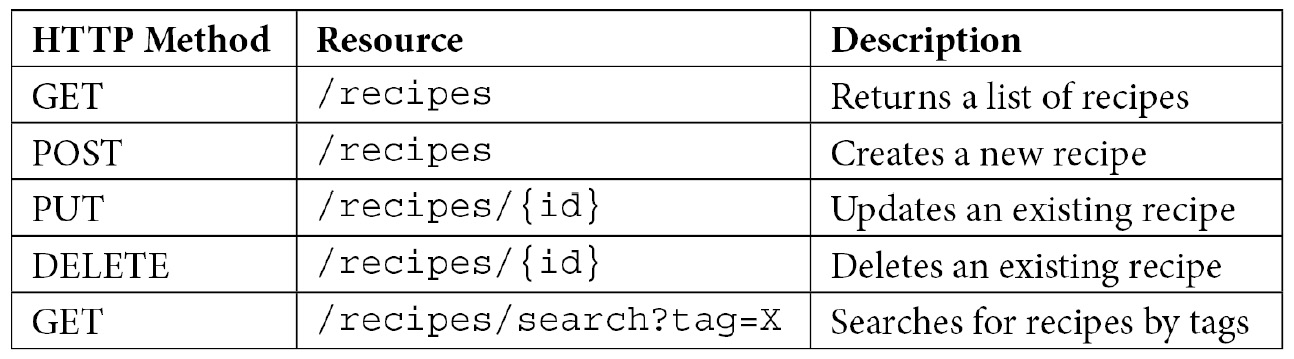
现在,我们将 建立我们 API 的端点。我们将通过 在 main 函数中创建所有端点来设置它。每个端点都需要一个单独的函数来处理请求。我们将在 main.go 文件中定义它们。
笔记
在下一章中,我们将介绍如何根据标准 Go 布局来构建 Go 项目。
Implementing HTTP routes
在本节中,我们将创建函数处理程序来处理 POST、GET、PUT 和 DELETE HTTP 请求。所以,让我们直接进入它。
POST /recipes
首先,让我们实现负责创建新配方的端点。在 /recipes 资源上创建一个 POST 方法。然后,为该路径定义一个 NewRecipeHandler 方法。 main.go 文件应如下所示:
在编写 NewRecipeHandler 方法的代码之前,我们需要定义一个名为 recipes 的全局变量来存储食谱列表。这个变量将暂时使用,并将在下一章中替换为数据库以实现数据持久性。要初始化 recipes 变量,我们可以使用 init() 方法,该方法将在应用程序启动期间执行:
在这里,我们将定义NewRecipeHandler背后的逻辑。 c.ShouldBindJSON 函数将传入的请求正文编组为 Recipe 结构,然后使用名为 <代码类="literal">xid。接下来,它使用 time.Now() 函数分配发布日期,并将配方附加到配方列表中,这会将其保存在内存中。如果请求正文无效,则处理程序将返回错误(400 状态码)。否则,处理程序将返回 200 状态码:
在前面的代码中,我们使用了内置的状态码常量,例如 http.StatusOK 和 http.StatusBadRequest 来代替硬编码的 HTTP 状态码。我们还将响应类型设置为 JSON。
在运行应用程序之前,我们需要下载xid包,其中用于生成唯一 ID:
新的依赖将自动添加到 go.sum 和 go.mod 文件中。运行服务器,如下:
将在端口 8080 上部署 HTTP 服务器:

图 2.6 – Gin 服务器日志
要对其进行测试,请使用 Postman 客户端在 http://localhost:8080/recipes 发出 POST 请求,请求正文中包含以下 JSON:
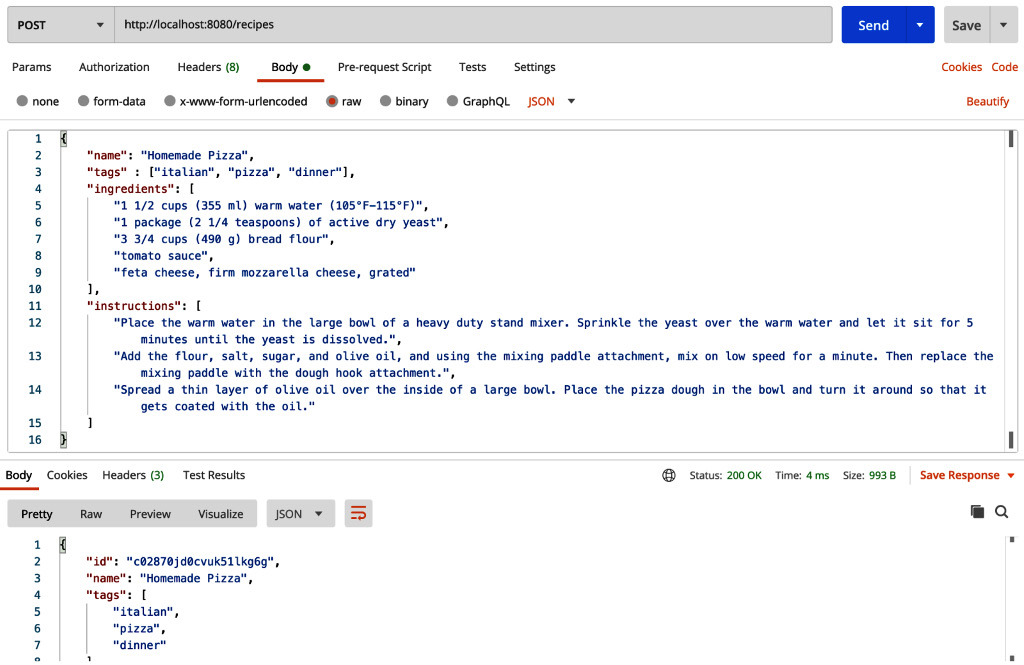
图 2.7 – 使用 Postman 客户端发出 POST 请求
前面的 命令会将配方添加到配方数组中,并返回带有指定 ID 和发布日期的 。
Postman 的另一个替代方法是使用 cURL 命令。使用以下 cURL 命令和 POST 动词,后跟 JSON 文档:
笔记
jq 实用程序 https://stedolan.github.io/jq / 用于将响应正文格式化为 JSON 格式。它是一个强大的命令行 JSON 处理器。
随着 POST 端点 按预期工作,我们可以将 代码更改推送到新功能分支:
提交后,提出拉取请求以将 feature/new_recipe 分支与 develop 分支合并:
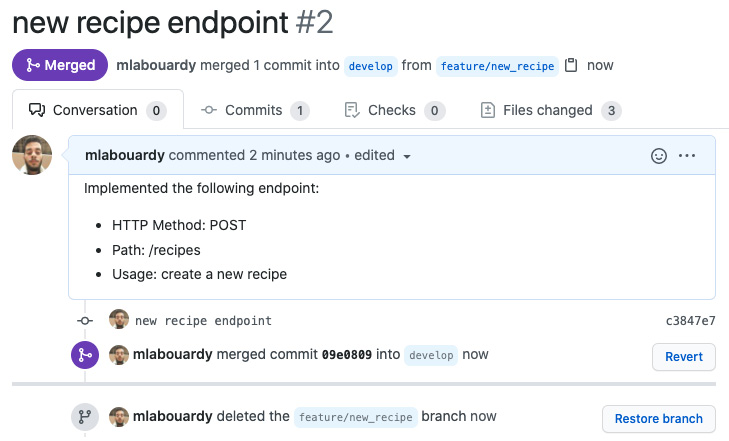
图 2.8 – 将新配方端点功能分支合并到开发分支
现在已经创建了 POST /recipes 端点,我们可以实现一个 GET /recipes 端点来列出我们拥有的所有食谱使用 POST/recipes 端点添加。
GET /recipes
类似于 上一个端点,在 /recipes 上注册一个 GET 方法资源并附加 ListRecipesHandler。当 在 /recipes 资源上收到传入的 GET 请求时,将调用该函数。代码很简单;它使用 c.JSON() 方法将 recipes 数组编组为 JSON:
使用 go run main.go 命令重新部署 应用程序:
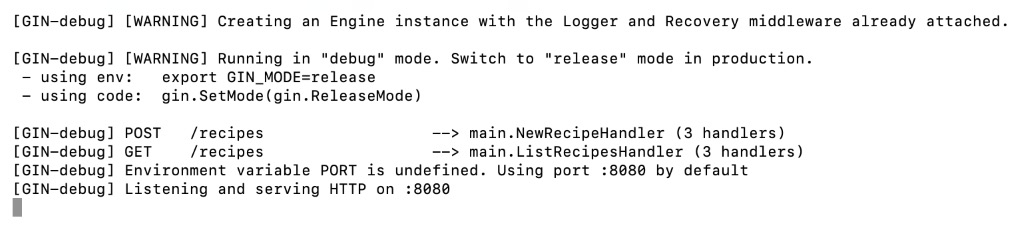
图 2.9 – 暴露一个 GET 端点
要测试端点,请在 http://localhost:8080/recipes 上发出 GET 请求。在这里,将返回一个空数组:
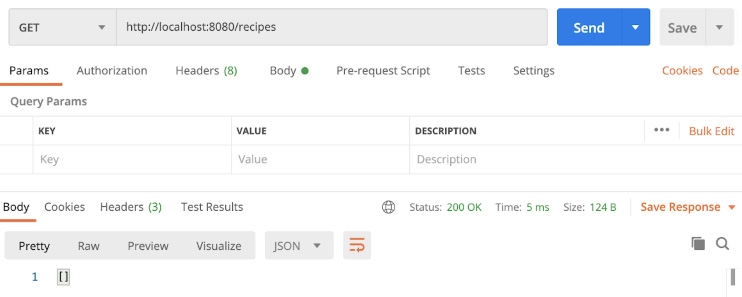
图 2.10 – 获取食谱列表
对应的cURL命令如下:
空 数组是由于 recipes 变量仅可用 在应用程序的运行期间。在下一章中,我们将介绍如何将 RESTful API 连接到 MongoDB 等数据库以实现数据持久性。但是现在,我们可以在启动应用程序时初始化 recipes 数组,方法是将初始化代码放在 init() 方法中。
加载机制将基于一个 JSON 文件,其中包含我预先创建的配方列表。完整列表可在本书的 GitHub 存储库中找到:
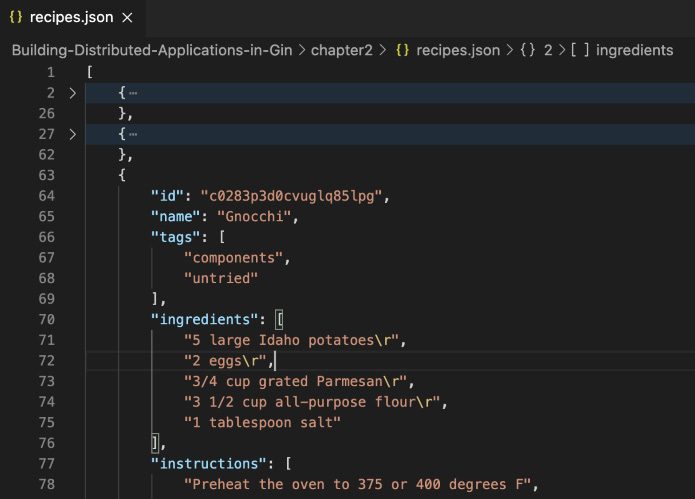
图 2.11 – JSON 格式的食谱列表
我们将使用 ioutil.ReadFile() 方法读取 JSON 文件,然后使用以下代码片段将内容转换为食谱数组:
之前别忘了import encoding/json 和io/ioutil您重新运行应用程序并在 /recipes 端点上发出 GET 请求。这一次,将以 JSON 格式返回食谱列表:

图 2.12 – GET /recipes 返回食谱列表
您可以使用 curl 和 jq 命令来计算请求返回的食谱数量:
recipes.json 文件包含 492 个食谱;因此,HTTP 请求应返回 492 个配方:

图 2.13 – 使用 jq 计算 JSON 项目
通过使用以下命令创建新功能分支 ,将 新端点代码提交到 Git:
推送更改后,创建拉取请求并将分支合并到 develop:
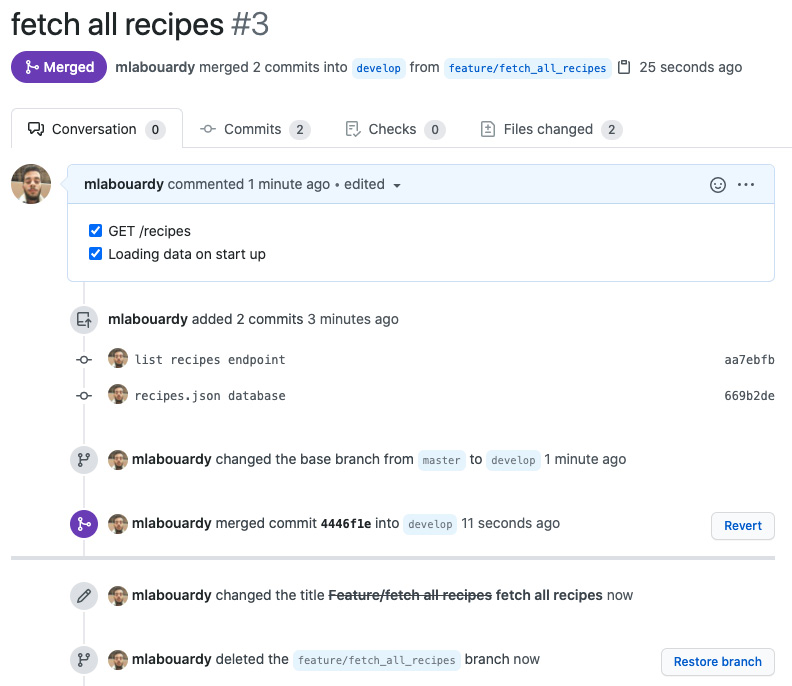
图 2.14 – 将配方端点特性分支列表合并到开发分支中
PUT /recipes/{id}
要更新 现有配方,我们将使用 PUT 动词和路径查询参数称为ID,表示要更新的recipe的标识符。在主函数内的 /recipes/:id 资源上注册一个端点:
UpdateRecipeHandler 端点的处理程序代码在以下片段中提供。它使用 c.Param() 方法从请求 URL 中获取配方 ID,将请求正文转换为 Recipe 结构, 并遍历食谱列表,寻找要更新的食谱。如果没有找到,则会发送一条错误消息,其中包含 404 代码错误;否则,recipe 将使用 请求正文中的新值进行更新:
重新启动服务器,然后发出 POST 请求以创建新配方。为了说明 更新端点是如何工作的,我们将使用以下示例 JSON 创建一个玛格丽塔披萨食谱:
为了测试它,再次使用 Postman 客户端,使用这个 JSON 文档在 http://localhost:8080/recipes 上发出一个新的 POST 请求:
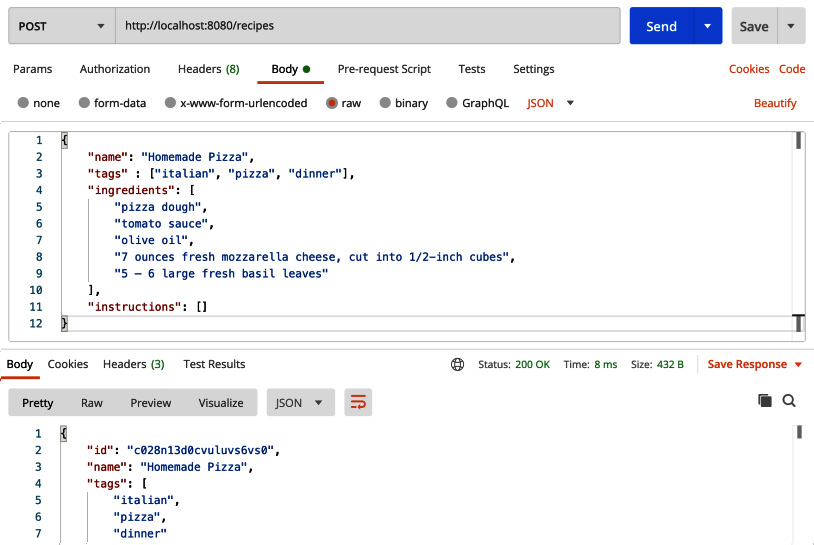
图 2.15 – 添加新配方
Homemade Pizza 食谱 将被创建,您将收到 新配方的 ID(在我们的示例中,它是 c2inb6q3k1kc2p0uqetg)。假设我们要更新食谱并将其更改为 Shrimp scampi Pizza。这一次,我们可以使用 PUT 方法并提供配方的 ID 作为 path 参数:
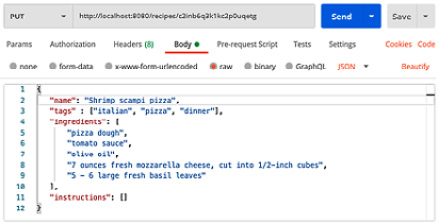
图 2.16 – 更新现有配方
该请求将 返回 200 状态代码。要验证 更改是否已生效,我们可以使用 GET /recipes 端点:
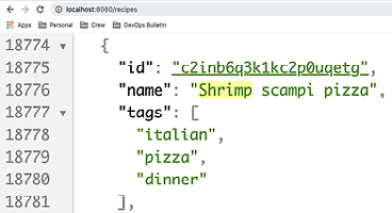
图 2.17 – 验证更改是否应用于配方
将新端点推送到新功能分支并将分支合并到 develop:
DELETE /recipes/{id}
要删除一个recipe,我们需要在里面注册DELETE HTTP路由我们的主要功能,如下:
DeleteRecipeHandler 函数的代码将从请求参数中获取目标配方 ID 并遍历配方列表。如果没有找到匹配的配方,则会发送错误消息 "Recipe not found" 并带有 404 状态码。否则,将使用数组上的配方索引,并根据索引删除配方:
要测试删除端点,请使用 Postman 客户端或在 中发出 cURL 命令a>终端会话:
如果目标配方存在,则将其删除,您将看到返回成功消息:
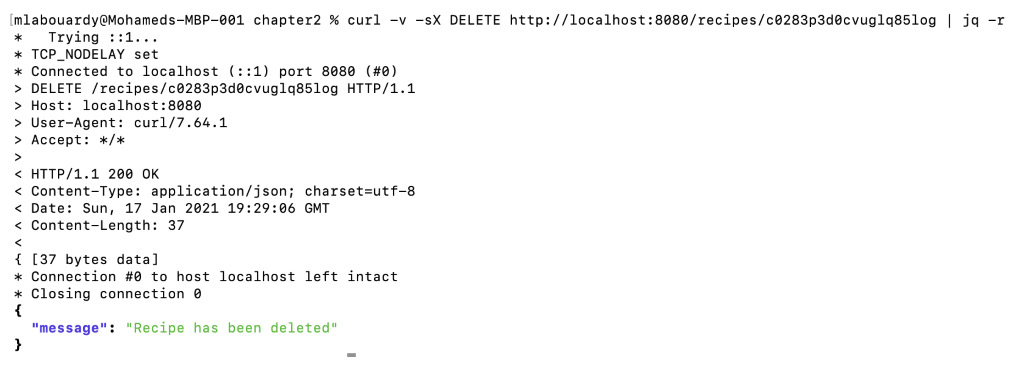
图 2.18 – 删除配方
否则,将返回错误消息:
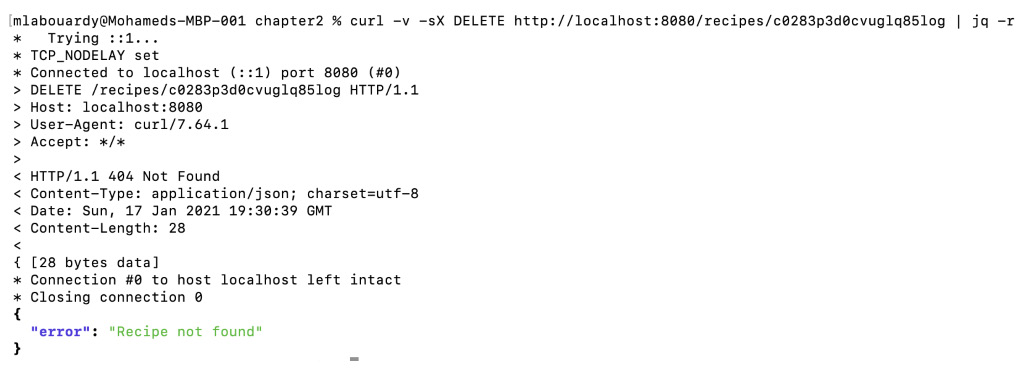
图 2.19 – 如果未找到配方,则返回错误 404 消息
再次,将更改存储在 功能分支中,并将 更改合并到 develop
:
GET /recipes/search
SearchRecipesHandler 处理程序代码片段如下(不要忘记导入 strings):
HTTP 处理程序使用 c.Query< 获取查询参数中给出的 标签值/代码>方法。
您可以通过在 http://localhost:8080/ 上查找带有 GET 请求的意大利食谱来测试端点食谱/搜索?标签=意大利语:
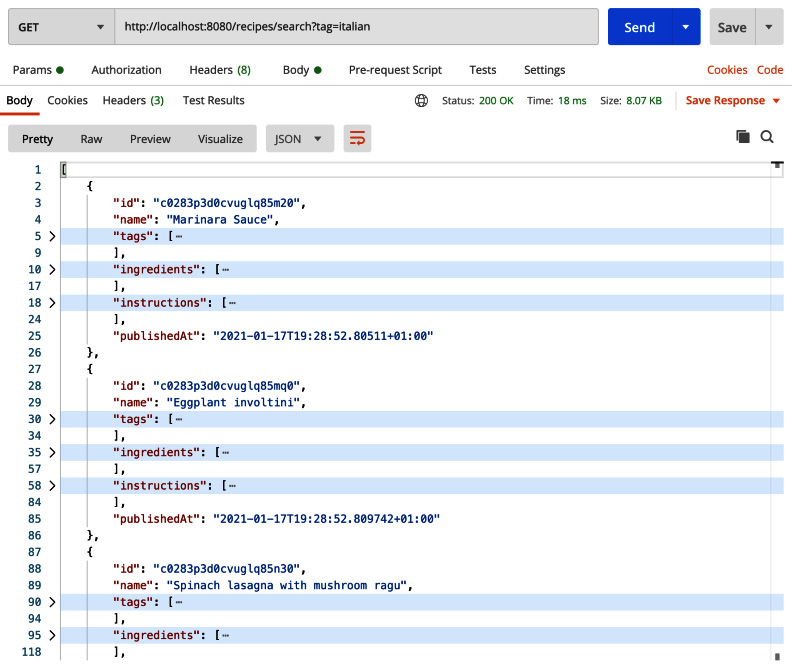
图 2.20 – 使用查询参数搜索食谱
最后,通过创建一个新的特性分支将搜索端点代码推送到远程存储库:
笔记
在每次提交之前,确保运行 go mod tidy 命令以确保您的 go.mod 和 go.sum 文件干净准确。
到目前为止,我们已经介绍了如何使用 Gin 框架在 Golang 中构建一个 RESTful API。但是,如果没有有意义的 API 文档,用户将无法使用它。
文档应该是您开发周期的一部分,以帮助您维护可扩展的 API。这就是为什么在下一节中,我们将探讨如何使用 OpenAPI 规范 (OAS)。
Writing the OpenAPI Specification
OpenAPI 规范(以前称为 Swagger 规范)是一种 API 描述格式或 API 定义语言。它允许您描述一个API,包括以下信息:
- General information about the API
- The available paths and operations (HTTP methods)
- The expected inputs (query or path parameters, request body, and so on) and responses (HTTP status code, response body, and so on) for each operation
寻找一种从现有 API 生成 OpenAPI 定义的简单方法可能具有挑战性。好消息是 Swagger 工具可以帮助您轻松做到这一点。
Installing Go Swagger
要开始,请安装官方指南中的go-swagger工具在 https://goswagger.io/install.html 或从 GitHub 下载二进制文件 https://github.com/go-swagger/go-swagger/releases。在编写本书时,最新的稳定版本是 v0.25.0:
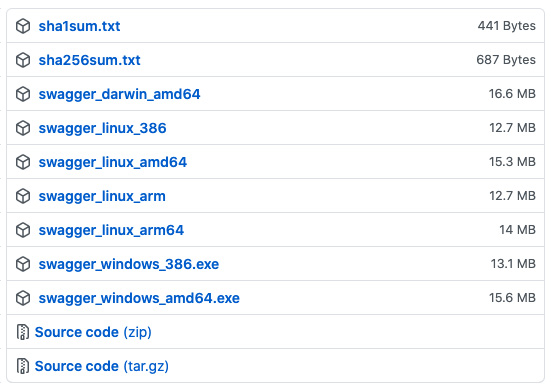
图 2.21 – Go Swagger 二进制文件 – 最新版本
确保 将其添加到 PATH 环境变量中。然后,发出以下命令来验证安装:
上述命令应显示以下输出:

图 2.22 – Go Swagger 版本
现在,是时候为食谱 API 编写我们的 OpenAPI 规范了。
笔记
go-swagger 的 替代品是 swag (https://github.com/swaggo/swag)。该工具可用于将 Go 注释转换为 Swagger 文档。
Swagger metadata
我们将首先通过 swagger:meta< /code> 注释。此注解具有以下属性:
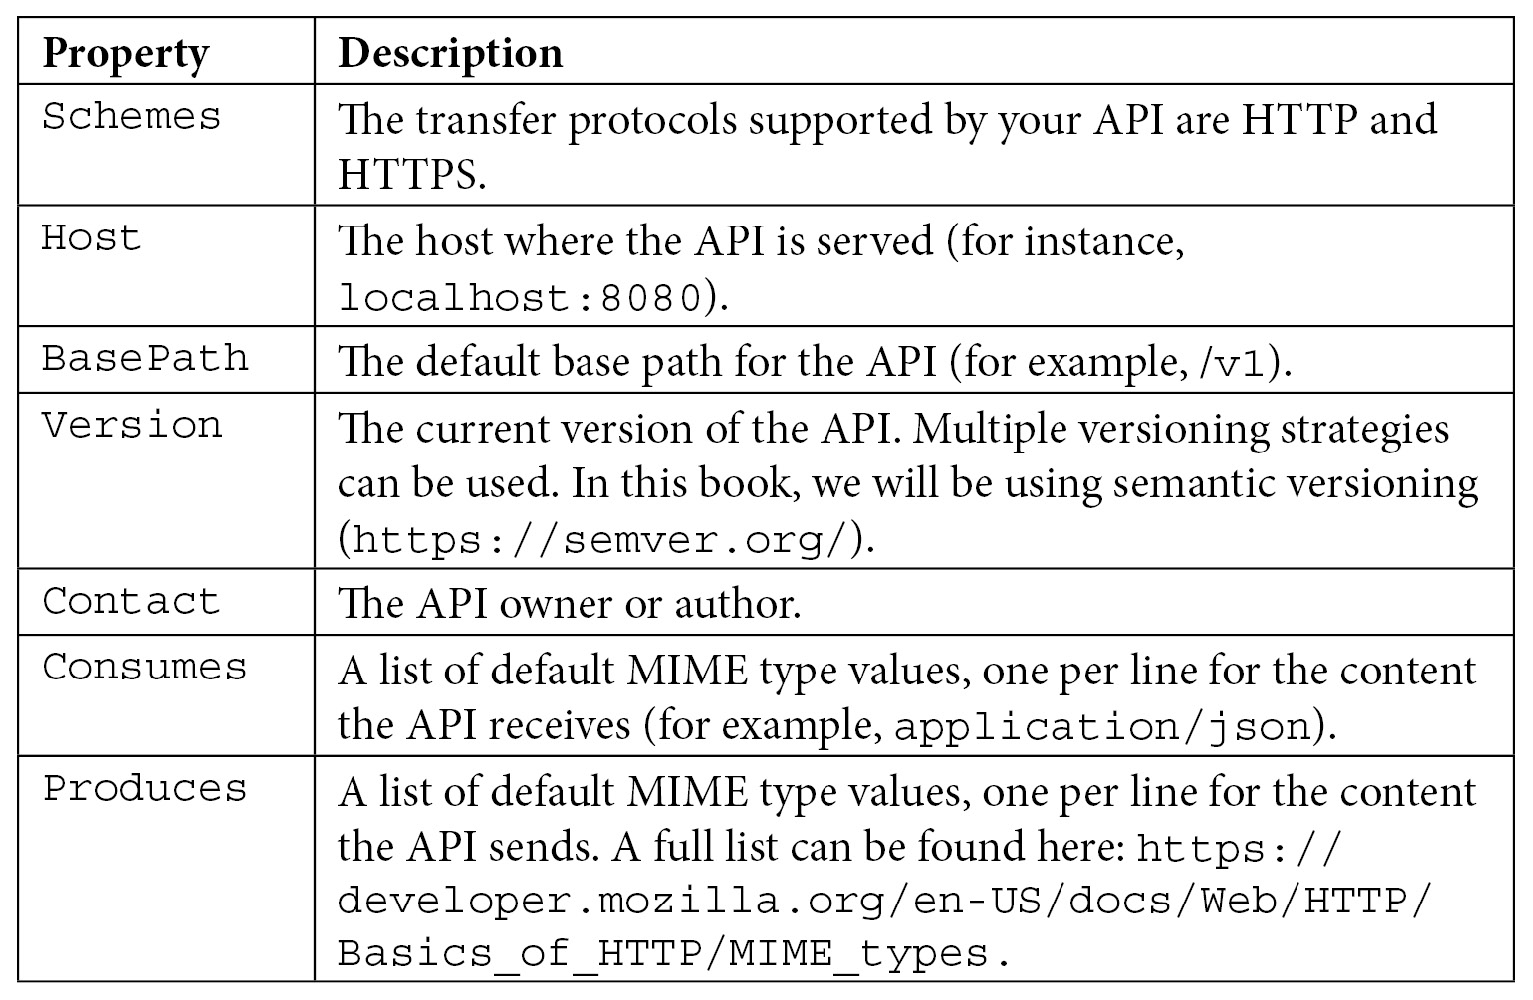
在 main 包的顶部添加以下注释:
这些注释包括诸如API的描述、版本、基本URL等内容。您可以包含更多字段(完整列表可在 https://goswagger.io/使用/spec/meta.html)。
为了生成 OpenAPI 规范,我们将使用 swagger 命令行工具。 CLI 将解析 main.go 文件。如果解析器遇到与 Swagger 注释或任何支持的标签匹配的注释,它将生成规范的相应块。
在您的终端上,发出以下命令以生成 spec 文件:
此命令将生成 JSON 格式的规范。您也可以通过在输出中附加 .yml 或 .yaml 扩展名来生成 YAML 格式的规范。
Swagger 命令行的另一个很酷的地方是它的嵌入式 UI。您可以使用以下命令在本地 Swagger UI 中加载生成的规范:
UI 将暴露在端口 http://localhost:49566 上:

图 2.23 – 在 UI 中加载 Swagger 规范
如果您将浏览器指向该 URL,您应该会看到基于 Redoc 模板的 UI。 UI 有两种风格——Redoc 和 Swagger UI:
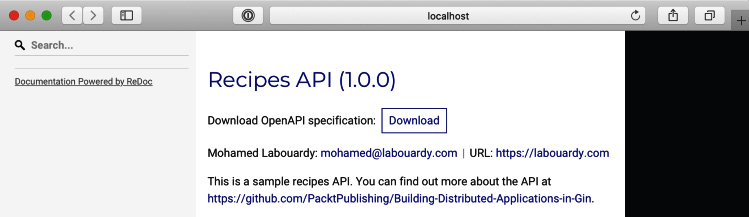
图 2.24 – 带有 Redoc 风格的 Swagger
如果您是 Swagger UI 的粉丝,您可以使用以下命令将风味标志设置为 swagger:
这一次,API 规范将由 Swagger UI 提供:
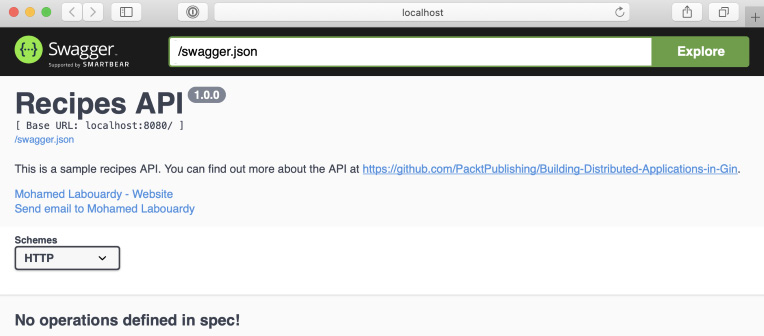
图 2.25 – Swagger UI 模式
笔记
您还可以使用 Swagger 在线编辑器 (https://editor.swagger .io/) 来编辑和加载您的 OpenAPI 规范文件。
接下来,我们将定义一个swagger:operation来列出配方端点。 注解具有以下属性:
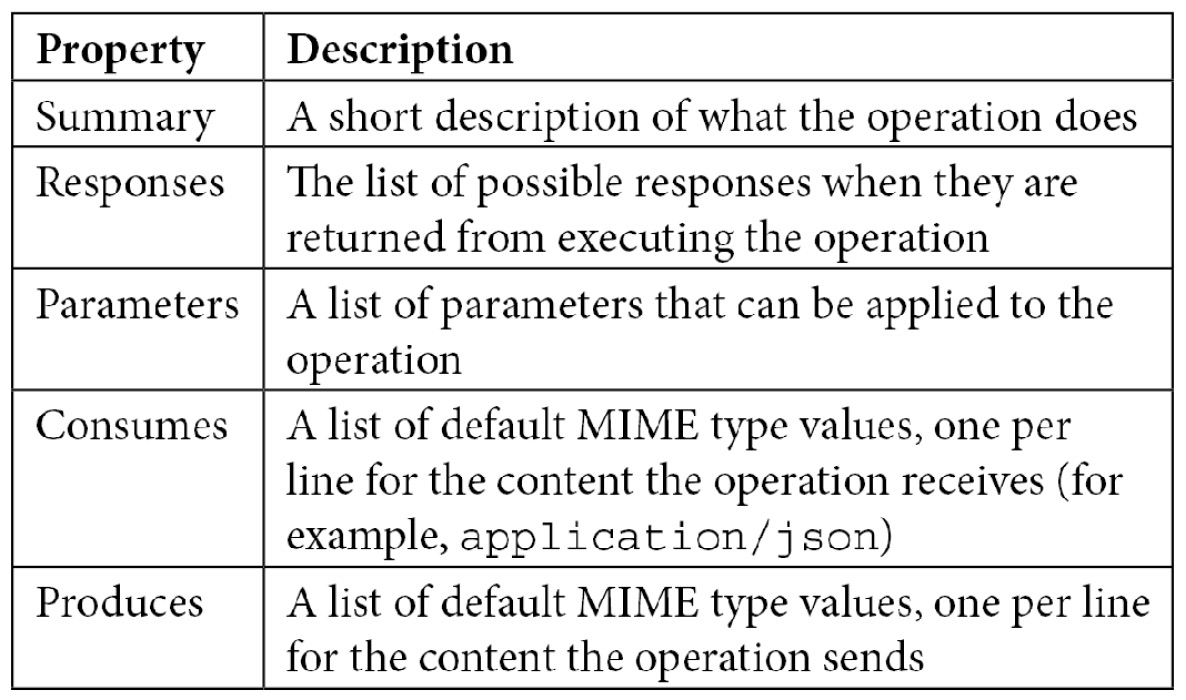
您可以在 https://github 找到所有属性。 com/OAI/OpenAPI-Specification/blob/master/versions/2.0.md#operationObject。
注释 ListRecipesHandler 函数,如 所示。注解 以 HTTP 方法、路径模式和操作 ID 作为参数:
对于每个操作,您可以在 responses 部分中描述与 HTTP 状态代码(200、404 等)匹配的 HTTP 响应。对于此端点,我们只会在响应 GET /recipes 时返回 200 成功代码。 description 字段解释了此响应的含义。
使用 Swagger CLI 生成规范并重新加载 swagger.json。这一次,将添加 GET /recipes 操作:
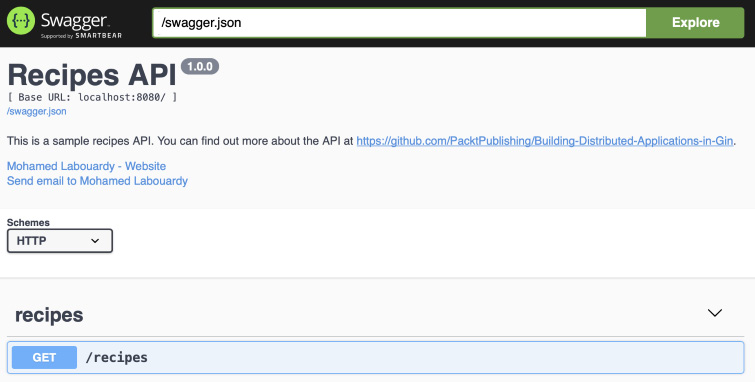
图 2.26 – 添加一个新的 Swagger 操作
为 PUT /recipes/{id} 端点定义另一个 Swagger 操作。类似于前面的操作,我们可以根据处理的响应码来定义响应。我们还可以将 ID 定义为 parameters 部分中的 path 参数。以及提供可选描述,如下所示:
重新生成 swagger.json 文件并重新加载 Swagger UI:
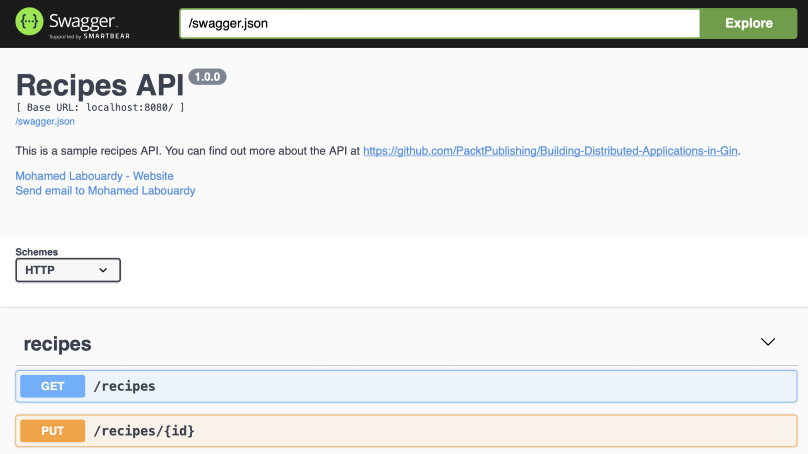
图 2.27 – Swagger 中的 PUT 操作
定义其余的操作。您应该有类似于以下内容的内容:
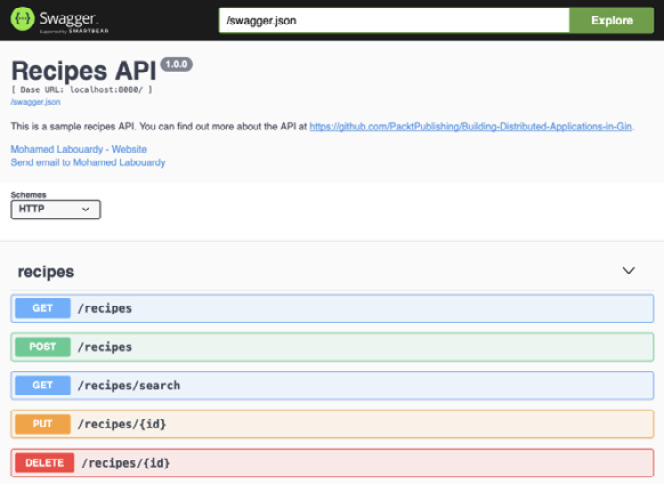
图 2.28 – 食谱 API 操作
至此,您已经了解了 OpenAPI 规范的基础知识。
作为一个简单的 JSON 文件,OpenAPI 规范文件可以在任何 SCM 中共享和管理,就像应用程序源代码一样。使用以下命令将 spec 文件提交到 GitHub:
更新后的存储库将如下所示:
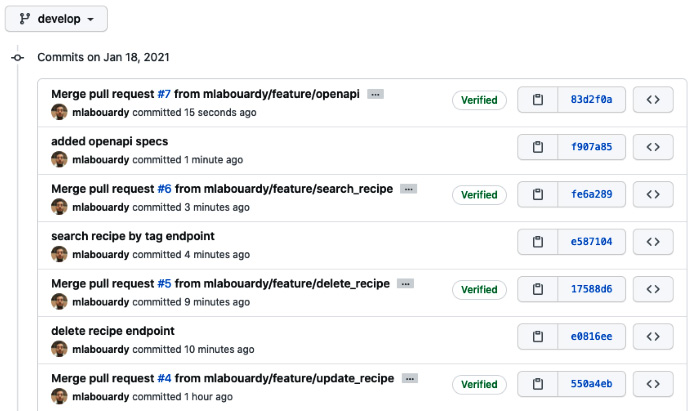
图 2.29 – 在 GitHub 上存储 OpenAPI 规范
Further reading
- Hands-On RESTful API Design Patterns and Best Practices, by Harihara Subramanian, Pethuru Raj, Packt Publishing
- DevOps with GIT(Flow) Jenkins, Artifactory, Sonar, ELK, JIRA [Video], by Nand Venegalla, Packt Publishing