读书笔记《hands-on-full-stack-development-with-spring-boot-2-0-and-react》部署您的应用程序
本章介绍如何将后端和前端部署到服务器。有多种 云服务器或PaaS(平台即服务< /span>) 提供程序,例如 Amazon (AWS)、DigitalOcean 和 Microsoft Azure。在本书中,我们使用了 Heroku,它支持在 Web 开发中使用 的多种编程语言。我们还将向您展示如何在部署中使用 Docker 容器。
在本章中,我们将看到以下内容:
- Different options for deploying the Spring Boot application
- How to deploy the Spring Boot application to Heroku
- How to deploy the React app to Heroku
- How to create the Spring Boot and MariaDB Docker container
我们在 第 4 章中创建的 Spring Boot 应用程序, 安全和测试您的后端,是必需的(GitHub: https://github.com /PacktPublishing/Hands-On-Full-Stack-Development-with-Spring-Boot-2.0-and-React/tree/master/Chapter%204)。< /em>
我们在上一章中使用的 React 应用程序 也是必需的(GitHub: https://github.com/PacktPublishing/Hands-On-Full-Stack-Development-with-Spring-Boot -2.0-and-React/tree/master/Chapter%2011)。
Docker 安装是必要的。
如果您打算使用 your 自己的服务器,部署 Spring Boot 应用程序的最简单方法是使用可执行 JAR 文件.如果您使用 Maven,则在命令行中通过键入 mvn clean install 命令生成一个可执行的 JAR 文件。该命令在 build 文件夹中创建 JAR 文件。在这种情况下,您不必安装单独的应用程序服务器,因为它嵌入在您的 JAR 文件中。然后,您只需使用 java 命令 java -jar your_appfile.jar 运行 JAR 文件。嵌入的 Tomcat 版本可以在 pom.xml 文件中使用以下行定义:
如果您使用单独的应用程序服务器,则必须创建一个 WAR 包。这有点复杂,您必须对您的应用程序进行一些修改。以下是创建 WAR 文件的步骤:
- Modify an application main class by extending
SpringBootServletIntializerand overriding theconfiguremethod:
- Change the packaging from JAR to WAR in the
pom.xmlfile:
- Add the following dependency to the
pom.xmlfile. Then, the Tomcat application is no longer embedded:
现在,当您构建应用程序时,会生成 WAR 文件。通过将文件复制到 Tomcat 的/webapps 文件夹,可以将其部署到现有的 Tomcat。
如今,云服务器是向最终用户提供应用程序的主要方式。接下来,我们要将后端部署到 Heroku 云服务器 (https://www.heroku. com/)。 Heroku 提供了一个免费帐户,您可以使用它来部署您的自己的应用程序。使用免费帐户,您的应用程序会在 30 分钟不活动后进入睡眠状态,并且重新启动应用程序需要更多时间。但是免费帐户足以用于测试和爱好目的。
对于部署,您可以使用 Heroku 的基于 Web 的用户界面。以下步骤将完成部署过程:
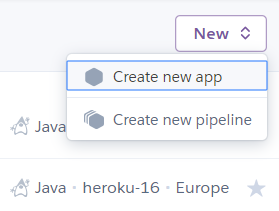
- After you have created an account with Heroku, log in to the Heroku website. Navigate to the dashboard that shows a list of your applications. There is a button called
Newthat opens a menu. SelectCreate new appfrom the menu:
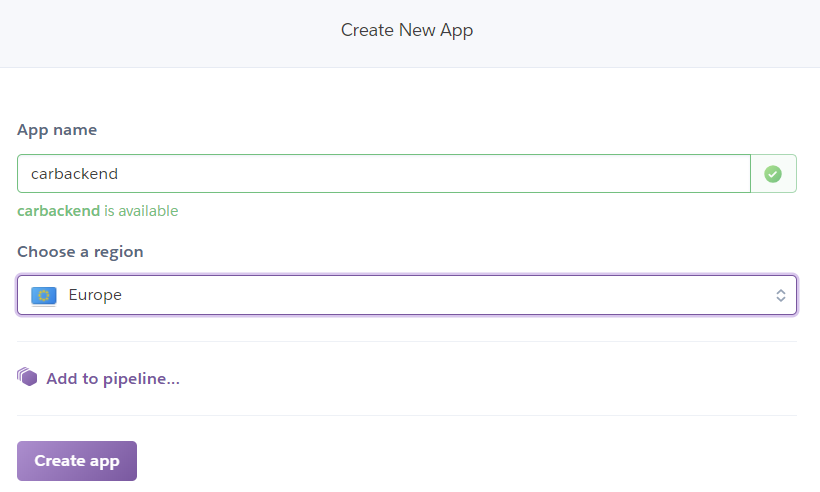
- Name your app, select a region, and press the
Create appbutton:
- Search for a repository you want to deploy to and then press the
Connectbutton:

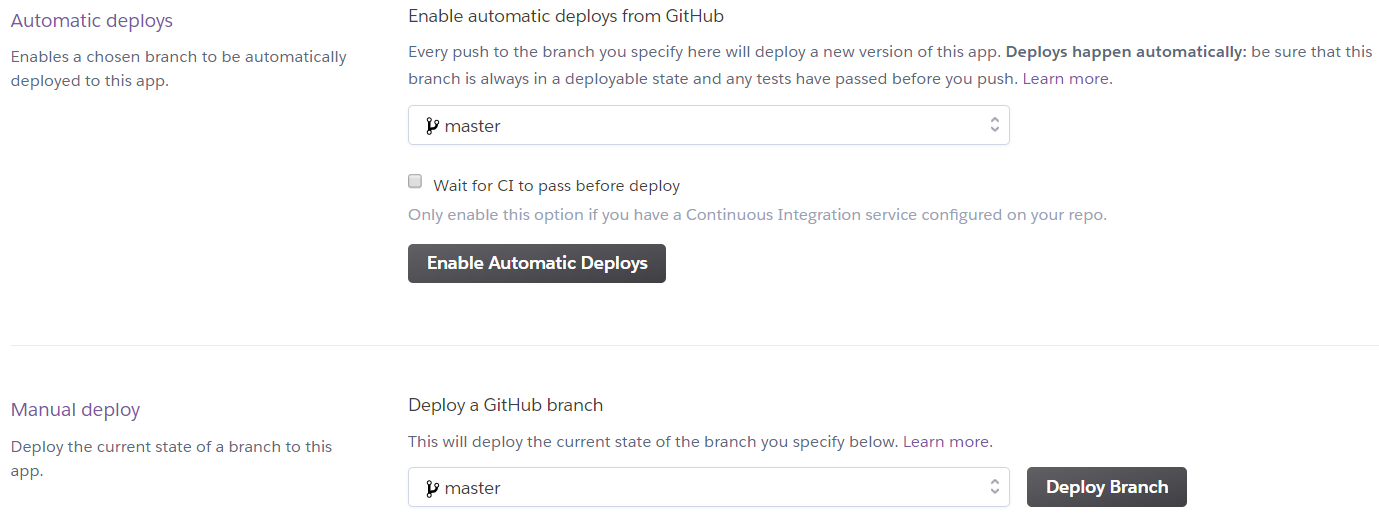
- Choose between automatic and manual deployment. The automatic option deploys your app automatically when you push a new version to connected the GitHub repository. You also have to select a branch you want to deploy. We will now use the manual option that deploys the app when you press the
Deploy branchbutton:
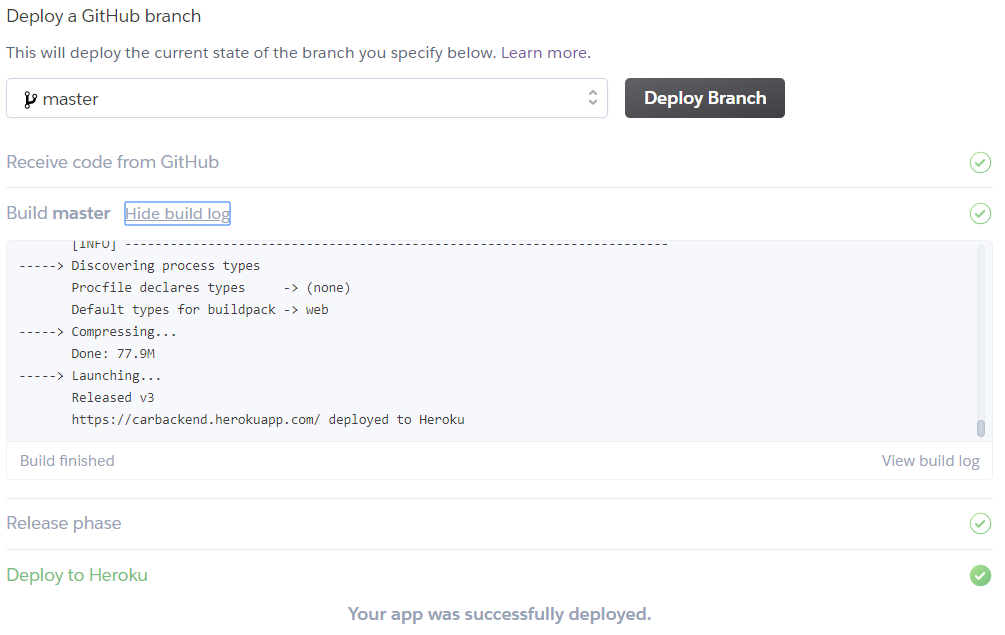
现在,您的应用程序已部署到 Heroku 云服务器。如果您使用的是 H2 内存数据库,这就足够了,您的应用程序应该可以工作。我们正在使用 MariaDB;因此,我们必须安装数据库。
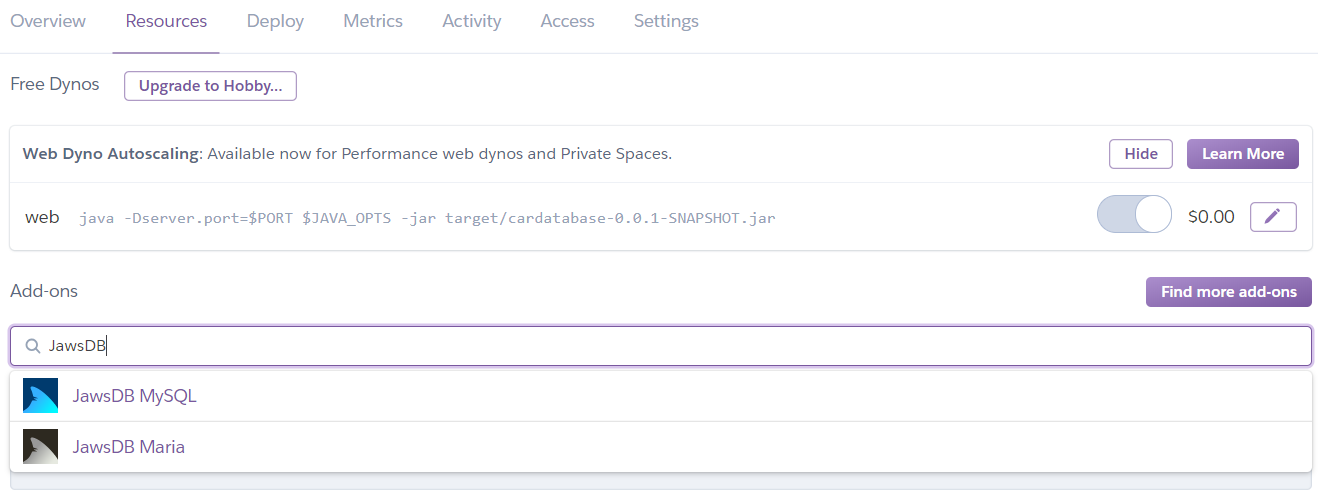
在 Heroku 中,我们可以使用 JawsDB,它在 Heroku 中作为附加组件提供。 JawsDB 是一个数据库即服务 (DBaaS) 提供商,它提供 MariaDB 数据库,可以在 Heroku 中使用。以下步骤描述了如何开始使用数据库:
- Open a
Resourcestab in your Heroku app page and typeJawsDBinto theAdd-onssearch field:
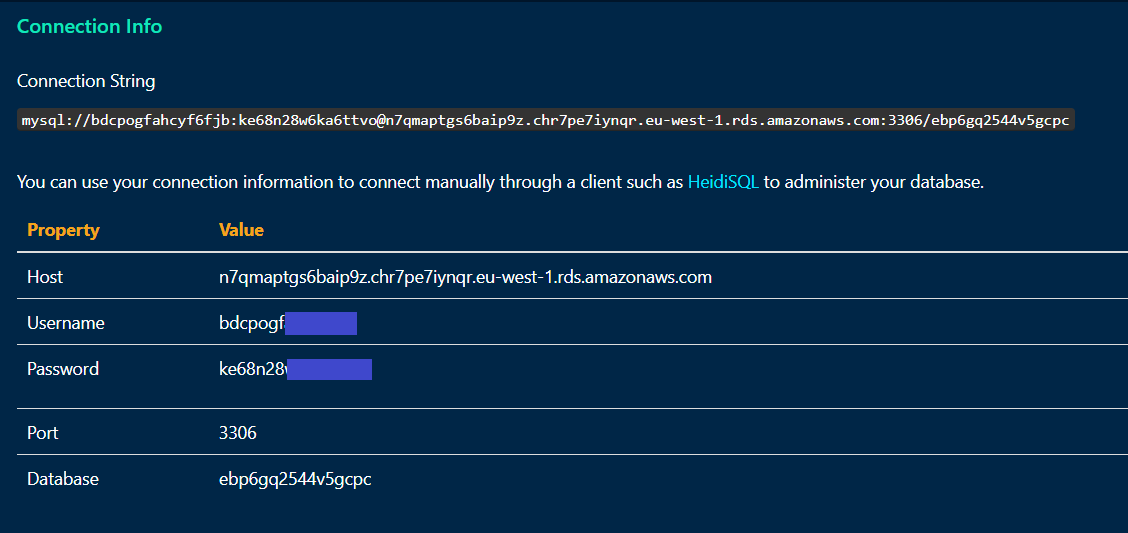
- Change the database connection definition in the
application.propertiesfile with the values from the JawsDB connection info page. In this example we use plain password but it is recommended to encrypt password using for example, Java Simplified Encryption (JASYPT) library:
- With the free account, we can have a maximum of 10 concurrent connections to our database; therefore, we also have to add the following line to the
application.propertiesfile:
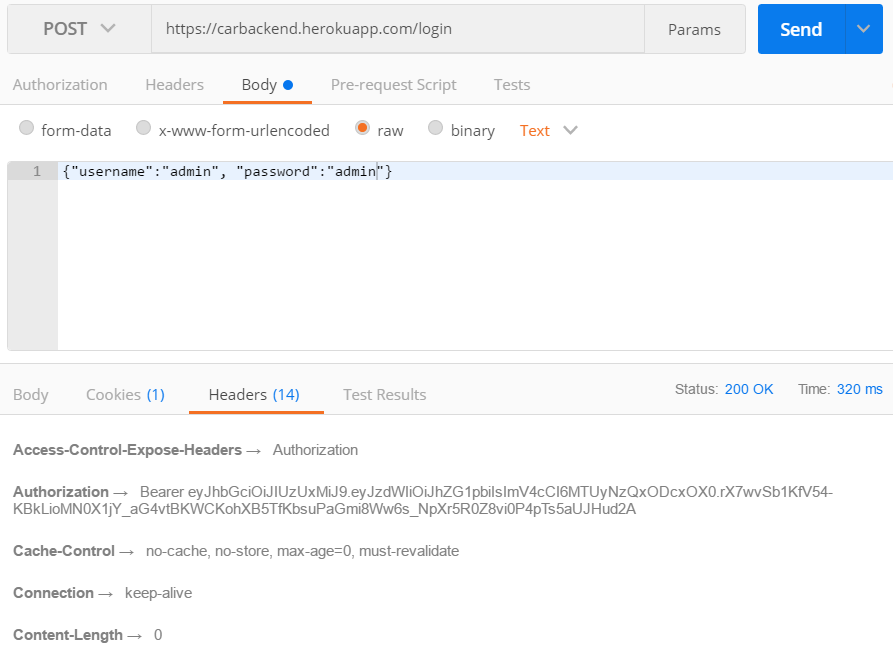
- Push your changes to GitHub and deploy your app in Heroku. Now, your application is ready and we can test that with Postman. The URL of the app is
https://carbackend.herokuapp.com/, but you can also use your own domain. If we send thePOSTrequest to the/loginendpoint with the credential, we can get the token in the response header. So, everything seems to work properly:
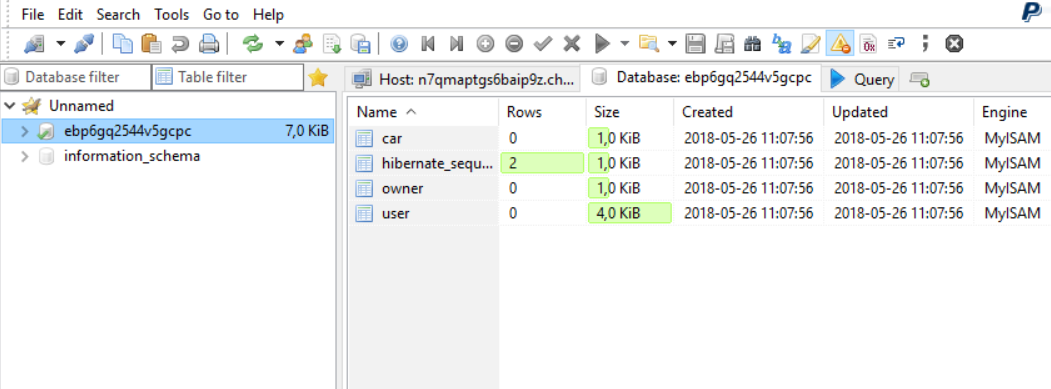
你也可以用HeidiSQL连接到JawsDB数据库,我们可以看到我们的汽车数据库已经创建好了:
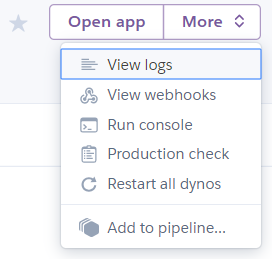
您可以通过选择 View 日志 来自 更多 菜单:
在本节中,我们将把我们的 React frontend 部署到 Heroku。将 React 应用程序部署到 Heroku 的最简单方法是使用 Heroku Buildpack 进行 create-react-app (https://github.com/mars/create-react-app-buildpack)。对于部署,我们必须安装 Heroku CLI,它是 Heroku 的命令行工具。您可以从 https://devcenter.heroku.com/articles/heroku-cli 下载安装包。安装完成后,您可以从 PowerShell 或您正在使用的终端使用 Heroku CLI。以下步骤描述了部署过程:
- Open your frontend project with VS Code and open the
constant.jsfile in the editor. Change theSERVER_URLconstant to match our backend's URL and save the changes:
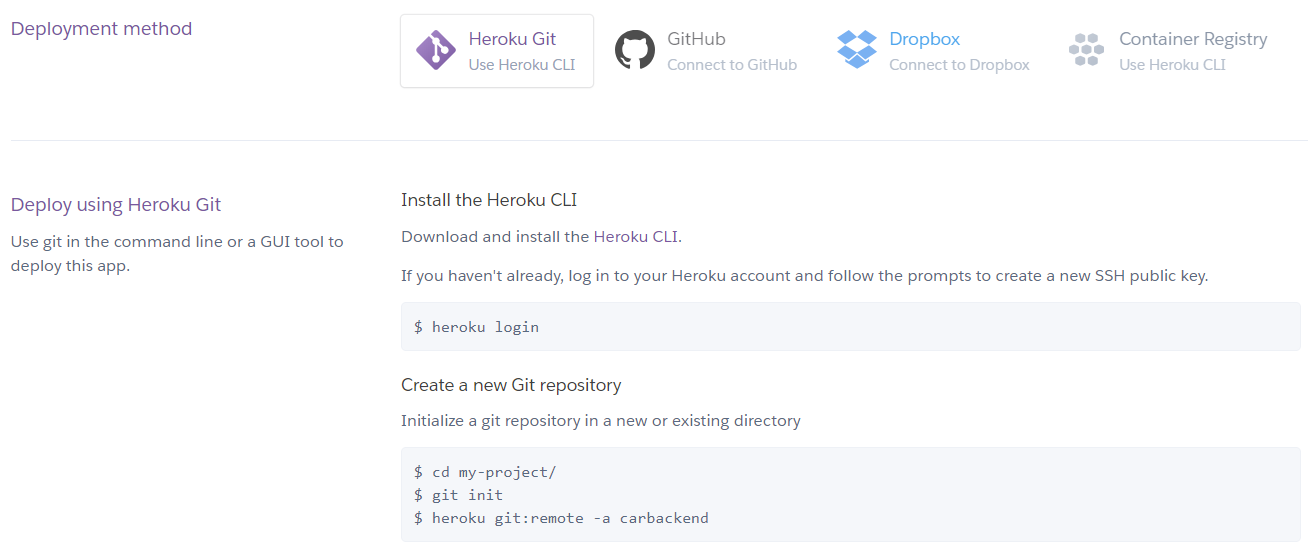
- Create a local Git repository to your project and commit the files, if you haven't done that, yet. Navigate to your project folder with the Git command-line tool and type the following commands:
- The following command creates a new Heroku app and asks for credentials to log in to Heroku. Replace
[APPNAME]with your own app name. After the command has been executed, you should see the new app in your Heroku dashboard:
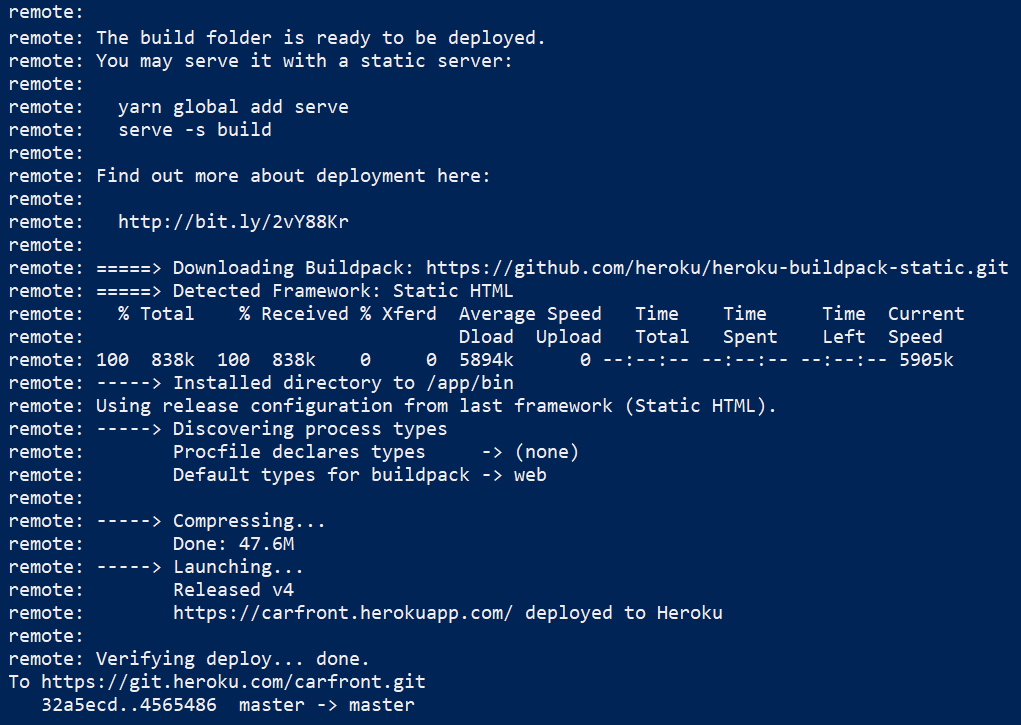
- Deploy your code to Heroku by typing the following command to PowerShell:
部署准备就绪后,您应该会在 PowerShell 中看到 Verifying deploy... done 消息,如以下屏幕截图所示:
现在,您可以转到 Heroku 仪表板并查看前端的 URL;您也可以通过输入 heroku open 命令从 Heroku CLI 打开它。如果您导航到前端,您应该会看到登录表单:

Docker 是一个容器平台,使 软件开发、部署和发布更容易。容器是轻量级和可执行的软件包,包含运行软件所需的一切。在本节中,我们将从 Spring Boot 后端创建一个容器,如下所示:
- Install Docker to your workstation. You can find the installation packages at https://www.docker.com/get-docker. There are installation packages for multiple platforms and if you have Windows operating system, you can go through the installation wizard using the default settings.
- The Spring Boot application is just an executable JAR file that can be executed with Java. The JAR file can be created with the following Maven command:
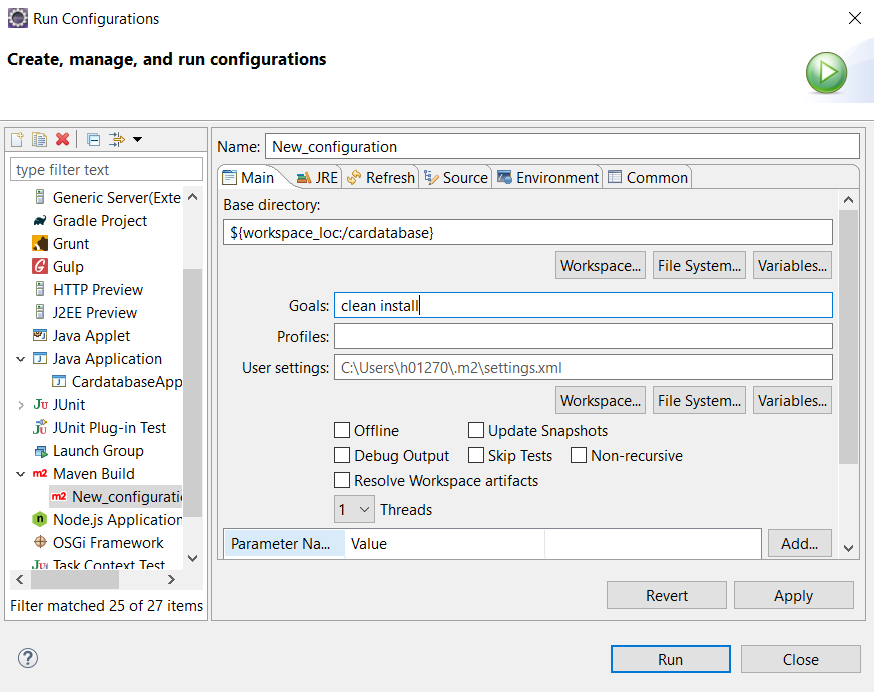
您还可以使用 Eclipse 来运行 Maven 目标,方法是打开 Run | 运行配置... 菜单。在 Base directory 字段中选择您的项目,使用 Workspace 按钮。将 clean install 输入 Goals 字段并按 运行 按钮:
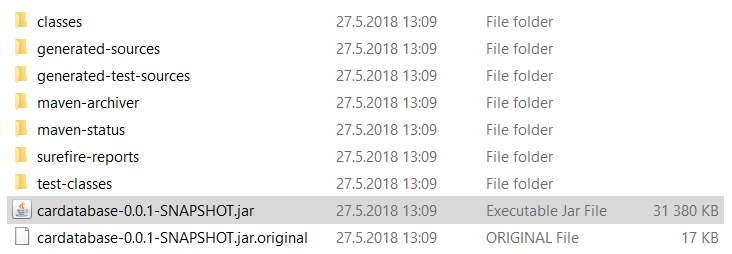
- After the build is finished, you can find the executable JAR file from the
/targetfolder:
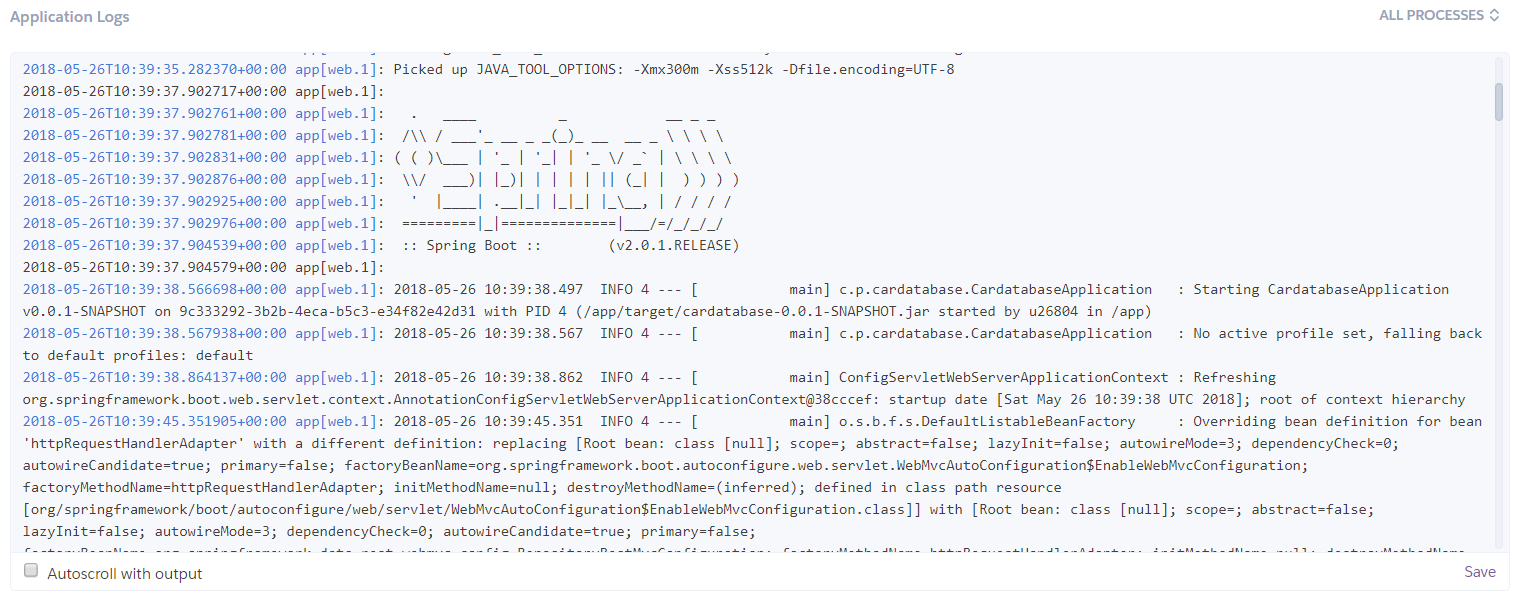
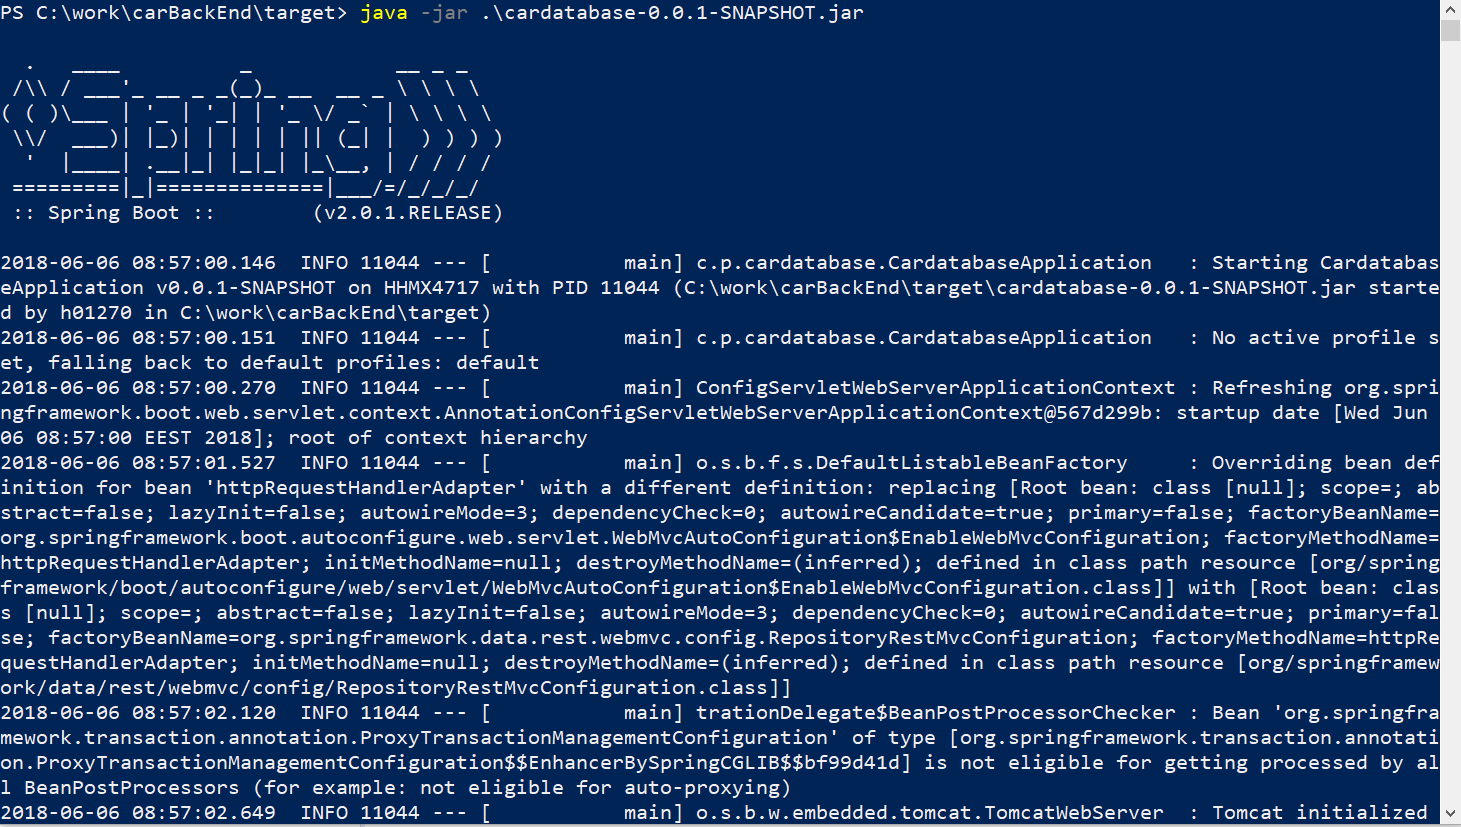
- You'll see the application's starting messages and, finally, your application is running:
容器是使用 Dockerfile 定义的。
- Create a new Dockerfile in the root folder of your project and name it
Dockerfile. The following lines show the content of the Dockerfile. We are using Alpine Linux.EXPOSEdefines the port that should be published outside of the container.COPYcopies the JAR file to the container's filesystem and renames itapp.jar.ENTRYPOINTdefines the command-line arguments that the Docker container runs.
Note
还有一个 Maven 插件可用于构建 Docker 映像。它由 Spotify 开发,可以在 https://github.com 找到/spotify/docker-maven-plugin.
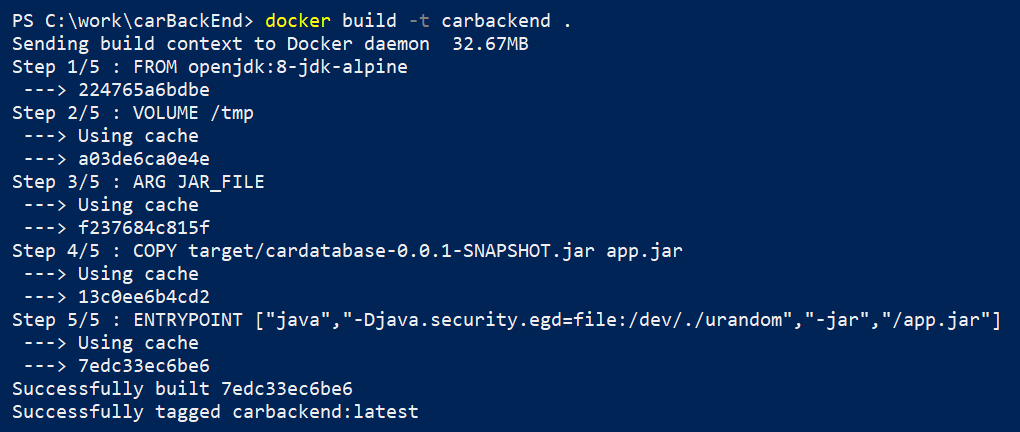
以下几行显示了 Dockerfile的内容。
在构建命令结束时,您应该会看到 Successfully built 消息:
- Check the list of the container using the
docker image lscommand:

- Run the container with the following command:
Spring Boot 应用程序启动但以错误结束,因为我们正在尝试访问 localhost 数据库。 localhost 现在指向容器本身,并且没有安装 MariaDB。
- We will create our own container for MariaDB. You can pull the latest MariaDB container from the Docker Hub using the following command:
- Run the MariaDB container. The following command sets the root user password and creates a new database, called
cardb, that we need for our Spring Boot application:
- We have to make one change to our Spring Boot
application.propertiesfile. Change thedatasourceURL to the following. In the next step, we will specify that our application can access the database container using themariadbname. After the change, you have to build your application and re-create the Spring Boot container:
- We can run our Spring Boot container and link the MariaDB container to it using the following command. The command now defines that our Spring Boot container can access the MariaDB container using the
mariadbname:
- We can also access our application logs by typing the
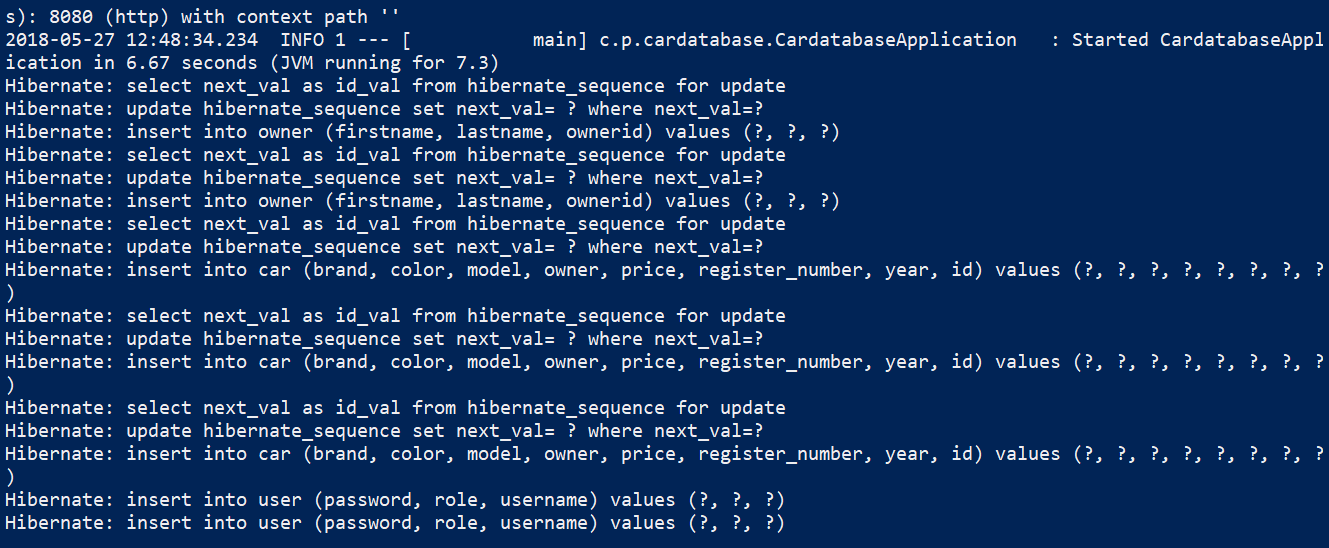
docker logs carappcommand. We can see that our application has started successfully and the demo data has been inserted into the database that exists in the MariaDB container:
Packt 还有其他很棒的资源可用于学习 React、Spring Boot 和 Docker: