vlambda博客
学习文章列表

读书笔记《developing-java-applications-with-spring-and-spring-boot-ebook》使用Spring Boot将您的应用程序投入生产

Chapter 19. Taking Your App to Production with Spring Boot

这是我的源代码

帮我在云端运行它

我不在乎

Cloud Foundry 俳句 (Onsi Fakhouri @onsijoe)

在上一章中,我们学习了如何保护基于微服务的社交媒体平台。

在本章中,我们将介绍以下主题:

  • Configuring profile-specific beans
  • Creating configuration property beans
  • Overriding property settings in production
  • Deploying our social media platform to the cloud

所以,今天就是这一天。我们工作了数周来构建这个系统。现在我们想把它投入生产。会发生什么?会出什么问题?

答:很多。而且……很多。

Spring Boot 具有强大的功能,可以轻松调整和调整生产环境,使我们能够最小化代码。这里介绍的一些概念植根于十二因子应用程序 (https://12factor.net/) 以及外部化配置设置的能力。我们已经通过配置服务器看到了 parts。但是,现在我们将在生产过程中深入挖掘并应用更多内容。

Profile-based sets of beans


许多基于云的平台使用包裹在应用程序周围的代理。这使平台能够支持许多功能,包括缓存、内容交付网络 (CDN)、负载平衡和 SSL 终止。毕竟,为什么要对开发人员提出如此通用的基础设施要求?

但是,副作用可能会破坏旨在保护我们在网络中的安全协议。例如,我们的应用程序可能在一个私有 IP 地址上运行,而原始请求来自一个面向公众的 URL。当我们的应用程序看到转发的 Web 请求时,我们如何区分正确的请求和利用我们服务的恶意跨站点脚本攻击?

这会影响我们的应用程序的第一个地方是 chat 服务的 WebSocket 处理。它需要显式配置来处理这样的跃点。但是,我们只希望在生产环境中应用我们的代码,而不是在我们的工作站上运行开发中的东西时应用。

解决方案是基于配置文件的bean。 Spring 允许 us 将 bean 配置为仅在启用某些配置文件时才创建。

在上一章中,我们将整个 WebSocket 配置放在一个顶级类中。我们需要更改该配置类并将其转换为具有不同选项的容器类,具体取决于我们是否在生产中。

第一步是将现有的 bean 定义移动到一个新的静态内部类中,如下所示:

    @Configuration 
    public class WebSocketConfig { 
      ... 
      @Profile("!cloud") 
      @Configuration 
      static class LocalWebSocketConfig { 
        ... 
      } 
    } 

到目前为止,我们并没有太大变化。我们所拥有的,可以描述如下:

  • The outer class, WebSocketConfig, looks the same
  • This new inner class, LocalWebSocketConfig, is annotated @Profile("!cloud"), meaning it only runs if there is nocloud profile
  • The new class is called LocalWebSocketConfig to clarify that it only operates when we run things locally

Note

什么是 cloud 配置文件? Spring 允许通过 spring.profiles.active 应用程序属性设置各种配置文件。我们可以创建我们想要的所有配置文件,甚至是重叠的配置文件。但是,部署到 Cloud Foundry 的任何应用程序都会自动拥有一个额外的配置文件,即 cloud ,已应用。

由于我们计划both 本地配置和基于云的配置,因此 区分什么是相同的,什么是不同的。 WebSocket 路由映射是相同的。

为了支持这一点,我们需要一个 configureUrlMappings() 方法来配置这个 SimpleUrlHandlerMapping

    private static SimpleUrlHandlerMapping configureUrlMappings( 
      CommentService commentService, 
      InboundChatService inboundChatService, 
      OutboundChatService outboundChatService) { 
        Map<String, WebSocketHandler> urlMap = new HashMap<>(); 
        urlMap.put("/topic/comments.new", commentService); 
        urlMap.put("/app/chatMessage.new", inboundChatService); 
        urlMap.put("/topic/chatMessage.new", outboundChatService); 
 
        SimpleUrlHandlerMapping mapping = new 
         SimpleUrlHandlerMapping(); 
        mapping.setOrder(10); 
        mapping.setUrlMap(urlMap); 
 
        return mapping; 
    } 

这与我们在上一章看到的代码相同,只是稍微移动了一下:

  • The three endpoints are tied to their respective services in Map of routes-to-WebSocketHandlers
  • A SimpleUrlHandlerMapping is defined with this map of handlers
  • The order is set to 10
  • The method is static since it will be placed outside our new LocalWebSocketConfig (but insideWebSocketConfig)

要利用它,我们只需在 LocalWebSocketConfig 中编写一个 bean 定义,如下所示:

    @Bean HandlerMapping webSocketMapping(CommentService
     commentService, InboundChatService inboundChatService, 
     OutboundChatService outboundChatService) { 
       return configureUrlMappings(commentService,  
             InboundChatService, outboundChatService); 
    } 

这个方法只不过是 invoke 我们的 WebSocket 配置方法。

设置好本地配置后,我们现在可以将注意力转向配置 WebSocket 代理以在云中工作。为此,我们需要在 WebSocketConfig 中添加另一个内部静态类,如下所示:

    @Profile("cloud") 
    @Configuration 
    @EnableConfigurationProperties(ChatConfigProperties.class) 
    static class CloudBasedWebSocketConfig { 

可以解释如下:

  • It's marked as @Profile("cloud"), meaning this only applies if the cloud profile is in force, the opposite of LocalWebSocketConfig
  • It contains @EnableConfigurationProperties(ChatConfigProperties.class), used to provide an extra set of properties
  • It's named CloudBasedWebSocketConfig to point out its role

如果您想知道 @EnableConfigurationProperties 是什么意思,它会引导我们进入下一部分。

Creating configuration property beans


@EnableConfigurationProperties,应用于我们应用程序的任何地方,将导致一个名为 ChatConfigProperties 的 bean 被添加到应用程序中语境。 配置属性 bean 旨在保存各种设置,这些设置可以使用可选默认值进行配置,并且可以通过 各种方式。

还记得像 server.port 这样的属性,我们在其中调整了 Netty Web 容器侦听 Web 请求的默认端口吗?我们通过本书看到的所有属性都是配置属性bean。该注释只是为我们提供了定义特定于我们应用程序的属性设置的方法。

在这种情况下,ChatConfigProperties 旨在配置 WebSocket 代理。

Note

将注释应用于此特定类并不重要。这很方便,因为它是我们打算使用它的地方。

尽管启用了这样的属性设置,我们仍然需要将 bean 注入到我们的 CloudBasedWebSocketConfig 配置类中,如下所示:

    private final ChatConfigProperties chatConfigProperties; 
 
    CloudBasedWebSocketConfig(ChatConfigProperties 
     chatConfigProperties) { 
       this.chatConfigProperties = chatConfigProperties; 
    } 

使用构造函数注入,我们现在可以访问此配置属性 bean 提供的任何属性设置。

Note

配置属性 bean 只是具有覆盖能力的 Spring bean。这意味着它们可以像任何其他 Spring bean 一样被注入。


深入研究 WebSocket 代理配置,我们需要的是我们愿意接受来自的 WebSocket 连接请求的远程主机。本质上,我们的 chat 微服务的面向公众的 URL。为此,我们将定义一个名为 origin 的属性并使用它,如下所示:

    @Bean HandlerMapping webSocketMapping(CommentService
     commentService, InboundChatService inboundChatService, 
     OutboundChatService outboundChatService) { 
       SimpleUrlHandlerMapping mapping = 
         configureUrlMappings(commentService,  
         InboundChatService, outboundChatService); 
 
       Map<String, CorsConfiguration> corsConfigurationMap = 
         new HashMap<>(); 
       CorsConfiguration corsConfiguration = new CorsConfiguration(); 
       corsConfiguration 
        .addAllowedOrigin(chatConfigProperties.getOrigin()); 
 
       mapping.getUrlMap().keySet().forEach(route -> 
        corsConfigurationMap.put(route, corsConfiguration) 
       ); 
 
       mapping.setCorsConfigurations(corsConfigurationMap); 
 
       return mapping; 
    } 

由于 configureUrlMappings 方法,此代码具有与 LocalWebSocketConfig 相同的端点。它还创建了一个 CORS 映射,就像我们在 Chapter 17, WebSockets with Spring 中所做的那样启动。只是,这一次,它使用注入的 getOrigin() 来插入 chat 服务的面向公众的 URL(保持紧——我们很快就会看到)。

缺少的是这个配置属性 bean 的定义。它显示在这里:

    @Data 
    @ConfigurationProperties(prefix = "lsb") 
    public class ChatConfigProperties { 
 
      @Value("https://${vcap.application.uris[0]}") 
      private String origin; 
 
    } 

代码可以解释如下:

  • Once again, we use Project Lombok's @Data annotation to avoid writing getters and setters. This is ideal for configuration property beans.
  • @ConfigurationProperty(prefix="lsb") flags this bean as a candidate for Spring Boot's property reading rules, starting with the lsbprefix.
  • There is a single property named origin that is initialized using Spring's @Value() annotation.
  • On Cloud Foundry, vcap.application.uris is a property applied to every application that lists publicly visible URLs. Assuming that the first is the one we wish to use, we are applying it to our origin property.
  • By combining the prefix (lsb) and the name of the property (origin), the full path of this property is lsb.origin, and it can be overridden at any time.

Overriding property settings in production


每次我们将 应用程序 带到一个新环境时,总会有一些设置需要调整。我们不想编辑代码。相反,如果我们可以覆盖各种属性会更容易。我们可以!

这在 第 10 章Java 快速入门中简要介绍过,以覆盖 Spring Boot 的属性设置为幌子。然而,我们可以编写自己的自定义配置属性 beans 的事实使得它成为应用程序自定义的强大功能。

回顾第 10 章中列出的规则,Java 快速入门 ,可以按以下顺序覆盖属性设置,从高到低:

  1. @TestPropertySource annotations on test classes.
  2. Command-line arguments.
  3. Properties found inside SPRING_APPLICATION_JSON (inline JSON embedded in an env variable or system property).
  4. ServletConfig init parameters.


  1. ServletContext init parameters.
  2. JNDI attributes from java:comp/env.
  3. Java System properties (System.getProperties()).
  4. OS environment variables.
  5. RandomValuePropertySource that only has properties in random.*.
  6. Profile-specific properties outside the packaged JAR file (application-{profile}.properties and YAML variants).
  7. Profile-specific properties inside the packaged JAR file (application-{profile}.properties and YAML variants).
  8. Application properties outside the package JAR file (application.properties and YAML variants).
  1. Application properties inside the packaged JAR file (application.properties and YAML variants).
  2. @PropertySource annotations on any @Configuration classes.
  3. Default properties (specified using SpringApplication.setDefaultProperties).

Note

默认情况下,我们可以使用 vcap.application.uris[0] 运行。但是,如果我们将它带到另一个云解决方案,我们可以简单地插入对 lsb.origin 的覆盖,并利用新云提供的任何环境变量。这让我们不必再次修改代码,而是专注于让事情运行起来。

最常见的策略之一是创建 beapplication-{profile}.yml 文件indexterm"> 生效时自动应用。由于 Cloud Foundry 应用程序获得 cloud 配置文件,它会 自然地创建一个 application-cloud.yml 文件。

但是,由于我们采用 Spring Cloud Config Server 并指定 chat 服务由 chat.yml 管理,因此我们只需要添加一个 chat-c​​loud.yml 文件。然后我们知道在部署到 Cloud Foundry 时将应用以下特定于云的设置:

    server: 
      port: 8080 
 
    eureka: 
      client: 
        serviceUrl: 
          defaultZone: http://user:password@learning-spring-boot-
           eureka-server.cfapps.io/eureka/ 
      instance: 
        hostname: ${vcap.application.uris[0]} 
        nonSecurePort: 80 

这些设置可以解释如下:

  • The server.port is the same as before
  • The eureka.client.serviceUrl.defaultZone is changed to the public-facing URL for our Eureka service, so the chat service can find it
  • Since the public-facing URL for our chat service is terminated by a proxy, we have to override eureka.instance.hostname with ${vcap.application.uris[0]} to avoid registering an unreachable IP address with Eureka
  • We must also register that we are visible (non-secure) on port 80

comments-cloud.yml 的以下设置相同:

    server: 
      port: 8080 
 
    eureka: 
      client: 
        serviceUrl: 
          defaultZone: http://user:password@learning-spring-boot-
           eureka-server.cfapps.io/eureka/ 
      instance: 
        hostname: ${vcap.application.uris[0]} 
        nonSecurePort: 80 

images-cloud.yml 也是如此:

    server: 
      port: 8080 
 
    eureka: 
      client: 
        serviceUrl: 
          defaultZone: http://user:password@learning-spring-boot-
           eureka-server.cfapps.io/eureka/ 
      instance: 
        hostname: ${vcap.application.uris[0]} 
        nonSecurePort: 80 

最后,我们需要通过 eureka-cloud.yml 为 Eureka 服务本身设置相同的实例详细信息,如下所示:

    server: 
      port: 8080 
 
    eureka: 
      instance: 
        hostname: ${vcap.application.uris[0]} 
        nonSecurePort: 80 

如果您注意到,没有 eureka.client.serviceUrl.defaultZone ,因为这是 Eureka 服务!

这些附加设置添加到 https: //github.com/gregturn/learning-spring-boot-config-repo/tree/production 将确保我们的应用程序在云中顺利运行。

如果我们想查看我们新创建的属性设置,我们可以访问 http://learning-spring-boot.cfapps.io/configprops 并查找 ChatConfigProperties

读书笔记《developing-java-applications-with-spring-and-spring-boot-ebook》使用Spring Boot将您的应用程序投入生产

配置属性可以描述如下:

  • The name is captured as the prefix + the canonical path of the class
  • The prefix, lsb, is displayed
  • The properties lists the named properties we can tap (nesting displayed if that were the case)

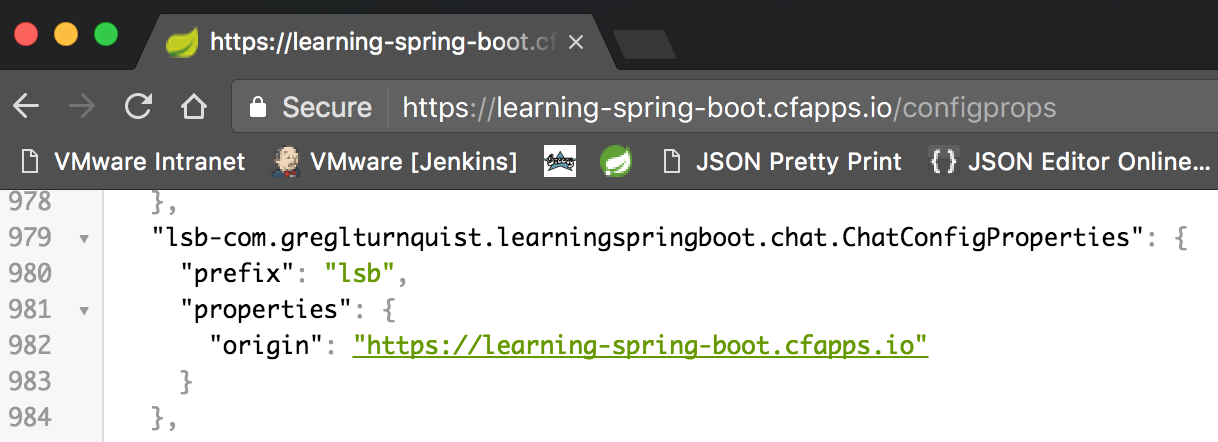
从中,我们可以很容易地发现 lsb.origin 是要覆盖的属性,如果我们有一些理由来调整它。

@ConfigurationProperties versus @Value

在我们的代码中,我们使用了基于强类型 @ConfigurationProperties 的类以及 @Value 标记的属性。 to你的 应用程序。


@Value 很旧,比 Spring Boot 早了几年。它是一个强大的注解,能够注入值以及接受默认值。但是,它遗漏了我们许多人在 编写 Boot 应用程序时所依赖的几个功能,如下表所示:

功能

@ConfigurationProperties

@Value

轻松绑定

是的

元数据支持

是的

SpEL评估

是的


该矩阵记录了三个关键特征:

  • Relaxed binding: The ability to match server.port, SERVER_PORT, and sErVeR.pOrT to the same attribute is quite valuable.
  • Meta-data support: The ability to include code completion for property settings is also of incredible value, along with hover-over tips. Anything that speeds up developer effort cannot be understated in value.
  • SpEL evaluation: The ability to write SpEL expressions to populate properties.

强烈建议从 @ConfigurationProperties 开始。当您在 POJO 中捆绑一组属性时,它确实是一个充满 @Value 属性的拳头的快捷方式。并且属性绑定是增压的。

但是,当您需要 SpEL 表达式支持时,就像我们获取应用程序的 URI (${ vcap.application.uris[0]}),那么就可以从@ConfigurationProperties中断,切换到@Value

但是,如果您注意到的话,我们会继续在 @ConfigurationProperties 中使用它。做错的真正暗示是,如果我们尝试使用 @Value 构造属性集合。配置属性是一种轻松构建属性层次结构的好方法。

Pushing app to Cloud Foundry and adjusting the settings


保持冷静,看推力。

- 互联网的居民

如果说对于任何平稳运行的 Ops 中心来说有一件至关重要的事情,那就是对自动化的需求。如果我们手工操作,我们会在生产中的各个组件之间引入漂移的风险。

以下部分展示了一些用于部署 our 基于微服务的 social 媒体平台,迈向自动化部署的第一步。

假设我们已经使用 Gradle 构建了所有东西,让我们通过将Spring Boot uber JAR 部署到Cloud Foundry 来开始:

#!/usr/bin/env bash 
 
cf push learning-spring-boot-config-server -p config-server/build/libs/learning-spring-boot-config-server-0.0.1-SNAPSHOT.jar & 
cf push learning-spring-boot-eureka-server -p eureka-server/build/libs/learning-spring-boot-eureka-server-0.0.1-SNAPSHOT.jar & 
cf push learning-spring-boot -p chat/build/libs/learning-spring-boot-chat-0.0.1-SNAPSHOT.jar & 
cf push learning-spring-boot-comments -p comments/build/libs/learning-spring-boot-comments-0.0.1-SNAPSHOT.jar & 
cf push learning-spring-boot-images -p images/build/libs/learning-spring-boot-images-0.0.1-SNAPSHOT.jar & 
cf push learning-spring-boot-hystrix-dashboard -p hystrix-dashboard/build/libs/learning-spring-boot-hystrix-dashboard-0.0.1-SNAPSHOT.jar & 

可以描述如下:

Note

一个真正的基于微服务的解决方案假定不同的团队负责不同的模块。因此,每个团队可能有不同的部署脚本以及不同的发布时间表。

让我们开始部署!控制台 output 显示我们正在运行 our 部署脚本:

gturnquist$ ./deploy.sh 
 
Creating app learning-spring-boot-comments in org cosmos-refarch / space development as [email protected]... 
Creating app learning-spring-boot in org cosmos-refarch / space development as [email protected]... 
Creating app learning-spring-boot-config-server in org cosmos-refarch / space development as [email protected]... 
Creating app learning-spring-boot-images in org cosmos-refarch / space development as [email protected]... 
Creating app learning-spring-boot-hystrix-dashboard in org cosmos-refarch / space development as [email protected]... 
Creating app learning-spring-boot-eureka-server in org cosmos-refarch / space development as [email protected]... 
... 
Using route learning-spring-boot-config-server.cfapps.io 
Binding learning-spring-boot-config-server.cfapps.io to learning-spring-boot-config-server... 
Using route learning-spring-boot-comments.cfapps.io 
Binding learning-spring-boot-comments.cfapps.io to learning-spring-boot-comments... 
Using route learning-spring-boot-eureka-server.cfapps.io 
Binding learning-spring-boot-eureka-server.cfapps.io to learning-spring-boot-eureka-server... 
Using route learning-spring-boot-images.cfapps.io 
Binding learning-spring-boot-images.cfapps.io to learning-spring-boot-images... 
Using route learning-spring-boot.cfapps.io 
Binding learning-spring-boot.cfapps.io to learning-spring-boot... 
Using route learning-spring-boot-hystrix-dashboard.cfapps.io 
Binding learning-spring-boot-hystrix-dashboard.cfapps.io to learning-spring-boot-hystrix-dashboard... 
... 
Uploading learning-spring-boot-config-server... 
Uploading learning-spring-boot-hystrix-dashboard... 
Uploading learning-spring-boot-comments... 
Uploading learning-spring-boot-eureka-server... 
Uploading learning-spring-boot-images... 
Uploading learning-spring-boot... 
... 
Starting app learning-spring-boot-hystrix-dashboard in org cosmos-refarch / space development as [email protected]... 
Starting app learning-spring-boot-comments in org cosmos-refarch / space development as [email protected]... 
Starting app learning-spring-boot-images in org cosmos-refarch / space development as [email protected]... 
Starting app learning-spring-boot-eureka-server in org cosmos-refarch / space development as [email protected]... 
Starting app learning-spring-boot in org cosmos-refarch / space development as [email protected]... 
Starting app learning-spring-boot-config-server in org cosmos-refarch / space development as [email protected]... 
... 
App started 
 
(the rest ommitted for brevity) 

我们社交媒体平台的所有组件现已部署到云端。

被警告!这还不够。上传位后必须应用一些自定义设置。

让我们从配置我们的 Eureka 服务器的部分开始,如下所示:

#!/usr/bin/env bash 
 
cf set-env learning-spring-boot-eureka-server spring.cloud.config.uri https://learning-spring-boot-config-server.cfapps.io 
cf set-env learning-spring-boot-eureka-server spring.cloud.config.label production 

Eureka 需要配置一个 Config Server URI 和从 GitHub 获取的标签,就像使用 cf set-env 所做的那样。

接下来,我们可以查看 chat 微服务的设置:

cf set-env learning-spring-boot spring.cloud.config.uri https://learning-spring-boot-config-server.cfapps.io 
cf set-env learning-spring-boot spring.cloud.config.label production 
 
cf bind-service learning-spring-boot learning-spring-boot-mongodb 
cf set-env learning-spring-boot spring.data.mongodb.uri ${vcap.services.learning-spring-boot-mongodb.credentials.uri} 
 
cf bind-service learning-spring-boot learning-spring-boot-rabbitmq

chat 服务 需要 配置服务器 URI(带有 GitHub 标签) ,一个MongoDB服务绑定 URI设置,和一个RabbitMQ服务绑定。

接下来,我们可以查看 comments 微服务的 设置,如此处显示:

cf set-env learning-spring-boot-comments spring.cloud.config.uri https://learning-spring-boot-config-server.cfapps.io 
cf set-env learning-spring-boot-comments spring.cloud.config.label production 
 
cf bind-service learning-spring-boot-comments learning-spring-boot-mongodb 
cf set-env learning-spring-boot-comments spring.data.mongodb.uri ${vcap.services.learning-spring-boot-mongodb.credentials.uri} 
 
cf bind-service learning-spring-boot-comments learning-spring-boot-rabbitmq

comments 服务需要一个配置服务器 URI(带有 GitHub 标签)、一个 MongoDB 服务绑定和 URI 设置,以及一个 RabbitMQ 服务绑定。

接下来,我们可以查看 images 微服务的设置,如下所示:

cf set-env learning-spring-boot-images spring.cloud.config.uri https://learning-spring-boot-config-server.cfapps.io 
cf set-env learning-spring-boot-images spring.cloud.config.label production 
 
cf bind-service learning-spring-boot-images learning-spring-boot-mongodb 
cf set-env learning-spring-boot-images spring.data.mongodb.uri ${vcap.services.learning-spring-boot-mongodb.credentials.uri} 
 
cf bind-service learning-spring-boot-images learning-spring-boot-rabbitmq 

images 服务需要一个配置服务器 URI(带有 GitHub 标签)、一个 MongoDB 服务绑定和 URI 设置以及一个 RabbitMQ 服务绑定。


Note

虽然所有三个服务都绑定到同一个 MongoDB 服务,但它们实际上可以使用单独的 MongoDB 服务。代码经过仔细编写以避免集成到数据库中。每个服务都有单独的集合。但是,为简洁起见,此代码中仅使用了一项服务。

有了这个,让我们运行以下配置脚本:

gturnquist$ ./config.sh 
 
Setting env variable 'spring.cloud.config.uri' to 'https://learning-spring-boot-config-server.cfapps.io' for app learning-spring-boot-eureka-server in org cosmos-refarch / space development as [email protected]... 
Setting env variable 'spring.cloud.config.label' to 'production' for app learning-spring-boot-eureka-server in org cosmos-refarch / space development as [email protected]... 
Setting env variable 'spring.cloud.config.uri' to 'https://learning-spring-boot-config-server.cfapps.io' for app learning-spring-boot in org cosmos-refarch / space development as [email protected]... 
Setting env variable 'spring.cloud.config.label' to 'production' for app learning-spring-boot in org cosmos-refarch / space development as [email protected]... 
Binding service learning-spring-boot-mongodb to app learning-spring-boot in org cosmos-refarch / space development as [email protected]... 
Setting env variable 'spring.data.mongodb.uri' to '${vcap.services.learning-spring-boot-mongodb.credentials.uri}' for app learning-spring-boot in org cosmos-refarch / space development as [email protected]... 
Binding service learning-spring-boot-rabbitmq to app learning-spring-boot in org cosmos-refarch / space development as [email protected]... 
 
(the rest omitted for brevity)

应用这些设置后,我们需要重新启动一切。为此,我们需要以下脚本:

#!/usr/bin/env bash 
 
cf restart learning-spring-boot-config-server 
 
sleep 10 
 
cf restart learning-spring-boot-eureka-server & 
cf restart learning-spring-boot & 
cf restart learning-spring-boot-comments & 
cf restart learning-spring-boot-images &

为什么重新启动配置服务器后延迟?重要的是,它有机会在其他应用程序之前启动并运行。所以,让我们按如下方式运行它:

$ ./restart.sh 
 
Stopping app learning-spring-boot-config-server in org cosmos-refarch / space development as [email protected]... 
Starting app learning-spring-boot-config-server in org cosmos-refarch / space development as [email protected]... 
 
    state     since                    cpu      memory         disk         details 
#0   running   2017-01-11 10:11:07 PM   207.4%   426.7M of 1G   146M of 1G 
 
Stopping app learning-spring-boot-images in org cosmos-refarch / space development as [email protected]... 
Stopping app learning-spring-boot-eureka-server in org cosmos-refarch / space development as [email protected]... 
Stopping app learning-spring-boot in org cosmos-refarch / space development as [email protected]... 
Stopping app learning-spring-boot-comments in org cosmos-refarch / space development as [email protected]... 
 
Starting app learning-spring-boot-eureka-server in org cosmos-refarch / space development as [email protected]... 
Starting app learning-spring-boot-images in org cosmos-refarch / space development as [email protected]... 
Starting app learning-spring-boot-comments in org cosmos-refarch / space development as [email protected]... 
Starting app learning-spring-boot in org cosmos-refarch / space development as [email protected]... 
 
App started 
 
(the rest ommitted for brevity) 


我们可以像这样轻松地检查它们的状态:

$ cf apps 
 
Getting apps in org cosmos-refarch / space development as [email protected]... 
OK 
 
name                                     requested state   instances   memory   disk   urls 
learning-spring-boot                     started           1/1         1G       1G     learning-spring-boot.cfapps.io 
learning-spring-boot-comments            started           1/1         1G       1G     learning-spring-boot-comments.cfapps.io 
learning-spring-boot-config-server       started           1/1         1G       1G     learning-spring-boot-config-server.cfapps.io 
learning-spring-boot-eureka-server       started           1/1         1G       1G     learning-spring-boot-eureka-server.cfapps.io 
learning-spring-boot-hystrix-dashboard   started           1/1         1G       1G     learning-spring-boot-hystrix-dashboard.cfapps.io 
learning-spring-boot-images              started           1/1         1G       1G     learning-spring-boot-images.cfapps.io

让我们来看看。我们可以通过访问 http://learning-spring-boot.cfapps.io 来做到这一点(在隐身标签中以确保新会话):
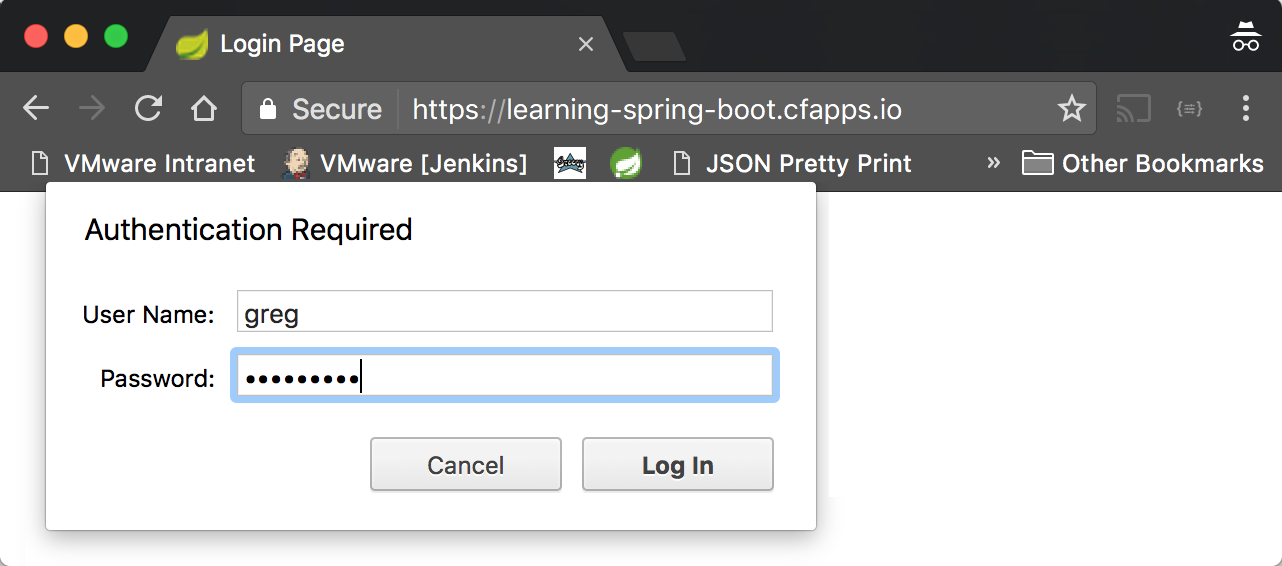
读书笔记《developing-java-applications-with-spring-and-spring-boot-ebook》使用Spring Boot将您的应用程序投入生产

我们将看到非常熟悉的登录页面。

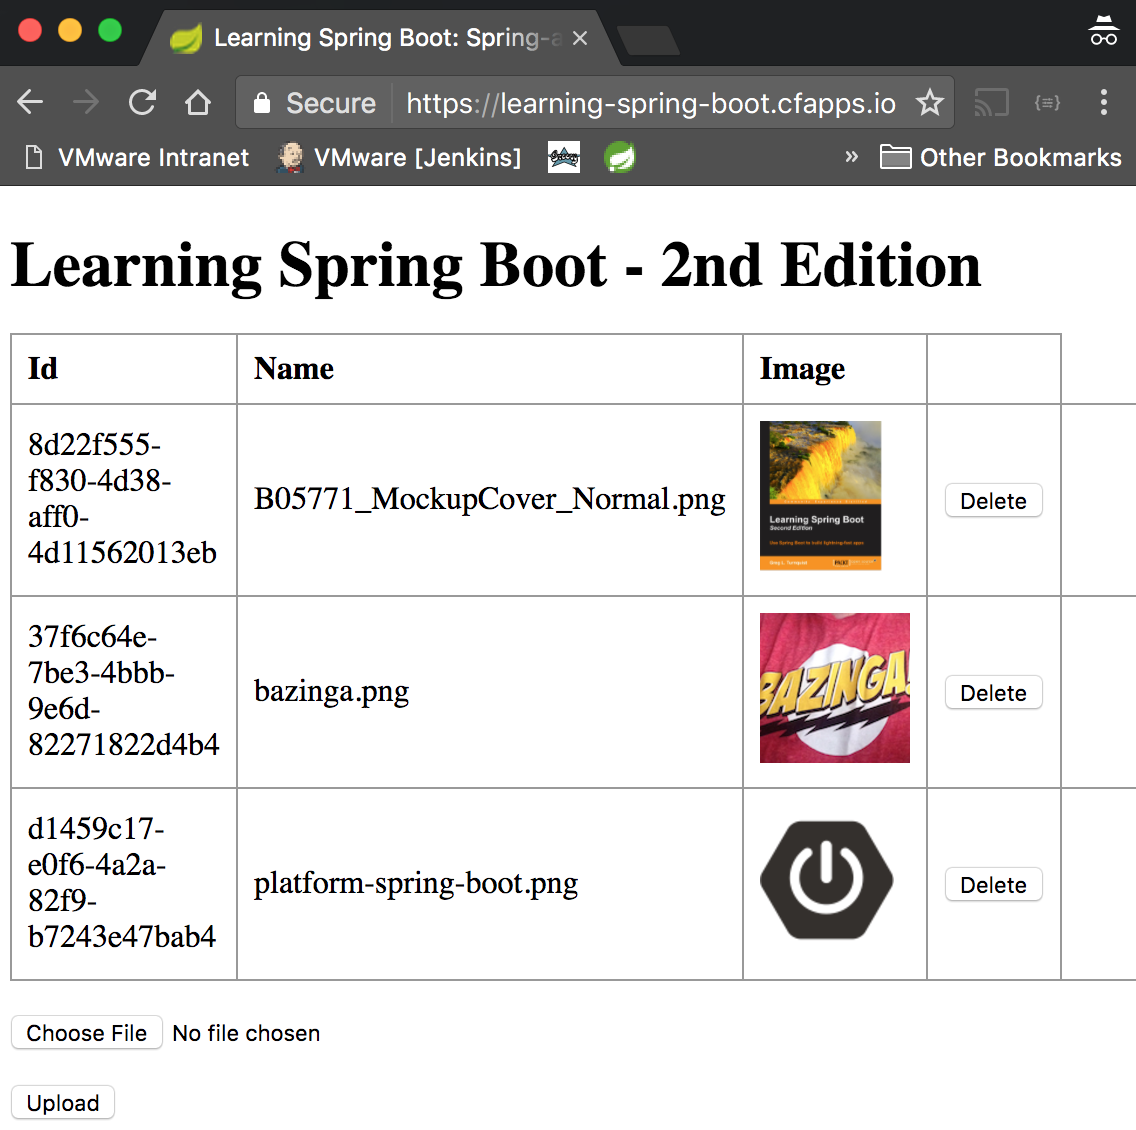
如果我们以 greg/turnquist 身份登录,删除默认图像并加载我们之前的收藏夹,我们可以期待看到这个:

读书笔记《developing-java-applications-with-spring-and-spring-boot-ebook》使用Spring Boot将您的应用程序投入生产

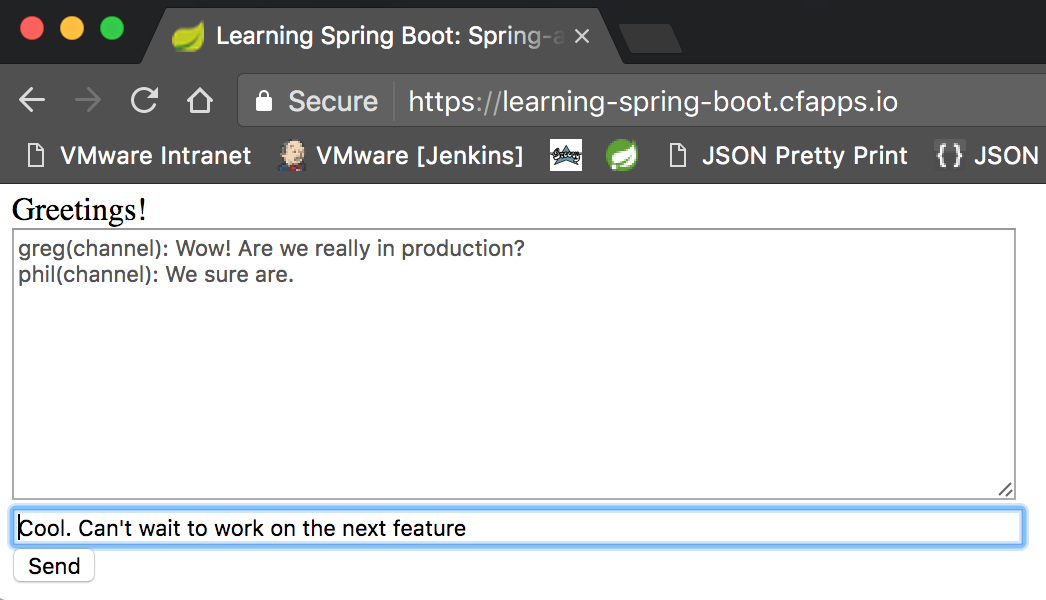
我们最喜欢的聊天频道位于 thethe 底部"indexterm"> 页面,如 如下截图所示:

读书笔记《developing-java-applications-with-spring-and-spring-boot-ebook》使用Spring Boot将您的应用程序投入生产

如需额外维护,可使用以下脚本删除all 应用程序(但不是相关的 AMQP 和 MongoDB 服务):

#!/usr/bin/env bash 
 
cf delete -f learning-spring-boot-config-server & 
cf delete -f learning-spring-boot-eureka-server & 
cf delete -f learning-spring-boot & 
cf delete -f learning-spring-boot-comments & 
cf delete -f learning-spring-boot-images & 
cf delete -f learning-spring-boot-hystrix-dashboard & 

使用 CF CLI,在后台作业中删除所有服务。

Note

Cloud Foundry 不支持清单 YAML 文件吗?虽然这是真的,但清单文件有一些我希望避免的限制。因此,我宁愿直接编写 CF CLI 操作的脚本,或者使用更强大的东西。

Summary


在本章中,我们创建了特定于配置文件的配置设置,以在本地或基于云的环境中处理 WebSocket 代理。我们插入了一个自定义配置属性 bean,并使用它从我们的云提供商那里获取必要的详细信息,以便我们的聊天频道能够正常工作。然后我们构建了一些 BASH 脚本来将东西部署到云中,配置必要的属性,并在需要时重新启动/清理。

这仅仅是开始。我们在本书中涉及了很多内容,包括 Web 应用程序、数据访问、测试、工具、消息传递、微服务、安全性和生产。我们做到了所有反应,确保我们更有效地使用资源。

认为我们的社交媒体平台价值 10 亿美元?也许,也许不是。但是,通过使用 Spring Boot 2.0、Spring Framework 5 及其基于反应器的端到端范例的长度和广度,我们在如何构建可扩展系统方面学到了很多东西。

希望我已经激起了您的兴趣,让您在从事下一个大项目时发现 Spring Boot 还可以提供什么。

请访问 https://github .com/learning-spring-boot/learning-spring-boot-2nd-edition-code 并“加星标”。这样,当 Spring Boot 2.0 达到 GA 版本并且此代码库已升级以匹配时,您将收到警报。还可以在 http://greglturnquist.com/books/learning 注册更新-spring-boot 这样您就可以收到最新消息的提醒,包括代码模组、竞赛等!