vlambda博客
学习文章列表

读书笔记《spring-security-3-x-cookbook》第 1 章基本安全

第 1 章基本安全

在本章中,我们将介绍:

  • JSP 上基于 JAAS 的安全认证

  • servlet 上基于 JAAS 的安全认证

  • servlet 上基于容器的基本身份验证

  • servlet 上基于表单的身份验证

  • 使用开放 LDAP 和 servlet 的基于表单的身份验证

  • servlet 上的散列/摘要身份验证

  • JAX-WS 和 JAX-RS 的基本身份验证

  • 启用和禁用文件列表

介绍


身份验证和授权已成为所有 Web 应用程序的主要部分。身份验证 涉及检查谁在访问应用程序。授权是一个检查用户访问权限的过程。在原生方式中,我们通常将用户的信息存储在数据库中,并在应用程序中编写代码。我们还为用户创建角色并进行映射。在这里,它与应用程序紧密耦合,因为当我们连接到新数据库或使用任何其他工具(如 LDAP 或 Kerbose)时,我们必须重写整个代码。但是有一些高级选项可以处理身份验证和授权。 J2EE 容器通过配置 XML 文件提供了不同的方式来验证用户。我们可以将认证分为两类,即基于容器的认证授权和应用级的认证授权。

J2EE 容器提供接口和类来提供身份验证。在本章中,我们可以看到如何使用 JAAS、基本身份验证和基于表单的身份验证来对用户进行身份验证。

在本书中,我们使用了 JAAS,因为它是一种标准的身份验证框架。 JAAS 在 PAM可插入身份验证模块)框架上工作。

可以通过以下方式提供身份验证和授权:

  • 基本身份验证:在这种技术中,应用程序服务器会提供一个登录表单,其中包含用户名和密码文本框,因此您不必自己创建登录页面。您还将知道呼叫者的身份。

  • 基于表单的身份验证:在这种技术中,容器处理身份验证,但 登录表单由用户作为 JSP 页面提供。

  • 基于摘要的身份验证:在这种方法中,用户凭据使用某些 算法进行散列。

  • 基于证书的身份验证:在这种技术中,客户端和服务器交换 证书以验证其身份。获得 SSL 证书可确保网络上的数据传输安全。

JSP 上基于 JAAS 的安全认证


部署描述符是所有Web应用程序的主要配置文件。容器在启动任何应用程序之前首先查找部署描述符。

部署描述符是一个 XML 文件,web.xml,位于 WEB-INF 文件夹中。

如果您查看 web.xml 文件的 XSD,您可以看到与安全相关的架构。

可以使用以下 URL 访问架构:http: //java.sun.com/xml/ns/j2ee/web-app_2_4.xsd

以下是 XSD 中可用的架构元素:

<xsd:element name="security-constraint" type="j2ee:security-constraintType"/>
<xsd:element name="login-config" type="j2ee:login-configType"/>
<xsd:element name="security-role "type="j2ee:security-roleType"/>

准备好

您将需要以下内容来演示身份验证和授权:

  • JBoss 7

  • 日食靛蓝 3.7

  • 创建一个动态 Web 项目并将其命名为 Security Demo

  • 创建一个包,com.servlets

  • WebContent文件夹中创建一个XML文件,jboss-web.xml

  • 创建两个 JSP 页面,login.jsplogoff.jsp

怎么做...

执行以下步骤,为 JSP 实现基于 JAAS 的安全性:

  1. 使用输入字段 j_usernamej_password 编辑 login.jsp 文件,并将其提交给 SecurityCheckerServlet

    <%@ page contentType="text/html; charset=UTF-8" %>
    <%@ page language="java" %>
    <html >
      <HEAD>
        <TITLE>PACKT Login Form</TITLE>
        <SCRIPT> function submitForm() { var frm = document. myform; if( frm.j_username.value == "" ) { alert("please enter your username, its empty"); frm.j_username.focus(); return ; } if( frm.j_password.value == "" ) { alert("please enter the password,its empty"); frm.j_password.focus(); return ; } frm.submit(); } </SCRIPT>
      </HEAD>
      <BODY>
        <FORM name="myform" action="SecurityCheckerServlet" METHOD=get>
        <TABLE width="100%" border="0" cellspacing="0" cellpadding="1" bgcolor="white">
        <TABLE width="100%" border="0" cellspacing="0" cellpadding="5">
        <TR align="center">
        <TD align="right" class="Prompt"></TD>
        <TD align="left">
          <INPUT type="text" name="j_username" maxlength=20>
        </TD>
        </TR>
        <TR align="center">
        <TD align="right" class="Prompt"> </TD>
        <TD align="left">
        <INPUT type="password"name="j_password" maxlength=20 >
        <BR>
        <TR align="center">
        <TD align="right" class="Prompt"> </TD>
        <TD align="left">
        <input type="submit" onclick="javascript:submitForm();" value="Login">
        </TD>
        </TR>
        </TABLE>
        </FORM>
      </BODY>
    </html>

    j_usernamej_password 是使用基于表单的身份验证的指标。

  2. 让我们修改web.xml文件< /a> 保护所有以 .jsp 结尾的文件。如果您尝试访问任何 JSP 文件,您将获得一个登录表单,该表单又调用 SecurityCheckerServlet 文件来验证用户身份。您还可以看到显示的角色信息。更新 web.xml 文件,如以下代码片段所示。我们使用了 2.5 xsd。以下代码需要放在 web.xml 文件中的 webapp 标记之间:

    <display-name>jaas-jboss</display-name>
     <welcome-file-list>
        <welcome-file>index.html</welcome-file>
        <welcome-file>index.htm</welcome-file>
        <welcome-file>index.jsp</welcome-file>
        <welcome-file>default.html</welcome-file>
        <welcome-file>default.htm</welcome-file>
        <welcome-file>default.jsp</welcome-file>
     </welcome-file-list>
    
     <security-constraint>
        <web-resource-collection>
         <web-resource-name>something</web-resource-name>
         <description>Declarative security tests</description>
         <url-pattern>*.jsp</url-pattern>
         <http-method>HEAD</http-method>
         <http-method>GET</http-method>
         <http-method>POST</http-method>
         <http-method>PUT</http-method>
         <http-method>DELETE</http-method>
        </web-resource-collection>
        <auth-constraint>
         <role-name>role1</role-name>
        </auth-constraint>
        <user-data-constraint>
         <description>no description</description>
         <transport-guarantee>NONE</transport-guarantee>
        </user-data-constraint>
     </security-constraint>
     <login-config>
        <auth-method>FORM</auth-method>
        <form-login-config>
         <form-login-page>/login.jsp</form-login-page>
         <form-error-page>/logoff.jsp</form-error-page>
        </form-login-config>
     </login-config>
     <security-role>
        <description>some role</description>
        <role-name>role1</role-name>
     </security-role>
     <security-role>
        <description>packt managers</description>
        <role-name>manager</role-name>
     </security-role>
     <servlet>
        <description></description>
        <display-name>SecurityCheckerServlet</display-name>
        <servlet-name>SecurityCheckerServlet</servlet-name>
        <servlet-class>com.servlets.SecurityCheckerServlet</servlet-class>
     </servlet>
     <servlet-mapping>
        <servlet-name>SecurityCheckerServlet</servlet-name>
        <url-pattern>/SecurityCheckerServlet</url-pattern>
     </servlet-mapping>
  3. JAAS Security Checker and Credential Handler:Servlet 是一个安全检查器。由于我们使用的是认证标准框架 JAAS,为了执行以下程序,您需要导入 org.jboss.security.SimplePrincipalorg.jboss.security.auth.callback.SecurityAssociationHandle 并添加所有必要的导入。在下面的 SecurityCheckerServlet 中,我们从 JSP 文件中获取输入并将其传递给 CallbackHandler

    然后我们将 Handler 对象传递给 LoginContext 类,该类具有 login() 方法进行身份验证。 认证成功后,会创建SubjectPrincipal 对于用户,带有用户详细信息。我们正在使用迭代器接口来迭代 LoginContext 对象以获取检索到的用户详细信息以进行身份​​验证。

    SecurityCheckerServlet 类中:

    package com.servlets;
    public class SecurityCheckerServlet extends HttpServlet {
      private static final long serialVersionUID = 1L;
         
        public SecurityCheckerServlet() {
          super();
        }
    
        protected void doGet(HttpServletRequest request, HttpServletResponse response) throws ServletException, IOException {
           char[] password = null;
           PrintWriter out=response.getWriter();
           try
           {
              
             SecurityAssociationHandler handler = new SecurityAssociationHandler();
             SimplePrincipal user = new SimplePrincipal(request.getParameter("j_username"));
             password=request.getParameter("j_password").toCharArray();
             handler.setSecurityInfo(user, password);
             System.out.println("password"+password);
        
             CallbackHandler myHandler = new UserCredentialHandler(request.getParameter("j_username"),request.getParameter("j_password"));
             LoginContext lc = new LoginContext("other", handler);
             lc.login();
        
             Subject subject = lc.getSubject();
             Set principals = subject.getPrincipals();
            
             List l=new ArrayList();
             Iterator it = lc.getSubject().getPrincipals().iterator();
             while (it.hasNext()) {
               System.out.println("Authenticated: " + it.next().toString() + "<br>");
               out.println("<b><html><body><font color='green'>Authenticated: " + request.getParameter("j_username")+"<br/>"+it.next().toString() + "<br/></font></b></body></html>");
                  }
               it = lc.getSubject().getPublicCredentials(Properties.class).iterator();
               while (it.hasNext()) System.out.println(it.next().toString());
          
               lc.logout();
           }     catch (Exception e) {
                 out.println("<b><font color='red'>failed authenticatation.</font>-</b>"+e);
                
           }
        }
      protected void doPost(HttpServletRequest request, HttpServletResponse response) throws ServletException, IOException {
       }
    
    }

    创建 UserCredentialHandler 文件:

    package com.servlets;
    class UserCredentialHandler implements CallbackHandler {
      private String user, pass;
    
      UserCredentialHandler(String user, String pass) {
        super();
        this.user = user;
        this.pass = pass;
      }
      @Override
      public void handle(Callback[] callbacks) throws IOException, UnsupportedCallbackException {
          for (int i = 0; i < callbacks.length; i++) {
            if (callbacks[i] instanceof NameCallback) {
              NameCallback nc = (NameCallback) callbacks[i];
              nc.setName(user);
            } else if (callbacks[i] instanceof PasswordCallback) {
              PasswordCallback pc = (PasswordCallback) callbacks[i];
              pc.setPassword(pass.toCharArray());
            } else {
            throw new UnsupportedCallbackException(callbacks[i], "Unrecognized Callback");
          }
        }
      }
     }

    jboss-web.xml 文件中:

    <?xml version="1.0" encoding="UTF-8"?>
    <jboss-web>
    <security-domain>java:/jaas/other</security-domain>
    </jboss-web>

    Otherlogin-config.xml 文件中定义的应用程序策略的名称。

    所有这些都将打包为一个 .war 文件。

  4. 配置 JBoss 应用服务器。转到 JBoss 中的 jboss-5.1.0.GA\server\default\conf\login-config.xml。如果您查看该文件,您可以看到数据库 LDAP 的各种配置和一个使用属性文件的简单配置,我在以下代码片段中使用了该文件:

    <application-policy name="other">
      <!-- A simple server login module, which can be used when the number of users is relatively small. It uses two properties files: users.properties, which holds users (key) and their password (value). roles.properties, which holds users (key) and a comma-separated list of their roles (value). The unauthenticatedIdentity property defines the name of the principal that will be used when a null username and password are presented as is the case for an unauthenticated web client or MDB. If you want to allow such users to be authenticated add the property, e.g., unauthenticatedIdentity="nobody" -->
      <authentication>
      <login-module code="org.jboss.security.auth.spi.UsersRolesLoginModule" flag="required"/>
        <module-option name="usersProperties">users.properties</module-option>
        <module-option name="rolesProperties">roles.properties</module-option>
        <module-option name="unauthenticatedIdentity">nobody</module-option> 
      </authentication>
    </application-policy>
  5. 创建 users.properties 文件 在同一文件夹中。以下是 Users.properties 文件,其中用户名映射到角色。

    用户属性

    anjana=anjana123

    角色属性

    anjana=role1
  6. 重新启动服务器。

这个怎么运作...

JAAS 由一组接口组成,用于处理身份验证过程。他们是:

  • CallbackHandlerCallback 接口

  • LoginModule 接口

  • LoginContext

CallbackHandler 接口获取用户凭据。它处理凭据并将它们传递给 LoginModule,后者对用户进行身份验证。

JAAS 是特定于容器的。每个容器都有自己的实现,这里我们使用 JBoss 应用服务器来演示 JAAS。

在我之前的示例中,我明确调用了 JASS 接口。

UserCredentialHandler 实现了 CallbackHandler 接口。

因此,CallbackHandler 是用户凭据的存储空间,LoginModule 对用户进行身份验证。

LoginContextCallbackHandler 接口与 LoginModule 连接起来。它将用户凭据传递给 LoginModule 接口进行身份验证:

CallbackHandler myHandler = new UserCredentialHandler(request.getParameter("j_username"),request.getParameter("j_password"));
  LoginContext lc = new LoginContext("other", handler);
  lc.login();

web.xml 文件定义了安全机制,还为我们指出了应用程序中受保护的资源。

以下屏幕截图显示了失败的身份验证窗口:

读书笔记《spring-security-3-x-cookbook》第 1 章基本安全

以下屏幕截图显示了一个成功的 身份验证窗口:

读书笔记《spring-security-3-x-cookbook》第 1 章基本安全

也可以看看

  • servlet 上基于 JAAS 的安全认证 配方

  • servlet 上基于容器的基本身份验证 配方

  • 基于表单的 servlet 身份验证 配方

  • 使用开放 LDAP 和 servlet 的基于表单的身份验证 配方

  • servlet 上的散列/摘要式身份验证 配方

  • JAX-WS 和 JAX-RS 的基本身份验证 配方

  • 启用和禁用文件列表配方

servlet 上基于 JAAS 的安全认证


servlet 上基于 JAAS 的安全认证是 基于 JAAS 的安全性的扩展JSP 的身份验证。在本节中,我们将演示我们甚至可以在 servlet 上应用安全性。

准备好

  • 在 Eclipse 中创建一个新的 Web 项目

  • 创建一个包,com.packt.security.servlets

  • 创建一个名为 ProtectedServlets 的 Servlet

怎么做...

以下是 servlet 基于 JAAS 的安全性的步骤:

  1. 创建一个 servlet 并将其命名为 ProtectedServlets

    public class ProtectedServlets extends HttpServlet {
      private static final long serialVersionUID = 1L;
        
      public ProtectedServlets() {
        super();
           
      }
      protected void doGet(HttpServletRequest request, HttpServletResponse response) throws ServletException, IOException {
        PrintWriter out=response.getWriter();
        try
        {
          out.println("Hello User");
          out.println("Authtype:"+request.getAuthType());
          out.println("User Principal:"+request.getUserPrincipal());
          out.println("User role:"+request.isUserInRole("role1"));
        }
        catch (Exception e) {
          out.println("<b><font color='red'>failed authenticatation</font>-</b>"+e);
    
        }
      }
    
      protected void doPost(HttpServletRequest request, HttpServletResponse response) throws ServletException, IOException {
        // TODO Auto-generated method stub
      }
    
    }
  2. 现在, 编辑 web.xml 文件以保护 servlet:

    <web-resource-collection>
    <web-resource-name>Servlet Protection</web-resource-name>
    <description>Declarative security tests</description>
    <url-pattern>/ProtectedServlets</url-pattern>
    <http-method>HEAD</http-method>
    <http-method>GET</http-method>
    <http-method>POST</http-method>
    <http-method>PUT</http-method>
    <http-method>DELETE</http-method>
    </web-resource-collection>

这个怎么运作...

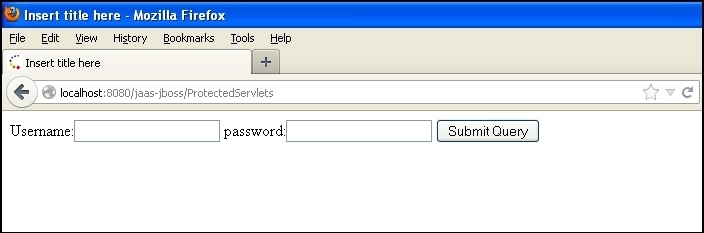
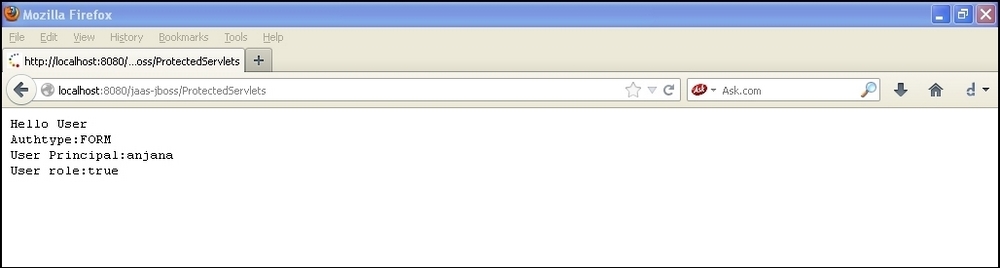
重新启动服务器并访问 URL:http://localhost:8080/jaas-jboss/ProtectedServlets

您将获得一个登录表单,该表单将对用户进行身份验证。 servlet 是受保护的资源,任何访问 servlet 的人都将被要求登录。身份验证由特定于应用程序服务器的 JAAS API 处理。每个应用服务器都有自己的安全实现。

也可以看看

  • servlet 上基于容器的基本身份验证 配方

  • 基于表单的 servlet 身份验证 配方

  • 使用开放 LDAP 和 servlet 的基于表单的身份验证 配方

  • servlet 上的散列/摘要式身份验证 配方

  • JAX-WS 和 JAX-RS 的基本身份验证 配方

  • 启用和禁用文件列表配方

servlet 上基于容器的基本身份验证


在我们的 之前的示例中,我们使用 JAAS 提供的接口与 loginform.jsp。以前的应用程序有一个自定义登录表单设计,其身份验证由应用程序服务器提供的 JAAS API 处理。

准备好

  • 创建一个简单的网络应用项目

  • 创建一个 servlet 类

  • 编辑 web.xml 文件以进行基本身份验证

  • 添加约束以限制用户访问 servlet

怎么做...

现在,我们将看到基本身份验证。容器提供登录表单并对用户进行身份验证,并在身份验证成功后将用户重定向到 servlet。不涉及登录表单。

web.xml 文件中进行以下更改:

<login-config>
   <auth-method>BASIC</auth-method>
<form-login-config>  

.war 导出到 JBoss,重新启动服务器,然后访问 servlet。

这个怎么运作...

在前面的示例中,容器通过读取 web.xml 文件来决定验证 servlet 的机制。这里的 <auth-method> 标签已将 BASIC 定义为模式 的身份验证。当我们访问受保护的资源时,我们应该会弹出一个登录对话框。

以下屏幕截图显示了实施的工作流程:

读书笔记《spring-security-3-x-cookbook》第 1 章基本安全

也可以看看

  • 基于表单的 servlet 身份验证 配方

  • 使用开放 LDAP 和 servlet 的基于表单的身份验证 配方

  • servlet 上的散列/摘要式身份验证 配方

  • JAX-WS 和 JAX-RS 的基本身份验证 配方

  • 启用和禁用文件列表配方

servlet 上基于表单的身份验证


之前的 部分中,我们演示了 servlet 和 JSP 的基本身份验证。现在让我们在 servlet 上使用基于表单的身份验证。

准备好

让我们在 servlet 上应用基于表单的身份验证。您将需要一个带有 servlet 的简单 Web 应用程序、一个处理身份验证的 Web 容器,以及告诉容器要进行哪些身份验证的 web.xml 文件。

怎么做...

让我们查看在servlet上实现基于表单的身份验证的一些简单步骤:

  1. 创建一个名为 Containerform.jsp 的 JSP 文件:

    <%@ page language="java" contentType="text/html; charset=ISO-8859-1"
        pageEncoding="ISO-8859-1"%>
    <!DOCTYPE html PUBLIC "-//W3C//DTD HTML 4.01 Transitional//EN" "http://www.w3.org/TR/html4/loose.dtd">
    <html>
    <head>
    <meta http-equiv="Content-Type" content="text/html; charset=ISO-8859-1">
    <title>Insert title here</title>
    </head>
    <body>
    <form method="POST" action="j_security_check">
    Username:<input type="text" name="j_username">
    password:<input type="password" name="j_password">
    <input type=submit>
    </form>
    </body>
    </html>

    你在前面的代码中观察到了什么?

    action=j_security_check 是 Web 容器识别的默认 URL。它告诉容器它具有要验证的用户凭据。

  2. 现在,编辑 web.xml 文件:

    <login-config>
      <auth-method>FORM</auth-method>
      <form-login-config>
        <form-login-page>/Containerform.jsp</form-login-page>
        <form-error-page>/logoff.jsp</form-error-page>
      </form-login-config>
    </login-config>

构建项目并将 .war 文件导出到 JBoss。

这个怎么运作...

前面的 示例演示了基于表单的 身份验证。 J2EE容器读取web.xml文件,<auth-method>标签有form 属性集。然后它进一步查找 login.jsp 文件,该文件需要显示以进行基于表单的身份验证。 <form-error-page><form-login-page> 有登录文件名和错误认证失败时需要显示的页面。当用户尝试访问受保护的资源时,J2EE 容器将请求重定向到登录页面。用户凭据提交给 j_security_check 操作。该动作由容器标识,并进行身份验证和授权;成功时,用户被重定向到受保护的资源,失败时显示错误页面。

以下是显示用户登录页面并显示成功认证的用户信息的工作流截图:

读书笔记《spring-security-3-x-cookbook》第 1 章基本安全

也可以看看

  • 使用开放 LDAP 和 servlet 的基于表单的身份验证 配方

  • servlet 上的散列/摘要式身份验证 配方

  • JAX-WS 和 JAX-RS 的基本身份验证 配方

  • 启用和禁用文件列表配方

使用开放 LDAP 和 servlet 的基于表单的身份验证


在本部分,我们将了解如何通过检索对用户进行身份验证="id40" class="indexterm">中存储的用户信息打开LDAP和JAAS。顾名思义,Open LDAP 是轻量级用户目录协议的免费版本,它允许我们创建组并向其中添加用户。

准备好

下载开放的 LDAP,创建角色、组和用户。

在 JBoss 应用服务器中,编辑 login-config.xml 文件。

怎么做...

执行以下步骤来配置应用程序服务器以从 Open LDAP 检索用户:

  1. login-config.xml 文件中提供 LDAP 端口 带有 网址、凭据和需要搜索以查找应用程序提供的用户名和密码的域:

    <application-policy name="example">
     <authentication>
     <login-module code="org.jboss.security.auth.spi.LdapExtLoginModule" flag="required" >
     <module-option name="java.naming.factory.initial">com.sun.jndi.ldap.LdapCtxFactory</module-option>
     <module-option name="java.naming.provider.url">ldap://localhost:389</module-option>
     <module-option name="java.naming.security.authentication">simple</module-option>
     <module-option name="bindDN">cn=Manager,dc=maxcrc,dc=com</module-option>
     <module-option name="bindCredential">secret</module-option>
     <module-option name="baseCtxDN">ou=People,dc=maxcrc,dc=com</module-option>
     <module-option name="baseFilter">(uid={0})</module-option>
    
     <module-option name="rolesCtxDN">ou=Roles,dc=maxcrc,dc=com</module-option>
      <module-option name="rolesCtxDN">ou=Department,dc=maxcrc,dc=com</module-option>
     <module-option name="roleFilter">(member={1})</module-option>
     <module-option name="roleAttributeID">cn</module-option>
     <module-option name="searchScope">ONELEVEL_SCOPE</module-option>
     <module-option name="allowEmptyPasswords">true</module-option>
     </login-module>
    </authentication>
    </application-policy>
  2. jboss-web.xml 文件中,我们将指定 JAAS 的查找名称:

    jboss-web.xml
    <?xml version="1.0" encoding="UTF-8"?>
    <jboss-web>
    <security-domain>java:/jaas/example</security-domain>
    </jboss-web>

这个怎么运作...

在 JBoss 上构建和部署 WAR,重新启动服务器,然后访问浏览器。

将被提示登录表单 并且JBoss 验证用户 基于提供的开放 LDAP 凭据 。检索用户并获得应用程序策略中提到的角色的授权。容器提供了用于身份验证的内置 API。模块 org.jboss.security.auth.spi.LdapExtLoginModule 处理 LDAP 身份验证过程。

也可以看看

  • servlet 上的散列/摘要式身份验证 配方

  • JAX-WS 和 JAX-RS 的基本身份验证 配方

  • 启用和禁用文件列表配方

servlet 上的散列/摘要身份验证


之前的身份验证机制中,客户端发送 用户凭据并由容器验证.

客户端 不会尝试加密密码。

因此,我们的 应用程序仍然不安全并且容易受到攻击。

本节介绍将加密的用户凭据传递给服务器,并告诉服务器可以使用哪种加密算法来解密数据。

JBoss 是我选择用来演示它的应用程序服务器。

准备好

  • 修改Login-config.xml

  • 创建 加密用户。属性

  • 创建 加密角色。属性

怎么做....

  1. 修改 web.xml 文件:

    <login-config>
        <auth-method>DIGEST</auth-method>
        <realm-name>PACKTSecurity</realm-name>
    </login-config>
  2. 现在,修改 jboss-web.xml 文件。 领域名称用于散列:

    <?xml version="1.0" encoding="UTF-8"?>
    <!-- <jboss-web> -->
    <!-- <security-domain>java:/jaas/other</security-domain> -->
    <!-- </jboss-web> -->
    <jboss-web>
    <security-domain>java:/jaas/encryptme</security-domain>
    </jboss-web>
  3. 修改login-config.xml文件

    <application-policy name="encryptme">
        <!--this is used to demonstrate DIGEST Authentication -->
        <authentication>
          <login-module code="org.jboss.security.auth.spi.UsersRolesLoginModule" flag="required"/>
        <module-option name="usersProperties">encrypt-users.properties</module-option>
        <module-option name="rolesProperties">encrypt-roles.properties</module-option>
        <module-option name="hashAlgorithm">MD5</module-option>
        <module-option name="hashEncoding">rfc2617</module-option>
        <module-option name="hashUserPassword">false</module-option>
        <module-option name="hashStorePassword">true</module-option>
        <module-option name="passwordIsA1Hash">true</module-option>
       <module-option name="storeDigestCallback">
                    org.jboss.security.auth.spi.RFC2617Digest
        </module-option>	
        </authentication>
      </application-policy>
  4. 现在,我们需要告诉 JBoss 加密用户的密码。为此,请执行以下步骤:

    • 转到 E:\JBOSS5.1\jboss-5.1.0.GA\common\lib

    • 打开 jbosssx-server.jar

    • 转到 安装JBoss 的文件夹。我已经在我的 E: 上安装了 JBoss

    • 现在在命令行上,写cd E:\JBOSS5.1\jboss-5.1.0.GA>代码>

    • 然后 粘贴以下命令:java -cp client/jboss-logging-spi.jar;common/lib/jbosssx -server.jar org.jboss.security.auth.spi.RFC2617Digest anjana "PACKTSecurity" role1

      读书笔记《spring-security-3-x-cookbook》第 1 章基本安全
    • 现在编辑 Encrypt-users。属性

      anjana=e3b6b01ec4b0bdd3fc1ff24d0ccabf1f
    • 加密角色并更新 roles.properties

这个怎么运作...

前面的示例演示了摘要身份验证机制。 J2EE 容器中给出的密码是使用 MD5 算法加密的。容器对其进行解密并根据解密的密码验证用户凭据。认证机制digest容器弹出登录对话框类似于基本的身份验证机制。

以下屏幕截图显示了工作流程:

读书笔记《spring-security-3-x-cookbook》第 1 章基本安全

它的行为类似于基本身份验证,但使用加密密码和领域名称 进行解密。

也可以看看

  • JAX-WS 和 JAX-RS 的基本身份验证 配方

  • 启用和禁用文件列表配方

JAX-WS 和 JAX-RS 的基本身份验证


对于 JAX-WS 和 JAX-RS, 身份验证配置保持不变

我们需要 URL class="literal"><网络资源集合>

Auth_type 可以是基本的。该容器将附带一个表单,供用户输入用户名和密码。

由容器处理的身份验证

我们将首先创建一个 Web 服务,然后让容器处理它的安全性。

让我们创建一个接口,该接口将公开 service 方法,然后声明一个 implementation 类。

让我们使用 Tomcat 6.0 来演示这一点。

准备好

  • 在 Eclipse-Indigo 中,创建一个动态 Web 项目

  • 服务器:Tomcat 6

  • 要添加到 Tomcat lib 文件夹的 JAR:https://jax-ws.java.net/2.2.7/

  • 下载项目并复制 lib 文件夹

怎么做...

  1. 创建一个 interface 和一个 implementation 类。向其中添加 @WebService 注释。创建一个名为 com.packt.ws 的包。创建一个名为 EmployeeProfile 的接口和一个 implementation 类:

    界面:

    package com.packt.ws;
    import javax.jws.WebMethod;
    import javax.jws.WebService;
    import javax.jws.soap.SOAPBinding;
    import javax.jws.soap.SOAPBinding.Style;
    @WebService
    @SOAPBinding(style = Style.RPC)
    public interface EmployeeProfile {
      @WebMethod
      String getSalary();
    }

    执行:

    package com.packt.ws;
    import javax.jws.WebService;
    import javax.jws.WebMethod;
    import javax.jws.WebService;
    @WebService(endpointInterface = "com.packt.ws.EmployeeProfile")
    public class EmployeeProfileImpl implements EmployeeProfile {
             @Override
    public String getSalary() {
        return "no salary for the month";
    }
    }
  2. 另外 添加 sun-jaxws.xml 文件 WEB-INF

    <?xml version="1.0" encoding="UTF-8"?>
    <endpoints xmlns="http://java.sun.com/xml/ns/jax-ws/ri/runtime" version="2.0">
      <endpoint name="EmployeeProfile" implementation="com.packt.EmployeeProfileImpl" url-pattern="/employee"/>
    </endpoints>
  3. 修改 web.xml 文件,如图:

    <?xml version="1.0" encoding="UTF-8"?>
    <web-app xmlns:xsi="http://www.w3.org/2001/XMLSchema-instance" xmlns="http://java.sun.com/xml/ns/javaee" xmlns:web="http://java.sun.com/xml/ns/javaee/web-app_2_5.xsd" xsi:schemaLocation="http://java.sun.com/xml/ns/javaee http://java.sun.com/xml/ns/javaee/web-app_2_5.xsd" id="WebApp_ID" version="2.5">
      <display-name>JAX-WS-Authentication-Tomcat</display-name>
       <listener>
            <listener-class>
               com.sun.xml.ws.transport.http.servlet.WSServletContextListener
            </listener-class>
        </listener>
        <servlet>
            <servlet-name>employee</servlet-name>
            <servlet-class>
            com.sun.xml.ws.transport.http.servlet.WSServlet
            </servlet-class>
            <load-on-startup>1</load-on-startup>
        </servlet>
        <servlet-mapping>
            <servlet-name>employee</servlet-name>
            <url-pattern>/employee</url-pattern>
        </servlet-mapping>
       <security-role>
         <description>Normal operator user</description>
         <role-name>operator</role-name>
       	</security-role>
     
    <security-constraint>
          <web-resource-collection>
            <web-resource-name>Operator Roles Security</web-resource-name>
            <url-pattern>/employee</url-pattern>
          </web-resource-collection>
     
          <auth-constraint>
            <role-name>operator</role-name>
          </auth-constraint>
          <user-data-constraint>
              <transport-guarantee>NONE</transport-guarantee>
          </user-data-constraint>
       </security-constraint>
     
    <login-config>
          <auth-method>BASIC</auth-method>
       </login-config>
     
    </web-app>
  4. 验证 Web 服务。编辑 tomcat-users.xml 文件并将其添加到 server.xml

    <Realm className="org.apache.catalina.realm.UserDatabaseRealm" resourceName="UserDatabase"/>

这个怎么运作...

通过访问以下网址,应该提示您登录。

每个 Web 服务 URL 都经过身份验证。

系统将提示您登录页面 (http://localhost:8080/EmployeeProfile/employee)

也可以看看

  • 启用和禁用文件列表配方

启用和禁用文件列表


通常 在您的应用程序中启用目录列表是不可取的。 By 默认目录列表将在 JBoss 上被禁用。

如果已启用,请转到您的 JBoss 安装文件夹。

怎么做...

以下步骤将有助于在应用程序服务器中禁用和启用文件列表:

  1. 浏览到路径 \server\default\deployers\jbossweb.deployer

  2. 打开 WEB-INF 文件夹中的 web.xml

  3. 将列表设置为 false

    <servlet>
          <servlet-name>default</servlet-name>
          <servlet-class>org.apache.catalina.servlets.DefaultServlet</servlet-class>
          <init-param>
             <param-name>debug</param-name>
             <param-value>0</param-value>
          </init-param>
          <init-param>
             <param-name>listings</param-name>
             <param-value>false</param-value>
          </init-param>
          <load-on-startup>1</load-on-startup>
       </servlet>

也可以看看

  • Spring Security with Struts2 秘诀