在本附录中,我们将介绍一些我们认为有帮助(并且大部分未记录)但过于全面而无法插入章节的参考资料。
读书笔记《spring-security-third-edition》其他参考资料
其他参考资料
JBCP 日历示例代码入门
正如我们在第 1 章中所述,剖析不安全的应用程序,我们假设您已经安装了 JDK。您可以从 Oracle 的网站 http://www.oracle.com 下载 JDK /technetwork/java/javase/downloads/index.html。您需要安装 JDK 8 才能运行代码示例。该代码库使用了许多与 JDK 7 不兼容的 JDK 8 功能,并且没有尝试解决 IDE 以及项目依赖项的各种 JDK 9 问题。
Gradle 构建工具
本书中的所有代码都是使用 Gradle 构建工具构建的,并以逐章多模块构建的形式进行组织。您可以在 https://gradle.org/install/ 找到在本地获取 Gradle 的说明和选项。
不需要在本地安装 Gradle,因为源代码的根目录已经安装了 Gradle 包装器。 Gradle 包装器可以安装在任何子模块中。您可以在 https://docs.gradle.org/current 找到有关 Gradle 包装器的更多信息/userguide/gradle_wrapper.html。
下载示例代码
您可以从您的帐户下载所有 Packt 书籍的示例代码文件,网址为 http://www.packtpub.com。如果您从其他地方购买了这本书,您可以访问 http://www.packtpub.com/support 并注册以将文件直接通过电子邮件发送给您。
您可以从您的帐户下载所有 Packt 书籍的示例代码文件,网址为 http://www.packtpub.com。如果您从其他地方购买了这本书,您可以访问 http://www.packtpub.com/support 并注册以将文件直接通过电子邮件发送给您。
Gradle IDE 插件
代码库已经配置了 IntelliJ 和 Eclipse IDE 插件。这意味着 Gradle 可以创建所有必要的 IDE 项目文件,而不是手动导入代码库,尽管您不必强制使用这些插件。
要使用这些插件,请打开代码库根目录的终端或命令提示符窗口。要执行插件,请在 OSX 或 Linux 上发出以下命令:
$ ./gradlew idea
运行该任务后,每个目录下都会有几个IDEA项目文件,如下截图所示:
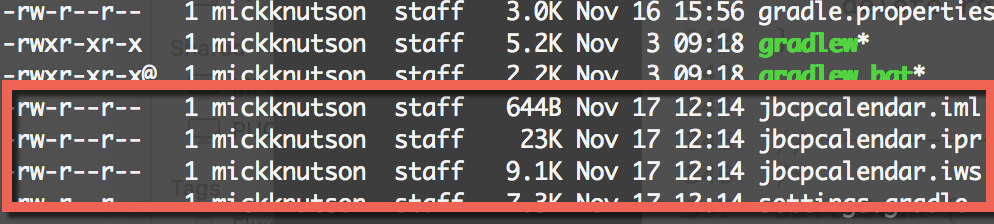
如果您在 Windows 机器上,您将发出以下命令:
C:\jbcdcalendar> gradlew.bat idea
前面的示例执行 gradlew 脚本,它是 Gradle 包装器,然后给出创建 IDE 文件的命令。 IntelliJ 项目文件是使用 idea 任务创建的,而 STS 或任何基于 Eclipse 的 IDE 的项目文件是使用 eclipse 任务创建的。
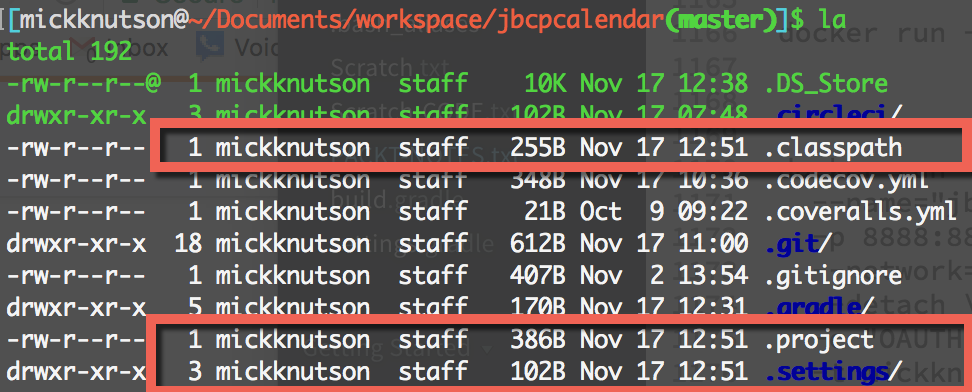
运行Eclipse任务后,每个目录下会有几个Eclipse项目文件和目录:
IntelliJ IDEA
本书中使用的大部分图表均来自 Jet Brains 的 IntelliJ IDEA (https://www.jetbrains.com /想法/)。 IDEA 对多模块 Gradle 构建有很好的支持。
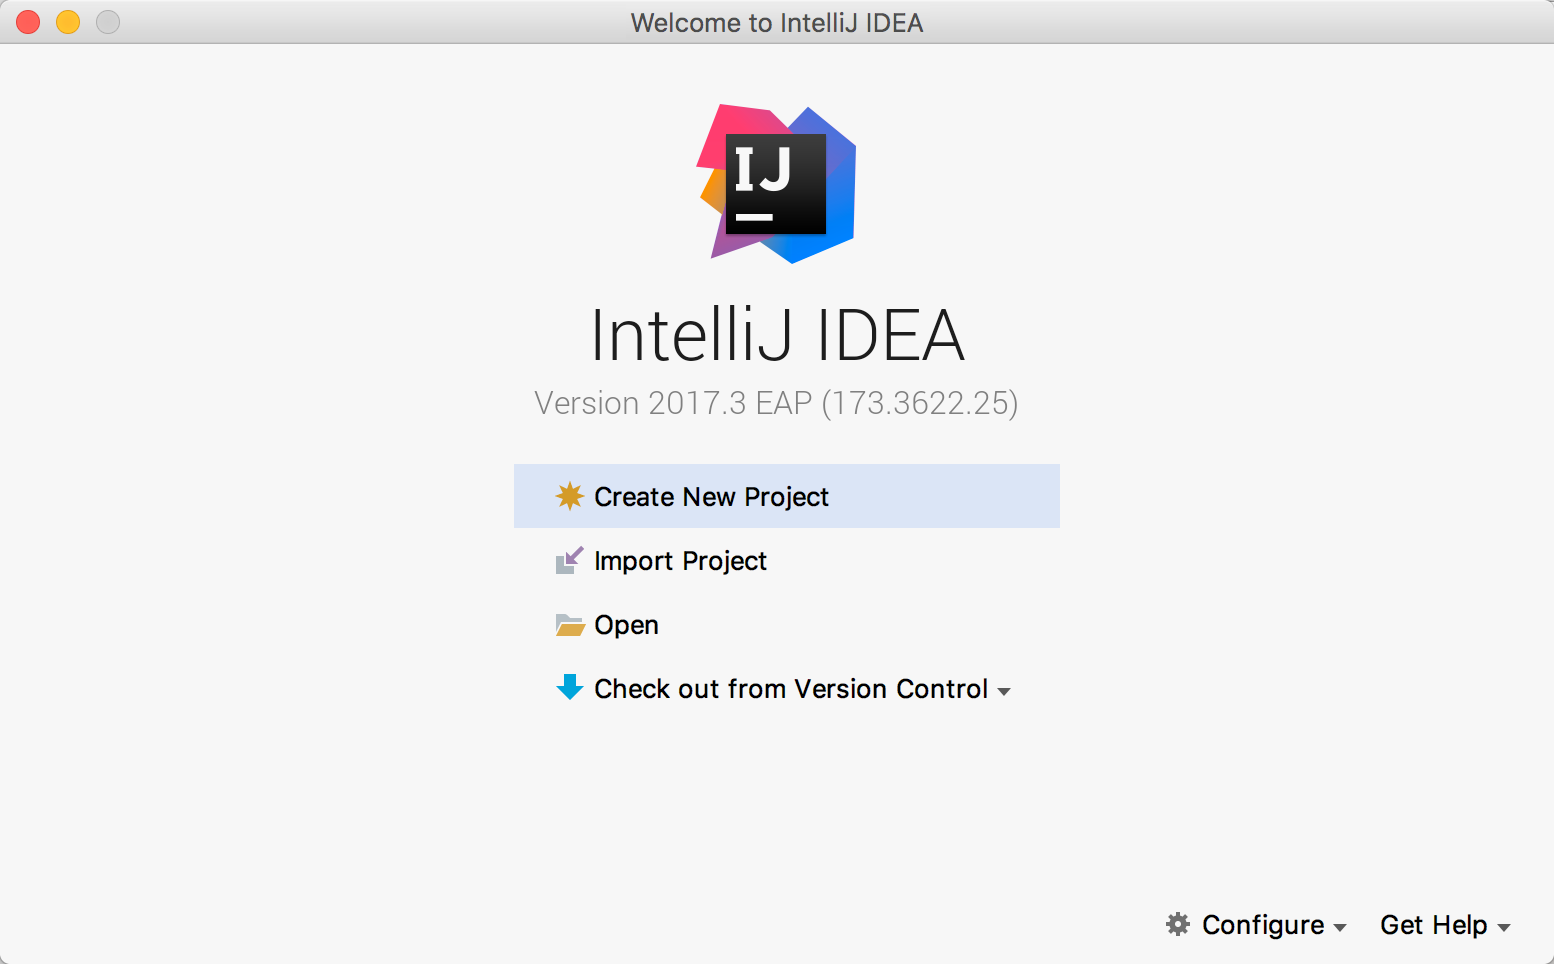
IDEA 将允许您导入现有项目,或者您可以简单地从源代码库的根目录打开 build.gradle 文件,IDEA 将为您创建必要的项目文件。
使用 Gradle idea 任务创建 IDEA 项目文件后,可以使用 Import Project 选项导入整个项目,如下所示截屏:
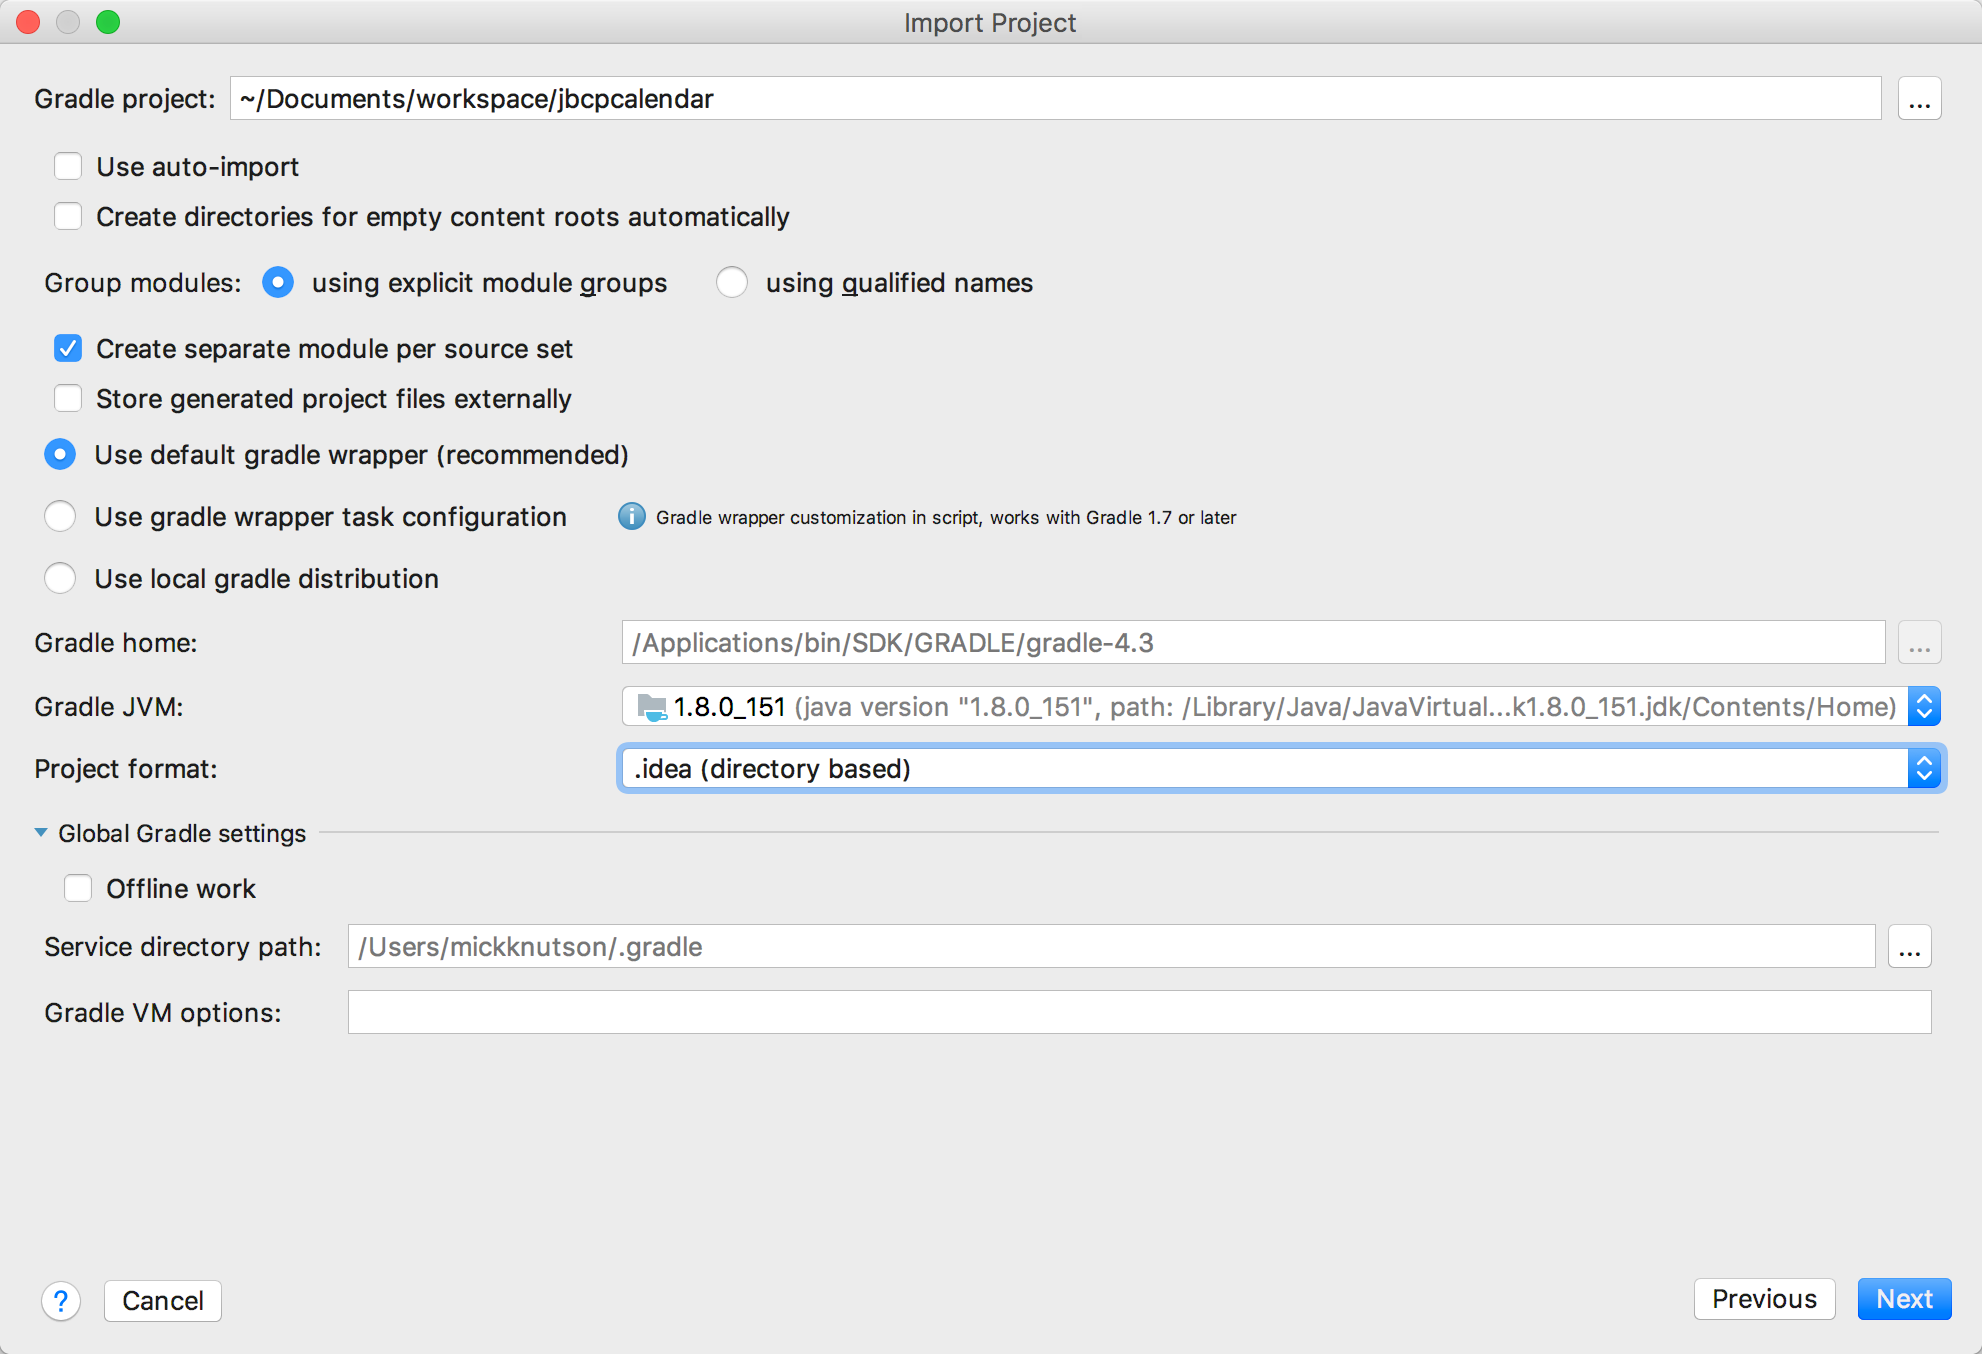
然后,系统将提示您选择 IDEA 将如何执行此 Gradle 构建的各种选项,如以下屏幕截图所示:
IDEA导入Gradle项目的特别说明
在前面的清单中,您会注意到有一个使用 Gradle 包装器任务配置的选项,而不是选择的选项,即使用默认的 Gradle 包装器(推荐)选项。唯一的区别是使用 Gradle 包装器任务配置选项,它将在每个项目目录中创建一个 Gradle 包装器实例。如果您想在终端或命令行上执行构建命令而不必安装本地版本的 Gradle,这将很有帮助。否则,IDEA 会处理所有项目的 Gradle 包装器调用。
在前面的清单中,您会注意到有一个使用 Gradle 包装器任务配置的选项,而不是选择的选项,即使用默认的 Gradle 包装器(推荐)选项。唯一的区别是使用 Gradle 包装器任务配置选项,它将在每个项目目录中创建一个 Gradle 包装器实例。如果您想在终端或命令行上执行构建命令而不必安装本地版本的 Gradle,这将很有帮助。否则,IDEA 会处理所有项目的 Gradle 包装器调用。
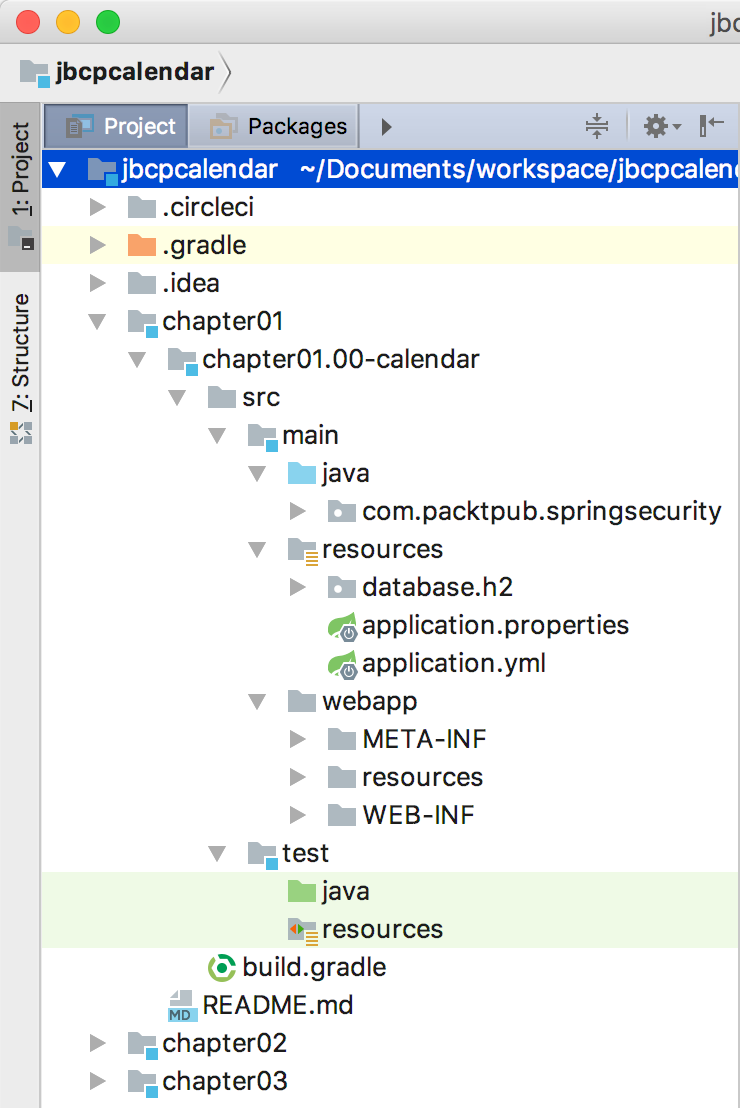
导入项目后,您将能够使用任何章节,并且布局将如下面的屏幕截图所示:
Spring 工具套件或 Eclipse
如果使用 STS,我们假设您可以访问 Spring Tool Suite (STS) 3.9.1。您可以从 https://spring.io/tools/sts 下载 STS。 STS 版本 3.9.1 基于 Eclipse Oxygen 1a (4.7.1a),您可以在 https://www.eclipse.org/ide/。
创建新工作区
最好创建一个新的工作区,以尽量减少与您的环境的差异,这可以通过执行以下步骤来完成:
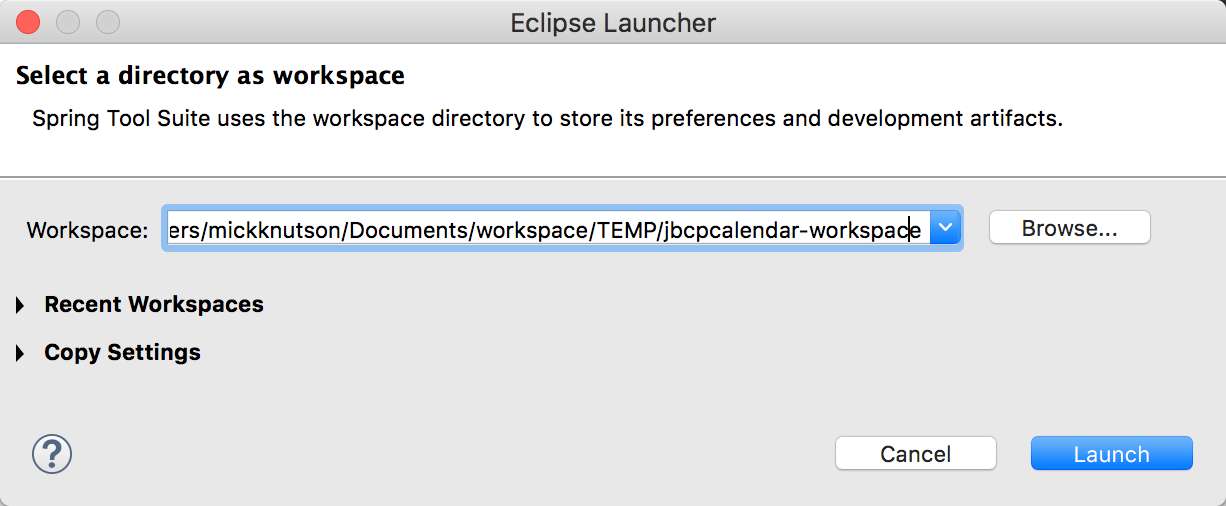
- When you first open STS, it will prompt you for the workspace location. If you were previously using STS, you may need to go to File | Switch Workspace | Other to create a new workspace. We recommend entering a workspace location that does not contain any spaces. For example, take a look at the following screenshot:
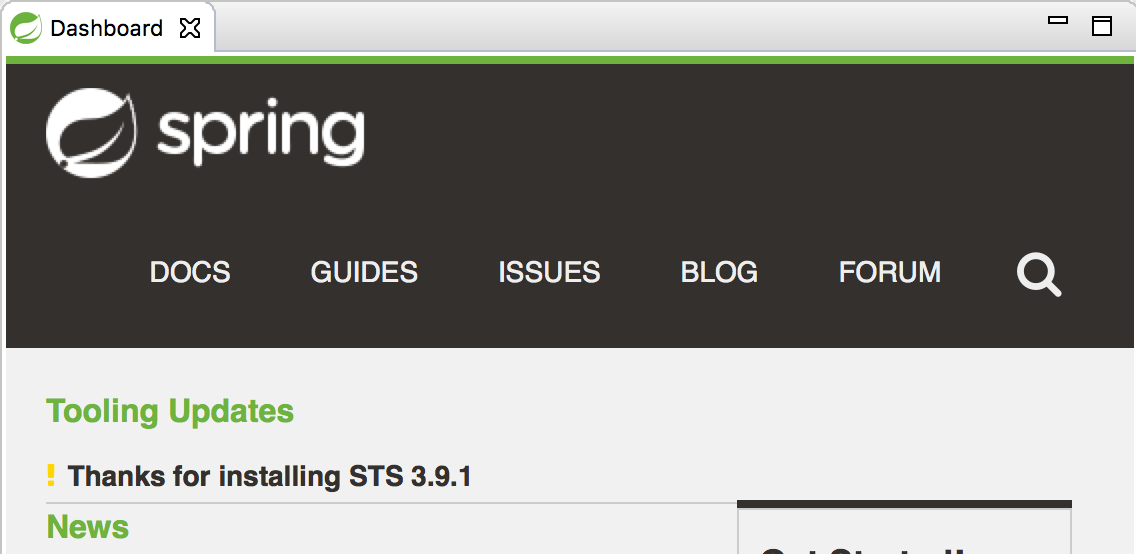
- Once you have created a new workspace, you will want to exit the welcome screen by clicking on the close button on the Welcome tab, as shown in the following screenshot:
示例代码结构
示例代码结构为 .zip 文件,并包含多模块 Gradle 项目的文件夹。每个文件夹命名为 chapterNN,其中 NN 是章节编号。每个 chapterNN 文件夹都有包含每个里程碑项目的附加文件夹,格式为 chapterNN.mm-calendar,其中 NN 是章节编号, mm 是该章节中的里程碑。为简单起见,我们建议您将源提取到不包含任何空格的路径。每个里程碑都是本章中的一个检查点,允许您轻松地将您的代码与本书的代码进行比较。例如,chapter02.03-calendar 包含 第 2 章,Spring Security 入门,日历应用程序。前面项目的位置是 ~/jbcpcalendar/chapter02/chapter02.03-calendar。
第 1 章,剖析不安全的应用程序 ,以及第 2 章,Spring Security 入门 em>,已创建为 Spring IO 项目,而不是使用 Spring Boot 作为项目基础。 第 3 章,自定义身份验证,转换了日历项目到 Spring Boot 代码库,并在 第 5 章中,使用 Spring Data 进行身份验证,将 JDBC 替换为 Spring Data 作为持久性机制。
为了使每个章节尽可能独立,本书中的大多数章节都是基于 第 9 章,向 OpenID 开放,或 第 15 章,额外的 Spring 安全特性。这意味着,在大多数情况下,您可以通读 第 9 章, 打开 OpenID,然后跳到本书的其他部分。然而,这也意味着重要的是从章节的里程碑00 源代码开始每一章,而不是继续处理前一章的代码。这可以确保您的代码从本章开始的相同位置开始。
虽然您可以在不执行任何步骤的情况下通读整本书,但我们建议从里程碑 00 开始每一章并实施书中的步骤。这将确保您充分利用本书。您可以使用里程碑版本来复制大部分代码或在遇到问题时比较您的代码。
导入样本
在我们可以将此 Gradle 项目导入 Eclipse 之前,您必须从 Eclipse 市场安装一个 Gradle 插件。在编写本书时只有两个选择。一种是 Gradle IDE 包(http://marketplace.eclipse.org/content/gradle- ide-pack),但是这个项目没有被维护,如果你安装了这个插件,Eclipse 会警告你并建议你迁移到 Buildship Gradle Integration 插件(http://marketplace.eclipse.org/content/buildship-gradle-integration)。安装后,您将可以选择导入现有的 Gradle 项目。
从我们的新工作区开始,执行以下步骤:
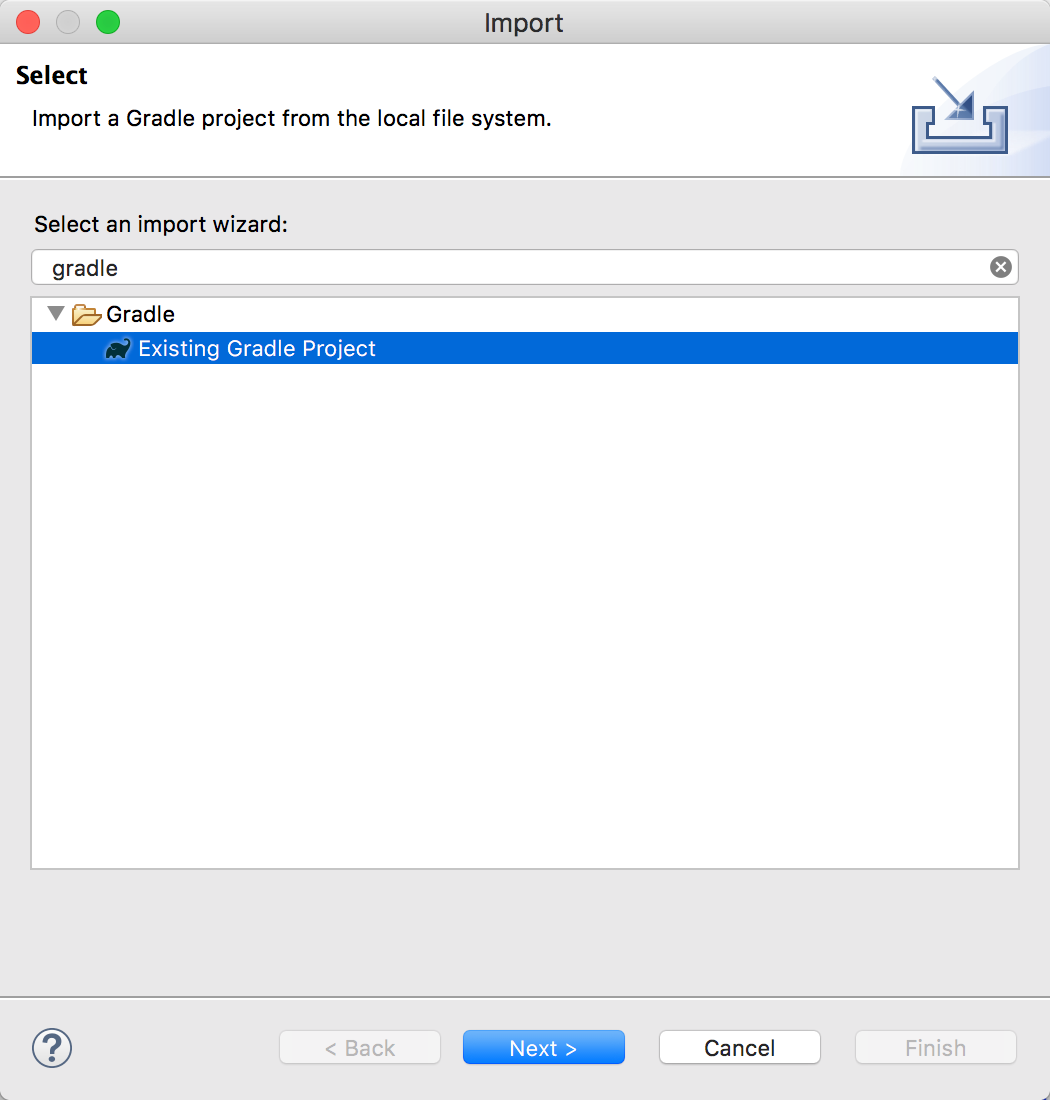
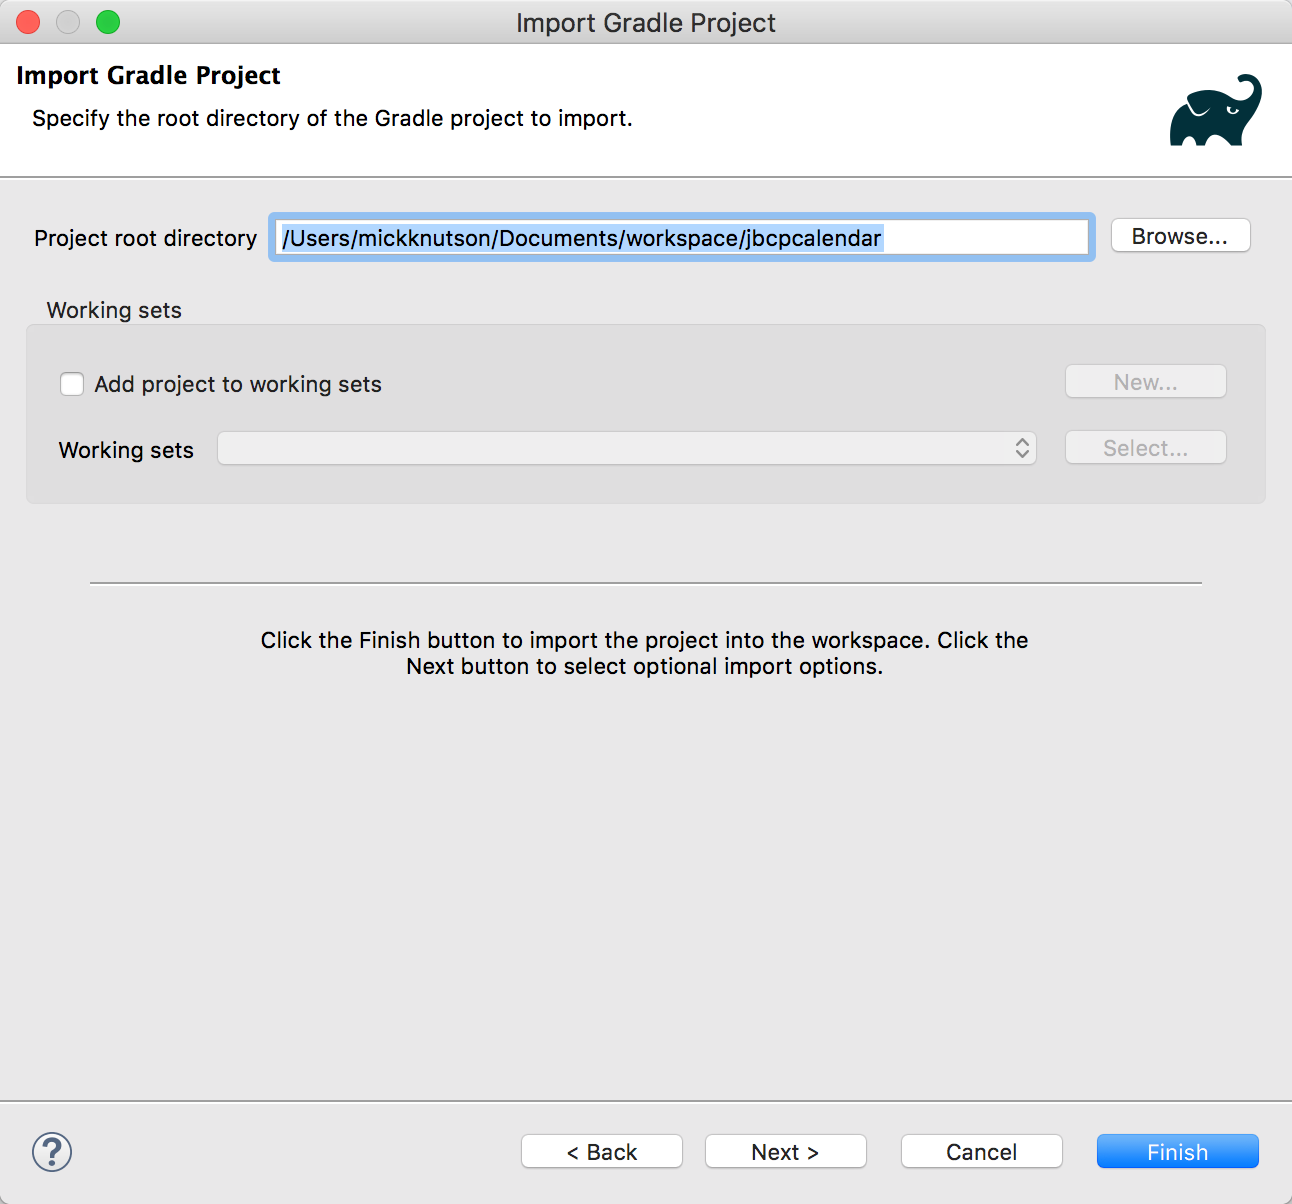
- Go to File | Import and select Existing Gradle Project, as shown in the following screenshot:
- Click on Next >, as shown in the following screenshot:
- Click on Next > as shown in the following screenshot:
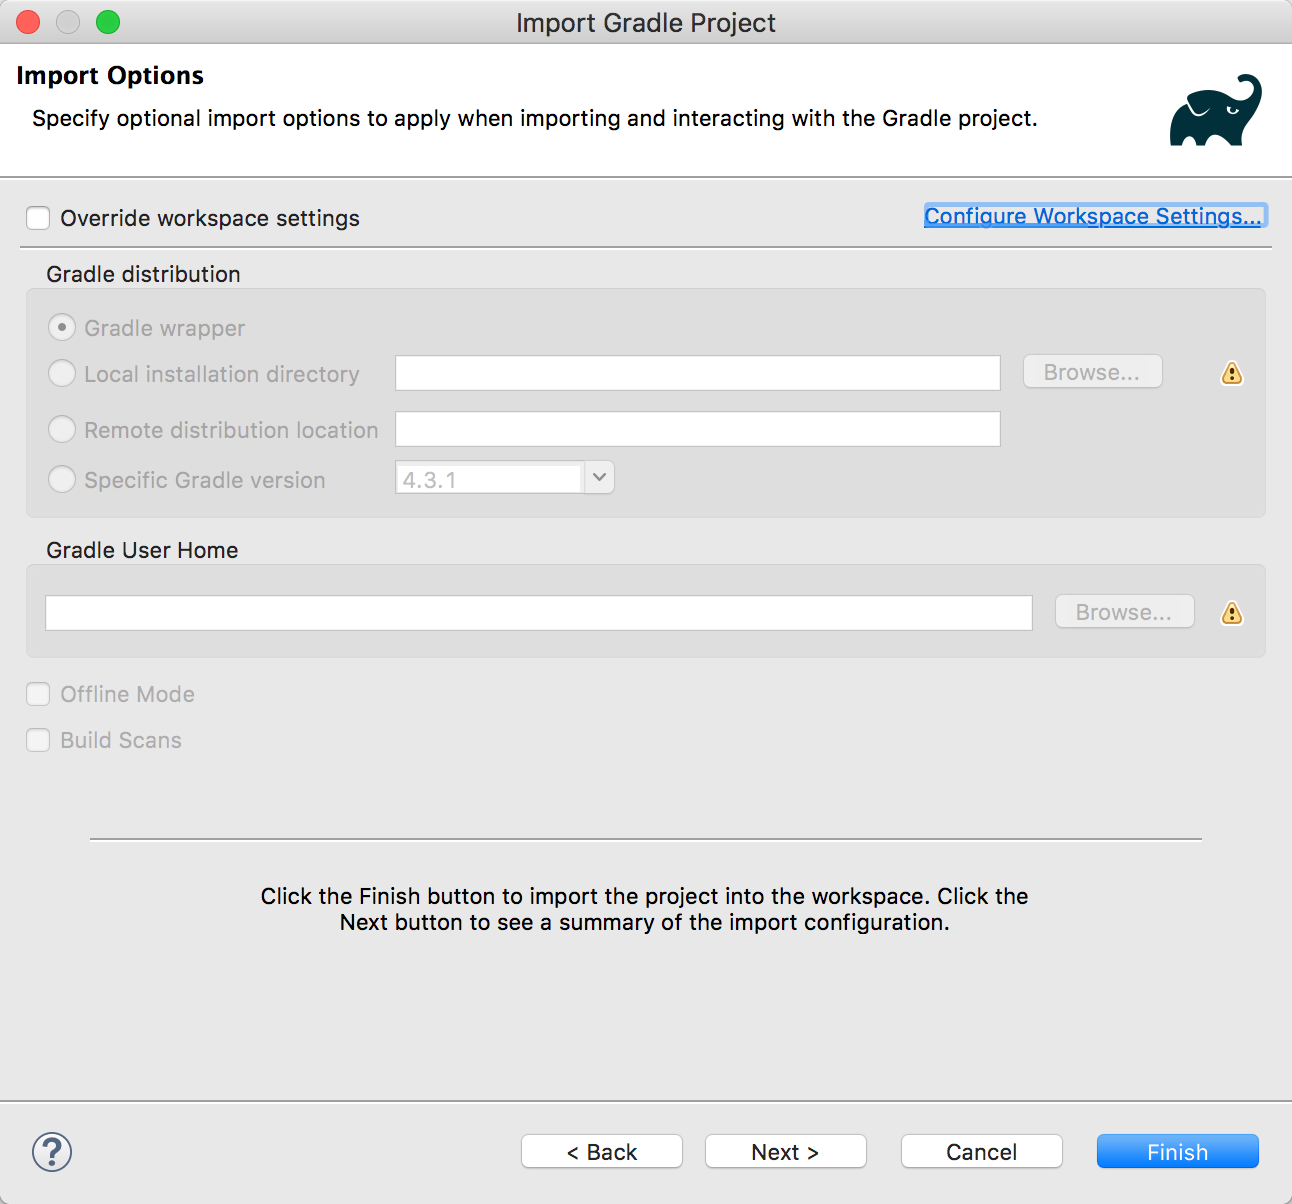
除非您想使用 Gradle 的本地安装,否则请确保保留默认值。
- Browse to the location you exported the code to and select the parent folder of the code. You will see all of the projects listed. You can select the projects you are interested in or leave all of the projects selected. If you decide to import all of the projects, you can easily focus on the current chapter since the naming conventions will ensure that the projects are sorted in the order that they are presented in the book:
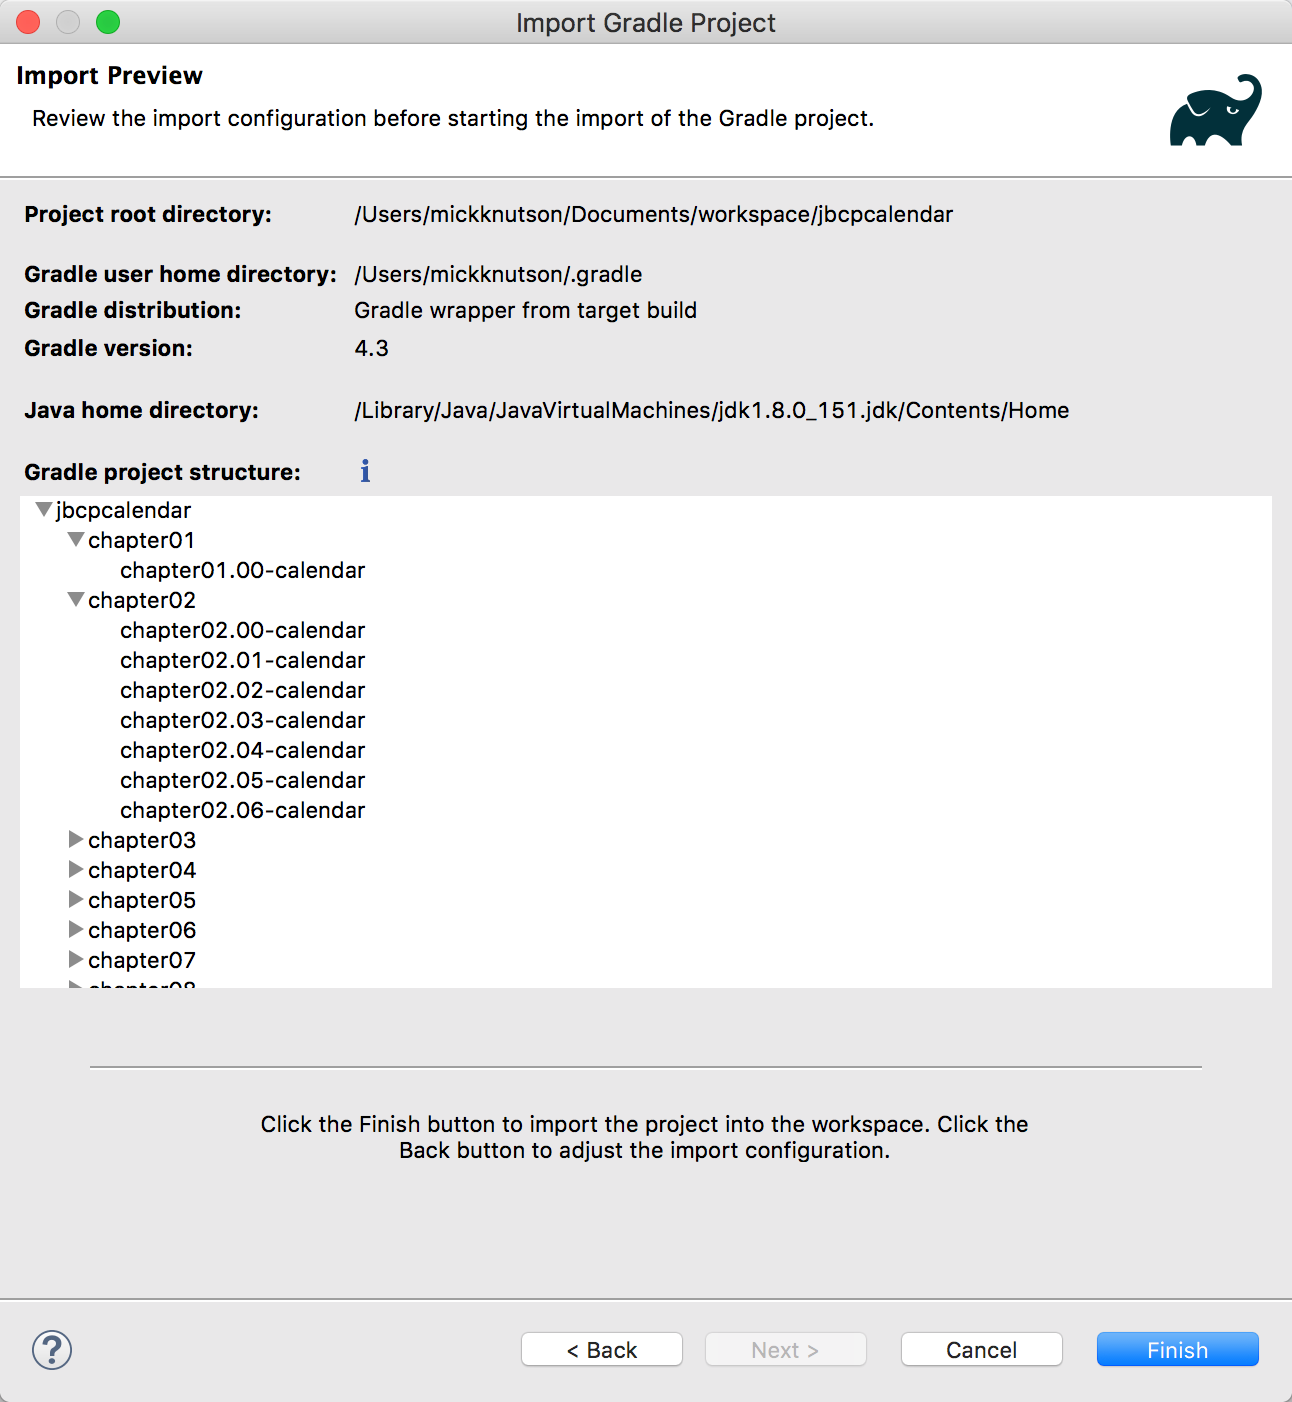
- Click on Finish. All of the selected projects will be imported. If you have not used Gradle frequently, it will take a while to download your dependencies.
下载依赖项需要 Internet 连接。
运行项目的更新说明可以在每个部分的 README.md 文件中找到。这确保了在对 STS 进行更新时,仍然可以使用最新工具构建和运行代码。
运行示例
为了在 IDEA 或 STS 中运行示例应用程序,需要做一些事情。在所有项目中,都在 Gradle 中配置了一个 Tomcat 插件来运行嵌入式实例,以帮助您更快地开始。
在 IDEA 中启动示例
可以通过为每个项目创建一个 Run/Debug Configuration 条目来运行里程碑项目。
从我们的新工作区开始,执行以下步骤:
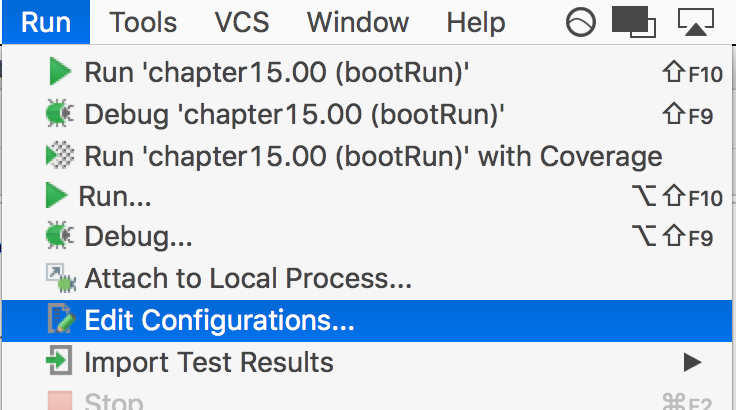
- Go to File | Run and select Edit Configurations..., as shown in the following screenshot:
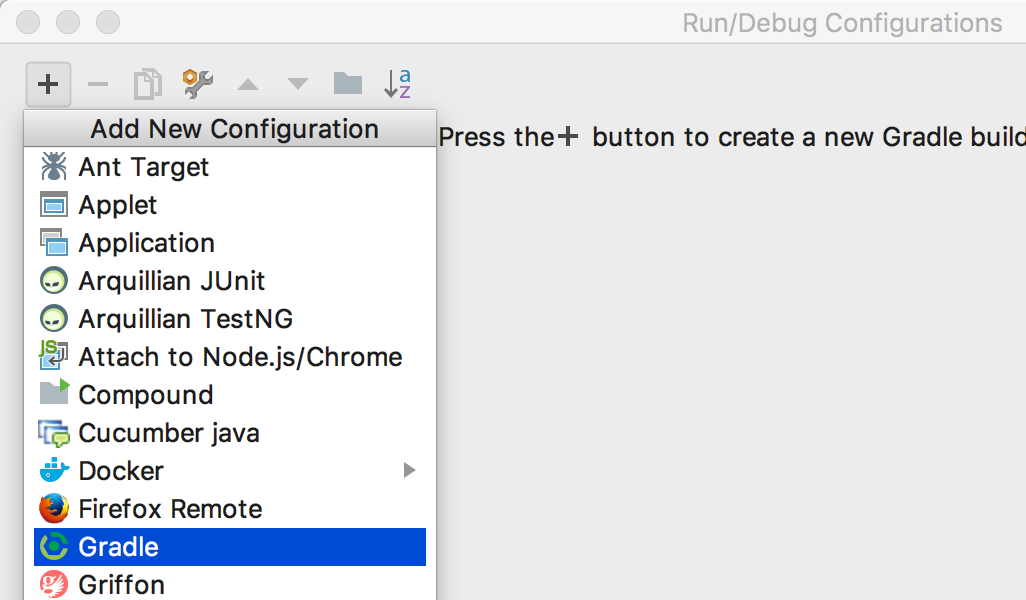
- You will be presented with options to add new configurations. Select the plus (+) sign in the upper-left corner to choose a new Gradle configuration, as shown in the following screenshot:
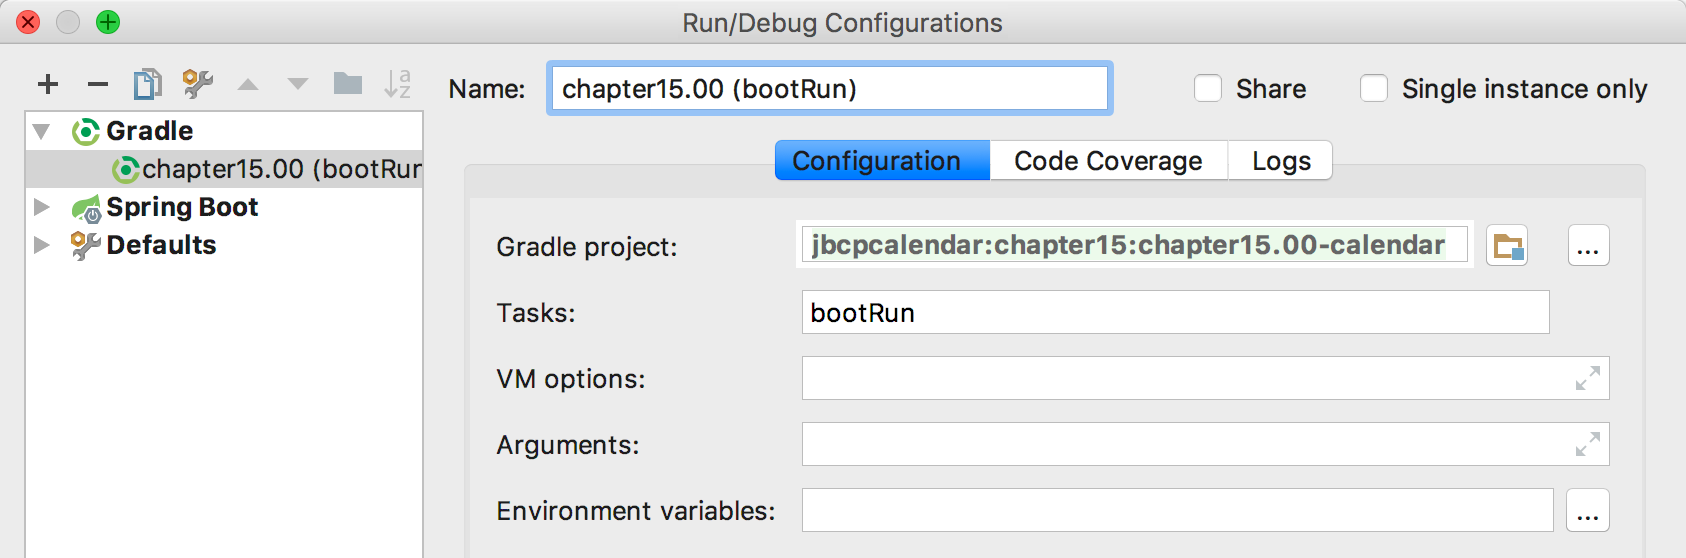
- Now, you can give it a name like chapter15.00 (bootRun) and select the actual milestone directory for this configuration. Finally, enter bootRun under the Tasks option to execute, as shown in the following screenshot:
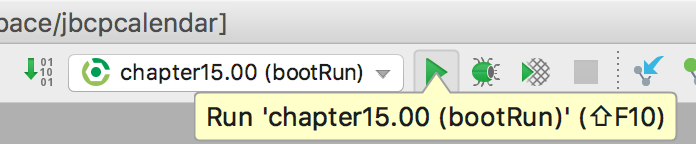
- Select the configuration you want to execute; click on the green run button or use the Shift + F10 key, as shown in the following screenshot:
Gradle 任务
在第 1 章中,剖析不安全的应用程序,以及第 2 章,Spring Security 入门< /em>,运行项目的 Gradle 任务将是 tomcatRun。本书其余章节均使用Spring Boot,启动项目的Gradle任务为bootRun。
在 STS 中启动样本
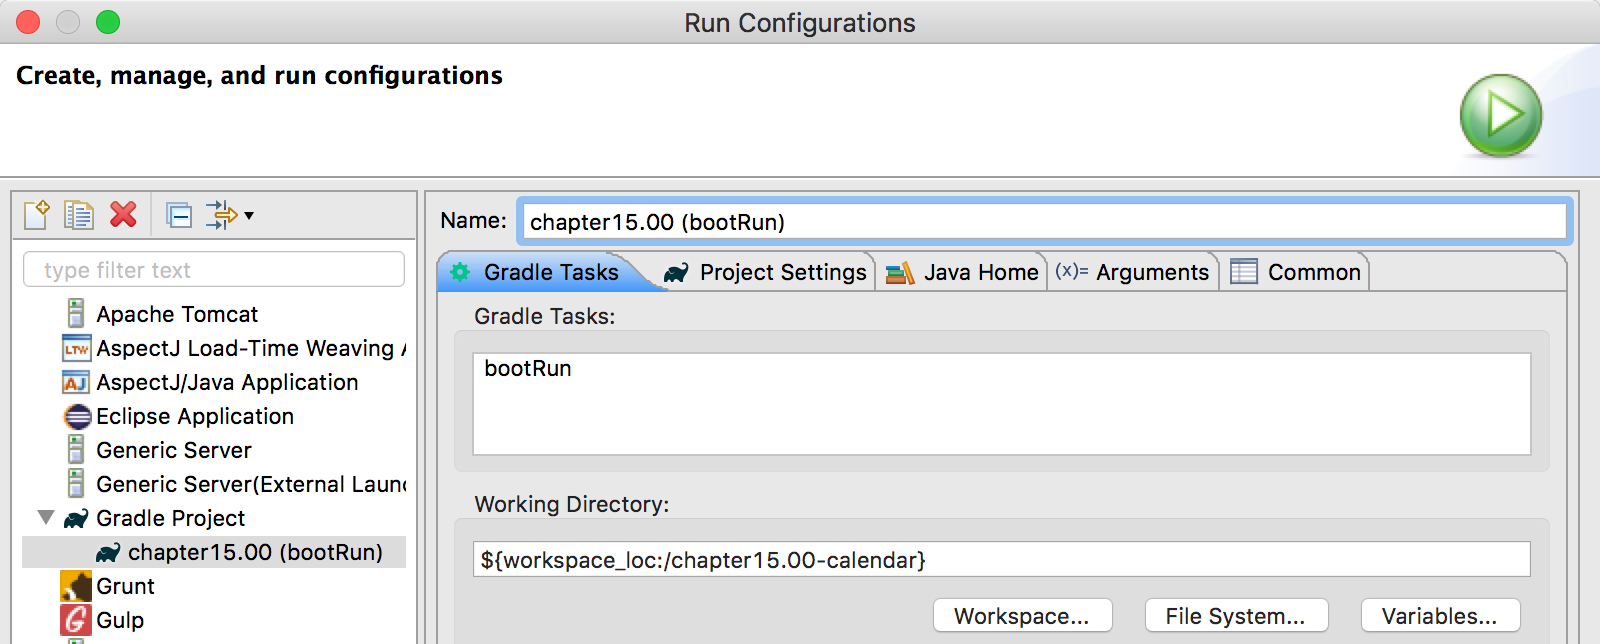
在 STS 中,还会创建一个运行配置,并且需要为每个要运行的里程碑项目包含相同的信息,如下面的屏幕截图所示:
在 STS 中使用 HTTPS
部分章节的示例代码(即Chapter 8,< em>使用 TLS 进行客户端证书身份验证,第 9 章, OAuth2 开放,第 10 章 , 使用中央身份验证服务进行单点登录)需要使用 HTTPS 才能使示例代码正常工作。
所有项目都已配置为运行 HTTPS;大多数配置都在属性或 YAM 文件中进行管理。
现在,当您从 Gradle 在嵌入式 Tomcat 服务器上运行示例代码时,您可以连接到 http://localhost:8080 或 https://localhost:8443。
Tomcat 中的 HTTPS 设置
在本节中,我们将概述如何在 Tomcat 中设置 HTTPS 以向我们的应用程序提供 TLS。所有包含的项目都在嵌入式 Tomcat 实例中运行,但我们将介绍证书创建过程以及在独立 Tomcat 实例中运行这些应用程序的一些技巧。
生成服务器证书
如果您还没有证书,则必须先生成一个。如果您愿意,可以跳过此步骤并使用 tomcat.keystore 文件,该文件包含位于本书示例源的 etc 目录中的证书。在命令提示符处输入以下命令行:
$ keytool -genkey -alias jbcpcalendar -keypass changeit -keyalg RSA \
-keystore tomcat.keystore
Enter keystore password: changeit
Re-enter new password: changeitWhat is your first and last name? [Unknown]: localhost
What is the name of your organizational unit? [Unknown]: JBCP Calendar
What is the name of your organization? [Unknown]: JBCP
What is the name of your City or Locality? [Unknown]: Anywhere
What is the name of your State or Province? [Unknown]: UT
What is the two-letter country code for this unit? [Unknown]: US
Is CN=localhost, OU=JBCP Calendar, O=JBCP, L=Anywhere, ST=UT, C=US correct? [no]: yes
大多数值是不言自明的,但您需要确保“您的名字和姓氏是什么?”的答案。是您将从中访问 Web 应用程序的主机。这是确保 SSL 握手成功所必需的。
您现在应该在当前目录中有一个名为 tomcat.keystore 的文件。您可以在同一目录中使用以下命令查看其内容:
$ keytool -list -v -keystore tomcat.keystore
Enter keystore password: changeit
Keystore type: JKS
Keystore provider: SUN
...
Alias name: jbcpcalendar
...
Owner: CN=localhost, OU=JBCP Calendar, O=JBCP, L=Anywhere, ST=UT, C=US
Issuer: CN=localhost, OU=JBCP Calendar, O=JBCP, L=Anywhere, ST=UT, C=US
您可能已经猜到,使用 changeit 作为密码是不安全的,因为这是许多 JDK 实现使用的默认密码。在生产环境中,您应该使用安全密码,而不是像 changeit 这样简单的密码。
有关 keytool 命令的更多信息,请参阅 Oracle 网站 https://docs.oracle.com/javase/9/tools/keytool.htm。如果您遇到问题,您可能还会发现 CAS SSL 故障排除和参考指南很有帮助(https://apereo.github.io/cas/5.1.x/installation/Troubleshooting-Guide.html)。
配置 Tomcat 连接器以使用 SSL
在本节中,我们将讨论如何通过执行以下步骤来配置 Tomcat 8.5 连接器到 SSL:
- Open the server.xml file that was included with the download of
Tomcat 8.5. You can find this in the conf directory of your Tomcat server's home directory. Find the following entry in your server.xml file:
    <!--
    <Connector port="8443" protocol="HTTP/1.1" SSLEnabled="true" maxThreads="150"
    scheme="https" secure="true" clientAuth="false" sslProtocol="TLS" />
- Uncomment the connector and modify the value of the keystoreFile attribute to be the location of the keystore from the previous section. Also, ensure that you update the value of the keystorePass attribute to be the password used when generating the keystore. An example is shown in the following code snippet, but ensure that you update the values of both keystoreFile and keystorePass:
    <Connector port="8443" protocol="HTTP/1.1" SSLEnabled="true"  maxThreads="150"
    scheme="https" secure="true" clientAuth="false" sslProtocol="TLS"
    keystoreFile="/home/mickknutson/packt/etc/tomcat.keystore"
    keystorePass="changeit"/>
- You should now be able to start Tomcat and access it at https://locahost:8443/. For more information on configuring SSL on Tomcat, refer to the SSL Configuration How-To at http://tomcat.apache.org/tomcat-8.5-doc/ssl-howto.html.
基本 Tomcat SSL 终止指南
本节旨在帮助设置 Tomcat 在使用 SSL 终止时使用 SSL。这个想法是外部实体(例如负载平衡器)管理 SSL 连接而不是 Tomcat。这意味着从客户端(即 Web 浏览器)到负载均衡器的连接是通过 HTTPS 进行的并且是安全的。从负载均衡器到 Tomcat 的连接是通过 HTTP 和不安全的。对于这种提供任何安全层的设置,从负载均衡器到 Tomcat 的连接应该通过专用网络。
此设置导致的问题是 Tomcat 现在将认为客户端正在使用 HTTP,因此将发送重定向,就好像存在 HTTP 连接一样。为了解决这个问题,您可以修改配置以指示 Tomcat 它位于代理服务器后面。
以下示例是一个完整的连接器,将用于采用客户端证书身份验证的 Tomcat 部署:
    //server.xml

    <Connector
    scheme="https"
    secure="true"
    proxyPort="443"
    proxyHost="example.com"
    port="8443"
    protocol="HTTP/1.1"
    redirectPort="443"
    maxThreads="750"
    connectionTimeout="20000" />
server.xml 文件可以在 TOMCAT_HOME/conf/server.xml 中找到。如果您使用 Eclipse 或 Spring Tool Suite 与 Tomcat 交互,您将找到一个名为 Servers 的项目,其中包含 server.xml 文件。例如,如果您使用的是 Tomcat 8.5,则 Eclipse 工作区中的路径可能类似于 localhost-config/server.xml 中的 /Servers/Tomcat v8.5 Server .
请注意,没有对 keystore 的引用,因为 Tomcat 不管理 SSL 连接。此设置将覆盖 HttpServletRequest 对象以相信连接是 HTTPS 以便正确执行重定向。但是,它将继续接受 HTTP 连接。如果客户端也可以建立 HTTP 连接,则可以创建一个单独的连接器——一个不包括 HTTPS 设置的连接器。然后,代理服务器可以根据原始请求是 HTTP 还是 HTTPS 将请求发送到适当的连接器。
有关详细信息,请参阅
Tomcat 代理方法 文档target="_blank">http://tomcat.apache.org/tomcat-8.5-doc/proxy-howto.html。如果您正在使用不同的应用程序,您可以参考他们的文档以使用代理服务器。
补充材料
本节列出了整本书中使用的技术和概念的其他资源:
- Java Development Kit Downloads: Refer to http://www.oracle.com/technetwork/java/javase/downloads/index.html for downloading the JDK.
- MVC Architecture: Refer to https://en.wikipedia.org/wiki/Model%E2%80%93view%E2%80%93controller.
- Spring Security site: Refer to https://projects.spring.io/spring-security/. You can find links to the Spring Security Javadoc, downloads, source code, and reference from at this link.
- Spring Framework: Refer to https://projects.spring.io/spring-framework/. You can find links to the Spring Framework Javadoc, downloads, source code, and reference from this link.
- Spring Boot: Refer to https://projects.spring.io/spring-boot/. You can find links to the Spring Boot Javadoc, downloads, source code, and reference from this link.
- Spring Data: Refer to https://projects.spring.io/spring-data/. You can find links to the Spring Data Javadoc, downloads, source code, and reference from this link. In this book, we covered three of the sub-projects of Spring-Data, including Spring Data Rest (https://projects.spring.io/spring-data-rest/), Spring Data JPA (https://projects.spring.io/spring-data-jpa/), and Spring Data MongoDB (https://projects.spring.io/spring-data-mongodb/).
- Maven: For more information about Maven, visit their site at https://maven.apache.org. For more information about Maven Transitive dependencies, refer to the Introduction to the Dependency Mechanism documentation at https://maven.apache.org/guides/introduction/introduction-to-dependency-mechanism.html#Transitive_Dependencies.
- Building with Gradle: Spring Security builds with Gradle (https://gradle.org) instead of using Maven. You can refer to the samples, for examples of how to build with Gradle at https://docs.spring.io/spring-security/site/docs/4.2.x/reference/html/sample-apps.html.
- Object-relational mapping (ORM): You can find more general information on Wikipedia at https://en.wikipedia.org/wiki/Object-relational_mapping. If you want more hands-on instruction, you may also be interested in the Hibernate (a common Java ORM Framework) documentation at http://www.hibernate.org/.
- Undertow: Undertow is a lightweight flexible performant web server written in Java, providing both blocking and non-blocking APIs based on NIO. There has been some work in the chapters to offer Undertow as an alternative to Tomcat. You can find more general information at http://undertow.io/.
以下是 UI 技术:
- JSP: You can find more information about JSPs on Oracle's site at https://javaee.github.io/tutorial/overview008.html#BNACM.
- Thymeleaf: It is a modern, tempting framework that provides an excellent alternative to JSPs. An additional benefit is that it provides support for both Spring and Spring Security out of the box. You can find more information about Thymeleaf at http://www.thymeleaf.org.