vlambda博客
学习文章列表

读书笔记《hands-on-full-stack-development-with-spring-boot-2-0-and-react》Reaction有用的第三方组件

Chapter 8. Useful Third-Party Components for React

React 是基于组件的,我们可以在我们的应用程序中找到许多有用的第三方组件。在本章中,我们将看看我们将在前端使用的几个组件。我们将了解如何找到合适的组件以及如何在自己的应用程序中使用这些组件。

在本章中,我们将看到以下内容:

  • How to find third-party React components
  • How to install components
  • How to use the React Table component
  • How to use the modal window component
  • How to use the Material UI component library
  • How to manage routing in React

Technical requirements


在本书中,我们使用的是 Windows 操作系统,但所有工具都可用于 Linux 和 macOS 作为 Node.js 并且 create-react-app 必须安装.

Using third-party React components

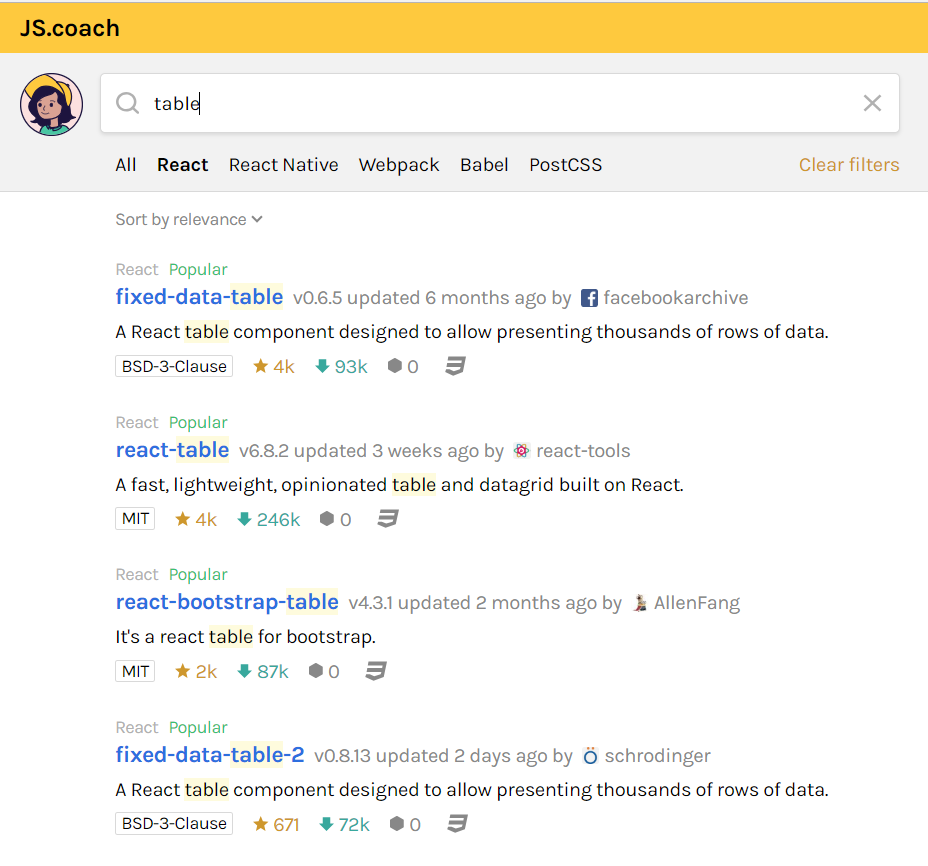
有很多不错的 React 组件可用于不同的目的。我们的首要任务是找到适合您需求的组件。 JS.coach (https://js.coach/)。您只需 输入关键字、搜索并从框架列表中选择 React。在以下屏幕截图中,您可以看到对 React 的表组件的搜索:

读书笔记《hands-on-full-stack-development-with-spring-boot-2-0-and-react》Reaction有用的第三方组件

React 组件的另一个好来源是 Awesome React 组件(https://github.com/brillout/awesome-react-components)。

组件通常有很好的文档,可以帮助您在自己的 React 应用程序中使用它们。让我们看看如何将第三方组件安装到我们的应用程序并开始使用它。导航到 JS.coach 站点,键入 list 搜索输入字段,并按 React< /强>。从搜索结果中,您可以找到列表组件,名为 react-tiny-virtual-list

读书笔记《hands-on-full-stack-development-with-spring-boot-2-0-and-react》Reaction有用的第三方组件

单击组件链接可查看有关组件的更多详细信息。很多时候,您可以在那里找到安装说明以及如何使用该组件的一些简单示例。信息页面通常会提供组件的网站或 GitHub 存储库的地址,您可以在其中找到完整的文档:

读书笔记《hands-on-full-stack-development-with-spring-boot-2-0-and-react》Reaction有用的第三方组件

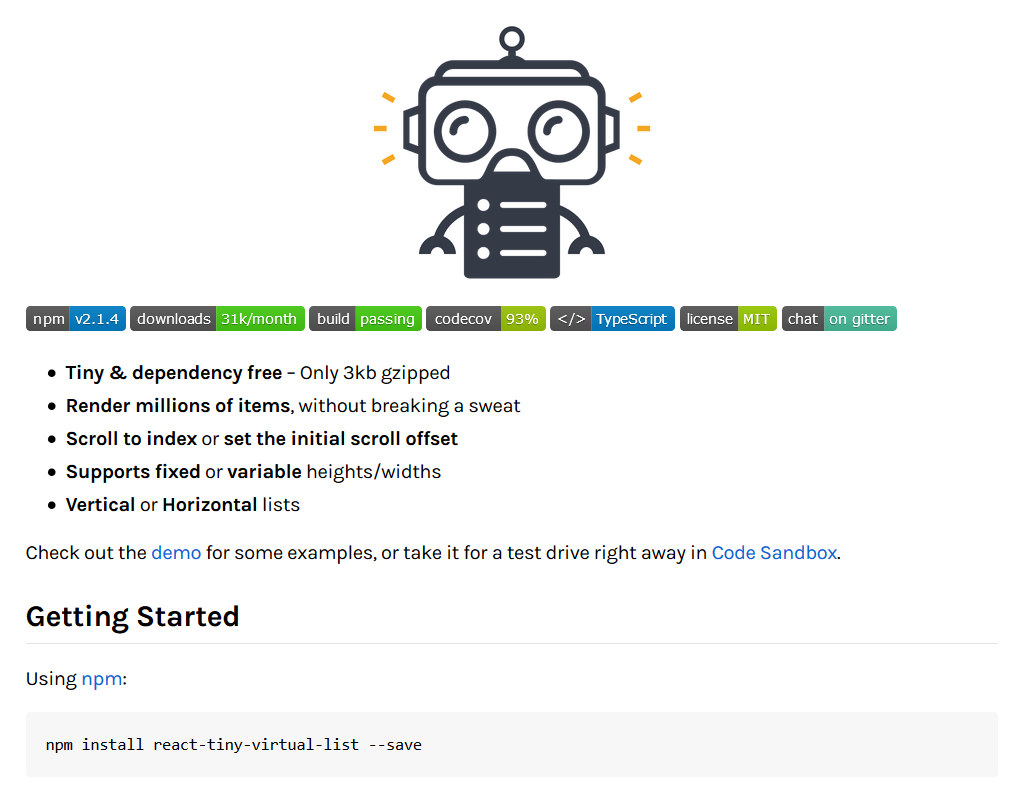
从组件的信息页面可以看到,组件的安装是使用 npm 完成的。该命令的语法如下:

npm install component_name --save

或者,如果您使用的是 Yarn,则如下所示:

yarn add component_name

--save 参数将组件的依赖保存到 React 应用根文件夹中的 package.json 文件.如果您使用的是 npm 版本 5 或更高版本,则默认情况下会这样做,没有 --save 参数。使用 Yarn,您不必指定它,因为它默认保存组件依赖项。

现在我们将 react-tiny-virtual-list 组件安装到我们在上一章创建的 myapp React 应用程序中。您必须移动到您的应用程序根文件夹并键入以下命令:

npm install react-tiny-virtual-list --save

如果您从应用根文件夹中打开 package.json 文件,您可以看到该组件现在已添加到依赖项中:

{
  "name": "myapp",
  "version": "0.1.0",
  "private": true,
  "dependencies": {
    "react": "^16.3.2",
    "react-dom": "^16.3.2",
    "react-scripts": "1.1.4",
    "react-tiny-virtual-list": "^2.1.4"
  },
  "scripts": {
    "start": "react-scripts start",
    "build": "react-scripts build",
    "test": "react-scripts test --env=jsdom",
    "eject": "react-scripts eject"
  }
}

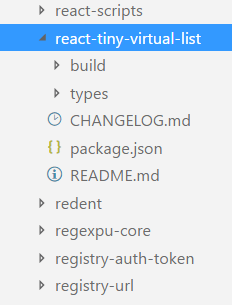
已安装的组件将保存到您应用的node_modules 文件夹中。如果您打开该文件夹,您应该会找到 react-tiny-virtual-list 文件夹:

读书笔记《hands-on-full-stack-development-with-spring-boot-2-0-and-react》Reaction有用的第三方组件

现在,如果您将 React 应用程序源代码推送到 GitHub,则不应包含 node_modules,因为该文件夹非常大。 create-react-app 包含.gitignore 文件,不包括 node_modules来自存储库的文件夹。  .gitignore 文件的内容如下所示:

# See https://help.github.com/ignore-files/ for more about ignoring files.

# dependencies
/node_modules

# testing
/coverage

# production
/build

# misc
.DS_Store
.env.local
.env.development.local
.env.test.local
.env.production.local

npm-debug.log*
yarn-debug.log*
yarn-error.log*

这个想法是,当您从 GitHub 克隆您的应用程序时,您输入 npm install 命令,该命令从 包中读取依赖项.json 文件并将它们下载到您的应用程序。

开始使用已安装组件的最后一步是将其导入到您正在使用它的文件中:

import VirtualList from 'react-tiny-virtual-list';

React Table

React Table (https://react-table.js.org) 是一个灵活的table 组件用于 React 应用程序。它具有许多有用的功能,例如过滤、排序和旋转。让我们使用我们在 previous 一章中创建的 GitHub REST API 应用程序:

  1. Install the react-table component. Open PowerShell and move to the restgithub folder, which is the root folder of the app. Install the component by typing the following command:
      npm install react-table --save
  1. Open the App.js file with the VS Code and remove all code inside the render() method except the return statement with the divider containing the button and input field. Now the App.js file should look like the following:
      import React, { Component } from 'react';
      import './App.css';

      class App extends Component {
        constructor(props) {
          super(props);
          this.state = { keyword: '', data: [] };
        }

        fetchData = () => {
          const url = `https://api.github.com/search/repositories?
           q=${this.state.keyword}`;
          fetch(url)
          .then(response => response.json()) 
          .then(responseData => {
            this.setState({data : responseData.items }); 
          }); 
        }

        handleChange = (e) => {
          this.setState({keyword: e.target.value});
        }

        render() {
          return (
            <div className="App">
              <input type="text" onChange={this.handleChange} />
              <button onClick={this.fetchData} value= {this.state.keyword} >Fetch</button>
            </div>
          );
        }
      }

      export default App;
  1. Import the react-table component and style sheet by adding the following lines at the beginning of the App.js file:
      import ReactTable from "react-table";
      import 'react-table/react-table.css';
  1. To fill React Table with data, you have to pass the data prop to the component. Data can be an array or object and therefore we can use our state, called data . Columns are defined using the columns prop and that prop is required:
      <ReactTable data={data} columns={columns} />
  1. We will define our columns by creating the array of column objects into the render() method. In a column object, you have to define at least the header of the column and the data accessor. The data accessor values come from our REST API response data. You can see that our response data contains an object called owner, and we can show these values using the owner.field_name syntax:
      const columns = [{
         Header: 'Name',  // Header of the column  
         accessor: 'full_name' // Value accessor
        }, {
         Header: 'URL',
         accessor: 'html_url',
        }, {
         Header: 'Owner',
         accessor: 'owner.login',
      }]
  1. Add the React Table component to our render() method, and then the source code of the method looks like the following:
      render() {
        const columns = [{
          Header: 'Name', // Header of the column
          accessor: 'full_name' // Value accessor
        }, {
          Header: 'URL',
          accessor: 'html_url',
        }, {
          Header: 'Owner',
          accessor: 'owner.login',
        }]

        return (
          <div className="App">
            <input type="text" onChange={this.handleChange} />
            <button onClick={this.fetchData} value={this.state.keyword} >Fetch</button>
            <ReactTable data={this.state.data} columns={columns} />
          </div>
        );
      }
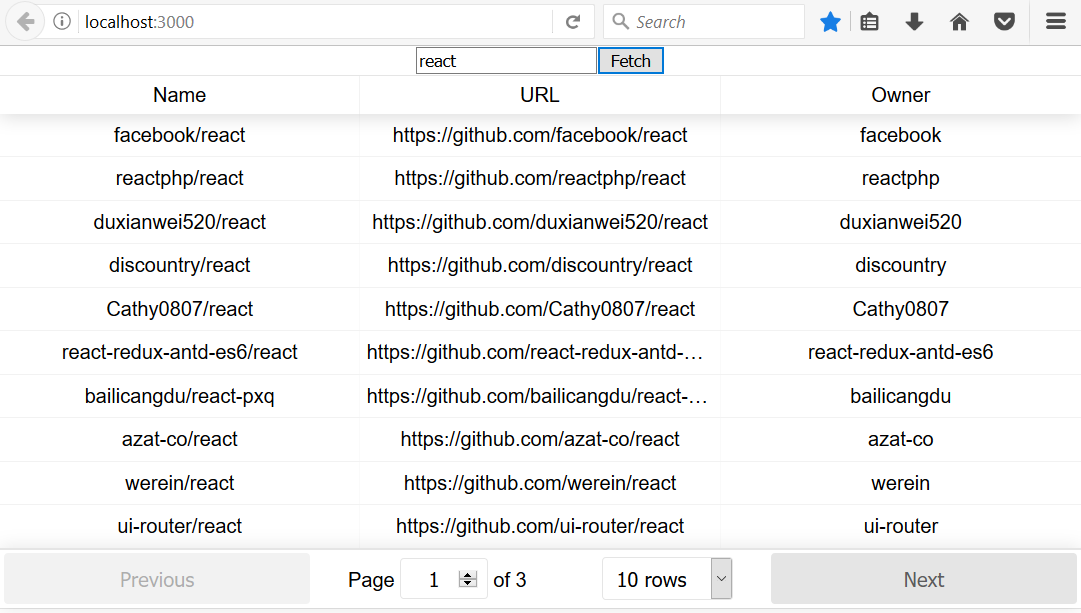
  1. Run the app and navigate to localhost:3000. The table looks quite nice. It has sorting and paging available by default:
读书笔记《hands-on-full-stack-development-with-spring-boot-2-0-and-react》Reaction有用的第三方组件

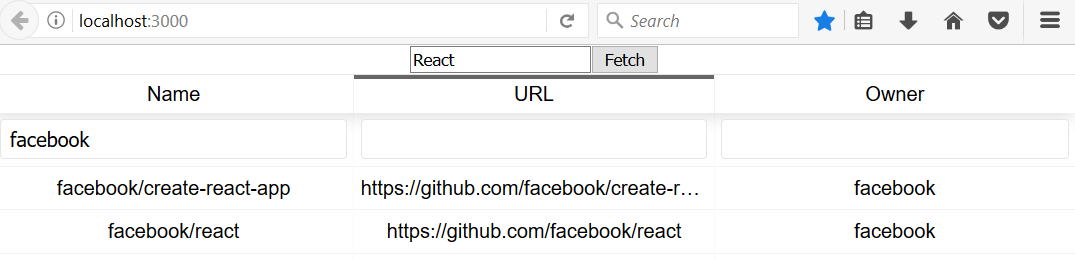
默认情况下禁用过滤,但您可以使用 filterable prop 在 ReactTable 组件中启用它。您还可以设置表格的页面大小:

<ReactTable data={this.state.data} columns={columns} filterable={true} defaultPageSize = {10} />

现在您应该在表格中看到过滤器元素。您可以使用任何列进行过滤,但还有一个选项可以在列级别设置过滤和排序:

读书笔记《hands-on-full-stack-development-with-spring-boot-2-0-and-react》Reaction有用的第三方组件

您可以从 React Table 网站找到表格和列的不同道具。

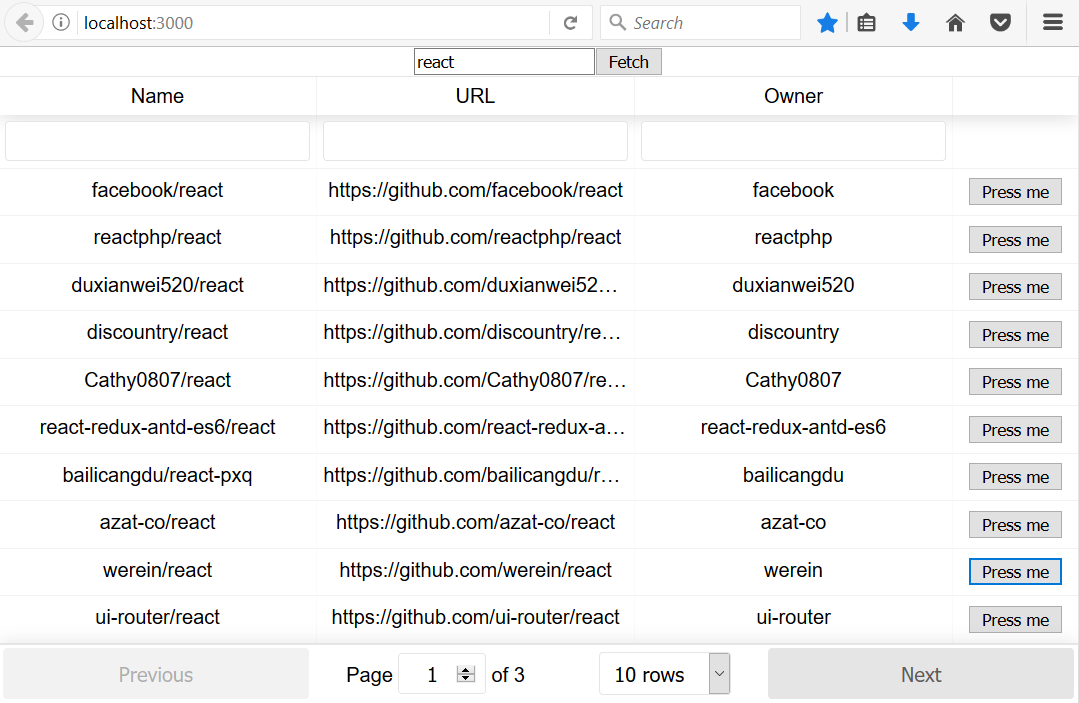
单元格渲染器可用于自定义表格单元格的内容。以下示例显示了如何将按钮呈现到表格单元格。单元格渲染器中的函数将 value 作为参数传递,在这种情况下,该值将是 full_name,这是定义的在列的访问器中。另一种选择是传递一行,它传递整个反对函数。然后,您必须定义 btnClick 函数,该函数在按下按钮时被调用,您可以对发送到函数的值执行一些操作:

render() {
  const columns = [{
    Header: 'Name', // Header of the column
    accessor: 'full_name' // Value accessor
  }, {
    Header: 'URL',
    accessor: 'html_url',
  }, {
    Header: 'Owner',
    accessor: 'owner.login',
  }, {
    id: 'button',
    sortable: false,
    filterable: false,
    width: 100,
    accessor: 'full_name',
    Cell: ({value}) => (<button className="btn btn-default btn-link" onClick=                            {() => {this.btnClick(value)}}>Press me</button>)
}]

以下是带有按钮的表格的屏幕截图:

读书笔记《hands-on-full-stack-development-with-spring-boot-2-0-and-react》Reaction有用的第三方组件

The modal window component

您正在创建CRUD 应用程序时,模态窗口非常适合。我们将创建一个简单的购物清单应用程序,用户可以在其中使用模式窗口添加新商品。我们将在示例中使用的模态窗口组件是 react-skylight (https://marcio.github.io/react-skylight/):

  1. Create a new React app called shoppinglist and install react-skylight by using the following command:
      npm install react-skylight --save
  1. Open the app folder with the VS Code and open the App.js file in the code editor. In the App.js component, we need only one state to keep shopping list items. One shopping list item contains two fields—product and amount. We also need a method to add new items to the list. The following is the source code of the constructor and the method for adding new items to the list. In the addItem method, we are using a spread notation (...), which is used to add a new item at the beginning of the existing array:
      constructor(props) {
        super(props);
        this.state={ items: [] };
      }

      addItem = (item) => {
        this.setState({items: [item, ...this.state.items]});
      }
  1. Add a new component for adding shopping items. Create a new file called AddItem.js to the root folder of the app. This component will use the React Skylight modal form so let's import react-skylight. Inside the React Skylight component in the render() method, we will add two input fields (product and amount) and a button that calls the addItem function. To be able to call the addItem function that is in the App.js component, we have to pass it in a prop when rendering the AddItem component. Outside the React Skylight component, we will add a button that opens the modal form when it is pressed. This button is the only visible element when the component is rendered initially and it calls the React Skylight show() method to open the modal form. We also have to handle the change event of the input fields, so that we can access the values that have been typed. When the button inside the modal form is clicked, the addItem function is called and the modal form is closed using the React Skylight hide() method. The function creates an object from the input field values and calls the App.js component's addItem function, which finally add a new item to the state array and re-renders the user interface:
import React, { Component } from 'react';
import SkyLight from 'react-skylight';

class AddItem extends Component {
  constructor(props) {
    super(props);
  }

  // Create new shopping item and calls addItem function. 
  // Finally close the modal form
  addItem = () => {
    const item = {product: this.state.product,
     amount: this.state.amount};
    this.props.additem(item);
    this.addform.hide();
  }

  handleChange = (e) => {
    this.setState({[e.target.name]: e.target.value});
  }

  render() {
    return (
      <div>
        <section>
          <button onClick={() => this.addform.show()}>Add
           Item</button>
        </section>
        <SkyLight 
          hideOnOverlayClicked 
          ref={ref => this.addform = ref} 
          title="Add item">
          <input type="text" name="product" onChange={this.handleChange} placeholder="product" /><br/>
          <input type="text" name="amount" onChange={this.handleChange} placeholder="amount" /><br/>
          <button onClick={this.addItem}>Add</button>
        </SkyLight> 
      </div>
    );
  }
}

export default AddItem;
  1. Modify the render() method in the App.js file. Add the AddItem component to the render() method and pass the addItem function in a prop to the AddItem component. At the beginning of the method, we transform items to listItems (<li></li>) using the map function:
// App.js
render() {
  const listItems = this.state.items.map((item, index) => 
    <li key={index}>{item.product} {item.amount}</li>)

  return (
    <div className="App">
      <h2>Shopping list</h2>
      <AddItem additem={this.addItem}/>
      <ul>{listItems}</ul>
    </div>
  );
}

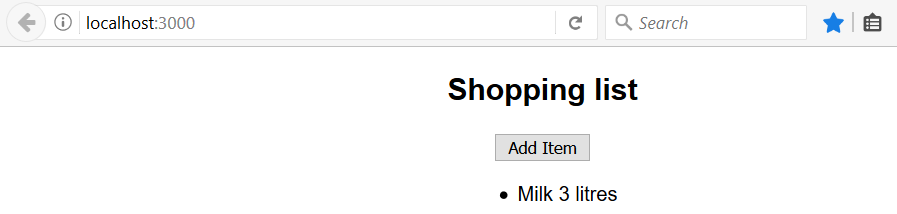
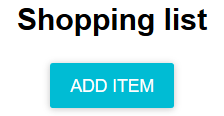
当您现在打开应用程序时,您将看到一个 empty 列表和一个添加新项目的按钮:

读书笔记《hands-on-full-stack-development-with-spring-boot-2-0-and-react》Reaction有用的第三方组件

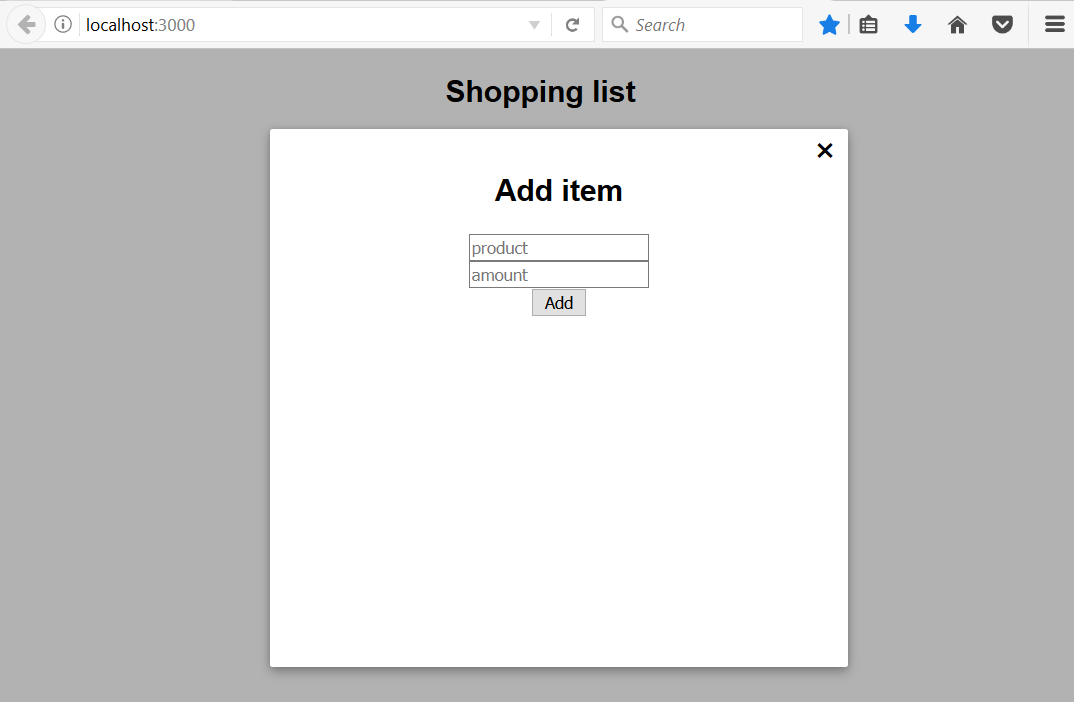
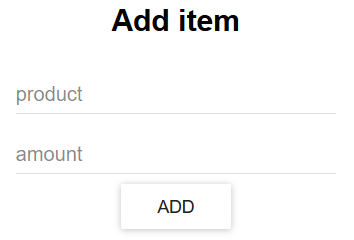
当您按下 Add Item 按钮时,模态表单打开:

读书笔记《hands-on-full-stack-development-with-spring-boot-2-0-and-react》Reaction有用的第三方组件

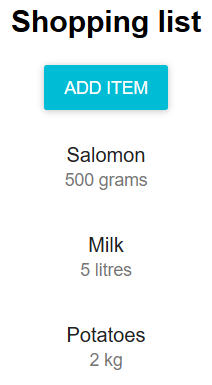
在输入框中输入一些值,然后按 添加 按钮。模态窗体关闭,可以在列表中看到新项目:

读书笔记《hands-on-full-stack-development-with-spring-boot-2-0-and-react》Reaction有用的第三方组件

Material UI component library

Material UI 是 实现 Google 的 Material Design 的 React 组件库。它包含许多不同的组件,例如按钮、列表、表格和卡片,您可以使用它们来获得漂亮且统一的用户界面。我们将继续使用购物清单应用程序,并开始使用 Material UI 设计用户界面:

  1. Open the shopping list app with VS Code. Install Material UI by typing the following command in the root folder to PowerShell or any suitable terminal you are using:
npm install @material-ui/core --save

OR with yarn

yarn add @material-ui/core
  1. We are ready to start to using the Material UI components. We will first change the buttons in the AddItem.js file to use the Material UI Button component. We have to import the Button component and then use it in the render() method. Different props of Button can be found in the Material UI documentation:
// Import RaisedButton
import RaisedButton from '@material-ui/core/Button';

// Use RaisedButton in render() method
render() {
  return (
    <div>
      <section>
        <Button onClick={() => this.addform.show()} 
         variant="raised" color="primary">
         Add Item</ Button>
      </section>
      <SkyLight 
        hideOnOverlayClicked 
        ref={ref => this.addform = ref} 
        title="Add item">
        <input type="text" name="product" onChange={this.handleChange} placeholder="product" /><br/>
        <input type="text" name="amount" onChange={this.handleChange} placeholder="amount" /><br/>
        <Button onClick={this.addItem} variant="default" >Add</ Button>
      </SkyLight> 
    </div>
  );
}

现在应用程序正在使用 RaisedButton,它看起来像这样:

读书笔记《hands-on-full-stack-development-with-spring-boot-2-0-and-react》Reaction有用的第三方组件
  1. Change the input fields in AddItem.js to use the Material UI TextField component. The steps are the same as with the buttons. Import the TextField component and then use it in the render() method:
// Import TextField component
import TextField from '@material-ui/core/TextField';

// Use TextField in render() method
render() {
  return (
    <div>
      <section>
        <Button onClick={() => this.addform.show()} 
         variant="raised" color="primary">
         Add Item</ Button>
      </section>
      <SkyLight 
        hideOnOverlayClicked 
        ref={ref => this.addform = ref} 
        title="Add item">
        <TextField type="text" name="product" onChange={this.handleChange} placeholder="product" /><br/>
        <TextField type="text" name="amount" onChange={this.handleChange} placeholder="amount" /><br/>
        <Button onClick={this.addItem} variant="default" >Add</ Button>     
      </SkyLight> 
    </div>
  );
}

更改后,您的表单应如下所示:

读书笔记《hands-on-full-stack-development-with-spring-boot-2-0-and-react》Reaction有用的第三方组件
  1. Change our list in the App.js file to use the Material UI List and ListItem components. Import the components and use ListItem in the map function where listItems are created and render List instead of ul. We will show the amount of the product in the secondary text of the ListItemText component:
// Import List, ListItem and ListItemText components
import List from '@material-ui/core/List';
import ListItem from '@material-ui/core/ListItem';
import ListItemText from '@material-ui/core/ListItemText';

// Use List and ListItem in render() method
render() {
 // Use ListItem component here instead of li 
    const listItems = this.state.items.map((item, index) => 
     <ListItem key={index}>
     <ListItemText primary={item.product} secondary={item.amount} />
     </ListItem>)
  return (
    <div className="App">
      <h2>Shopping list</h2>
      <AddItem additem={this.addItem}/>
      <List>{listItems}</List>
    </div>
  );
}

现在用户界面看起来类似于 如下。通过少量的工作,用户界面现在更加精致:

读书笔记《hands-on-full-stack-development-with-spring-boot-2-0-and-react》Reaction有用的第三方组件

Routing

在 React 中有多种解决方案可用于 routing。我们使用的最流行的是 React Router (https://github. com/ReactTraining/react-router)。对于 Web 应用程序,React Router 提供了 一个名为 react-router-dom

要开始使用 React Router,我们必须使用以下命令安装它:

npm install react-router-dom --save

react-router-dom 中有四个不同的组件需要实现路由。 BrowserRouter 是基于 Web 的应用程序的路由器。  Route 如果给定的位置匹配,组件会渲染定义的组件。以下是 Route 组件的两个示例。当用户导航到 /contact 结束路径时,第一个渲染 Contact 组件。您还可以将内联渲染与 Route 组件一起使用,如第二个示例所示:

<Route path="/contact" component={Contact} />
// Route with inline rendering
<Route path="/links" render={() => <h1>Links</h1>} />

Switch 组件包装了多个 Route 组件。  Link 组件为您的应用程序提供导航。以下示例显示 Contact 链接并导航到 /contact端点点击链接:

<Link to="/contact">Contact</Link>

以下示例展示了如何在实践中使用这些组件。让我们使用 create-react-app 创建一个新的 React 应用程序,名为 routerapp。使用 VS Code 打开 app 文件夹并打开 App.js 文件到编辑器视图。从 react-router-dom 包中导入组件,并从渲染方法中移除额外代码。修改后,您的 App.js 源代码应如下所示:

import React, { Component } from 'react';
import './App.css';
import { BrowserRouter, Switch, Route, Link } from 'react-router-dom'

class App extends Component {
  render() {
    return (
      <div className="App">
      </div>
    );
  }
}

export default App;

让我们首先创建两个可以在路由中使用的简单组件。创建两个新文件, Home.js 和 Contact.js, 到应用程序根目录文件夹。仅向render() 方法添加标题以显示组件的名称。看组件的代码如下:

//Contact.js
import React, { Component } from 'react';

class Contact extends Component {
  render() {
    return (
      <div>
        <h1>Contact.js</h1>
      </div>
    );
  }
}

export default Contact;

// Home.js
import React, { Component } from 'react';

class Home extends Component {
  render() {
    return (
      <div>
        <h1>Home.js</h1>
      </div>
    );
  }
}

export default Links;

打开 App.js 文件,让我们添加一个 允许的路由器我们在组件之间导航:

import React, { Component } from 'react';
import './App.css';
import { BrowserRouter, Switch, Route, Link } from 'react-router-dom'
import Contact from './Contact';
import Home from './Home';

class App extends Component {
  render() {
    return (
      <div className="App">
        <BrowserRouter>
          <div>
            <Link to="/">Home</Link>{' '}
            <Link to="/contact">Contact</Link>{' '} 
            <Link to="/links">Links</Link>{' '} 
            <Switch>
              <Route exact path="/" component={Home} />
              <Route path="/contact" component={Contact} />
              <Route path="/links" render={() => <h1>Links</h1>} />
              <Route render={() => <h1>Page not found</h1>} />
            </Switch>
          </div>
        </BrowserRouter>
      </div>
    );
  }
}

export default App;

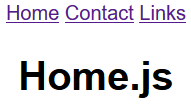
现在,当您启动应用程序时,您将看到链接和 Home 组件,它显示在根结束路径 (localhost: 3030/) 在第一个 Route 组件中定义。第一个 Route 组件中的 exact 关键字表示路径必须完全匹配。如果你删除它,那么路由总是会转到 Home 组件:

读书笔记《hands-on-full-stack-development-with-spring-boot-2-0-and-react》Reaction有用的第三方组件

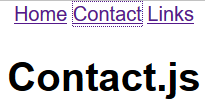
当您按下 Contact 链接时,Contact 组件被渲染:

读书笔记《hands-on-full-stack-development-with-spring-boot-2-0-and-react》Reaction有用的第三方组件

Summary


在本章中,我们学习了如何使用第三方 React 组件。我们熟悉了我们将在前端使用的几个组件。 React Table 是具有内置功能的表格组件,例如排序、分页和过滤。 React Skylight 是模态表单组件,我们将在前端使用它来创建用于添加和编辑项目的表单。 Material UI 是一个组件库,它提供了多个实现 Google 的 Material Design 的用户界面组件。我们还学习了如何在 React 应用程序中使用 React Router 进行路由。在下一章中,我们将为前端开发构建一个环境。

Questions


  1. How should you find components for React?
  2. How should you install components?
  3. How should you use the React Table component?
  4. How should you create modal forms with React?
  5. How should you use the Material UI component library?
  6. How should you implement routing in a React application?