最终幻想 7 (VII) 重生 没有标志演练
征兆缺失是《最终幻想 7 (VII) 重生》中的支线任务。本演练将引导您完成“缺少标志支线任务(零工)”的所有目标。它也被称为“天空观察者的请求”。它要求你访问宇宙峡谷地区的三个地点,击败强大的恶魔并在每个地点拍摄天象的照片。
完成第 10 章宇宙峡谷的故事事件后,当您获得主要目标“荒野,蓝色那边”时,即可使用“无标志”。
支线任务:无标志第10章 区域:
宇宙峡谷-行星学大会任务给予者:凯撒要求:完成第10章宇宙峡谷中的故事事件,当你获得主要目标“荒野,蓝色那边”时。然后查看科斯莫峡谷村的布告栏。奖励:配件:塔罗牌、艾里斯关系强化、10 点队伍经验、玩家经验(根据你的等级调整)任务信息:最近在山谷中发现了灾难性废墟的预兆——可怕的恶魔,它们的出现预示着厄运。但一切还没有消失,因为在过去,我们观察到的天象表明伟大的母亲战胜了这些力量。我们请求协助发现和拍摄上述现象;寻找导师凯撒了解更多信息。
目标:
- 拍摄天象(1/3)
- 拍摄天象 (2/3)
- 拍摄天象 (3/3)
- 向凯撒报告

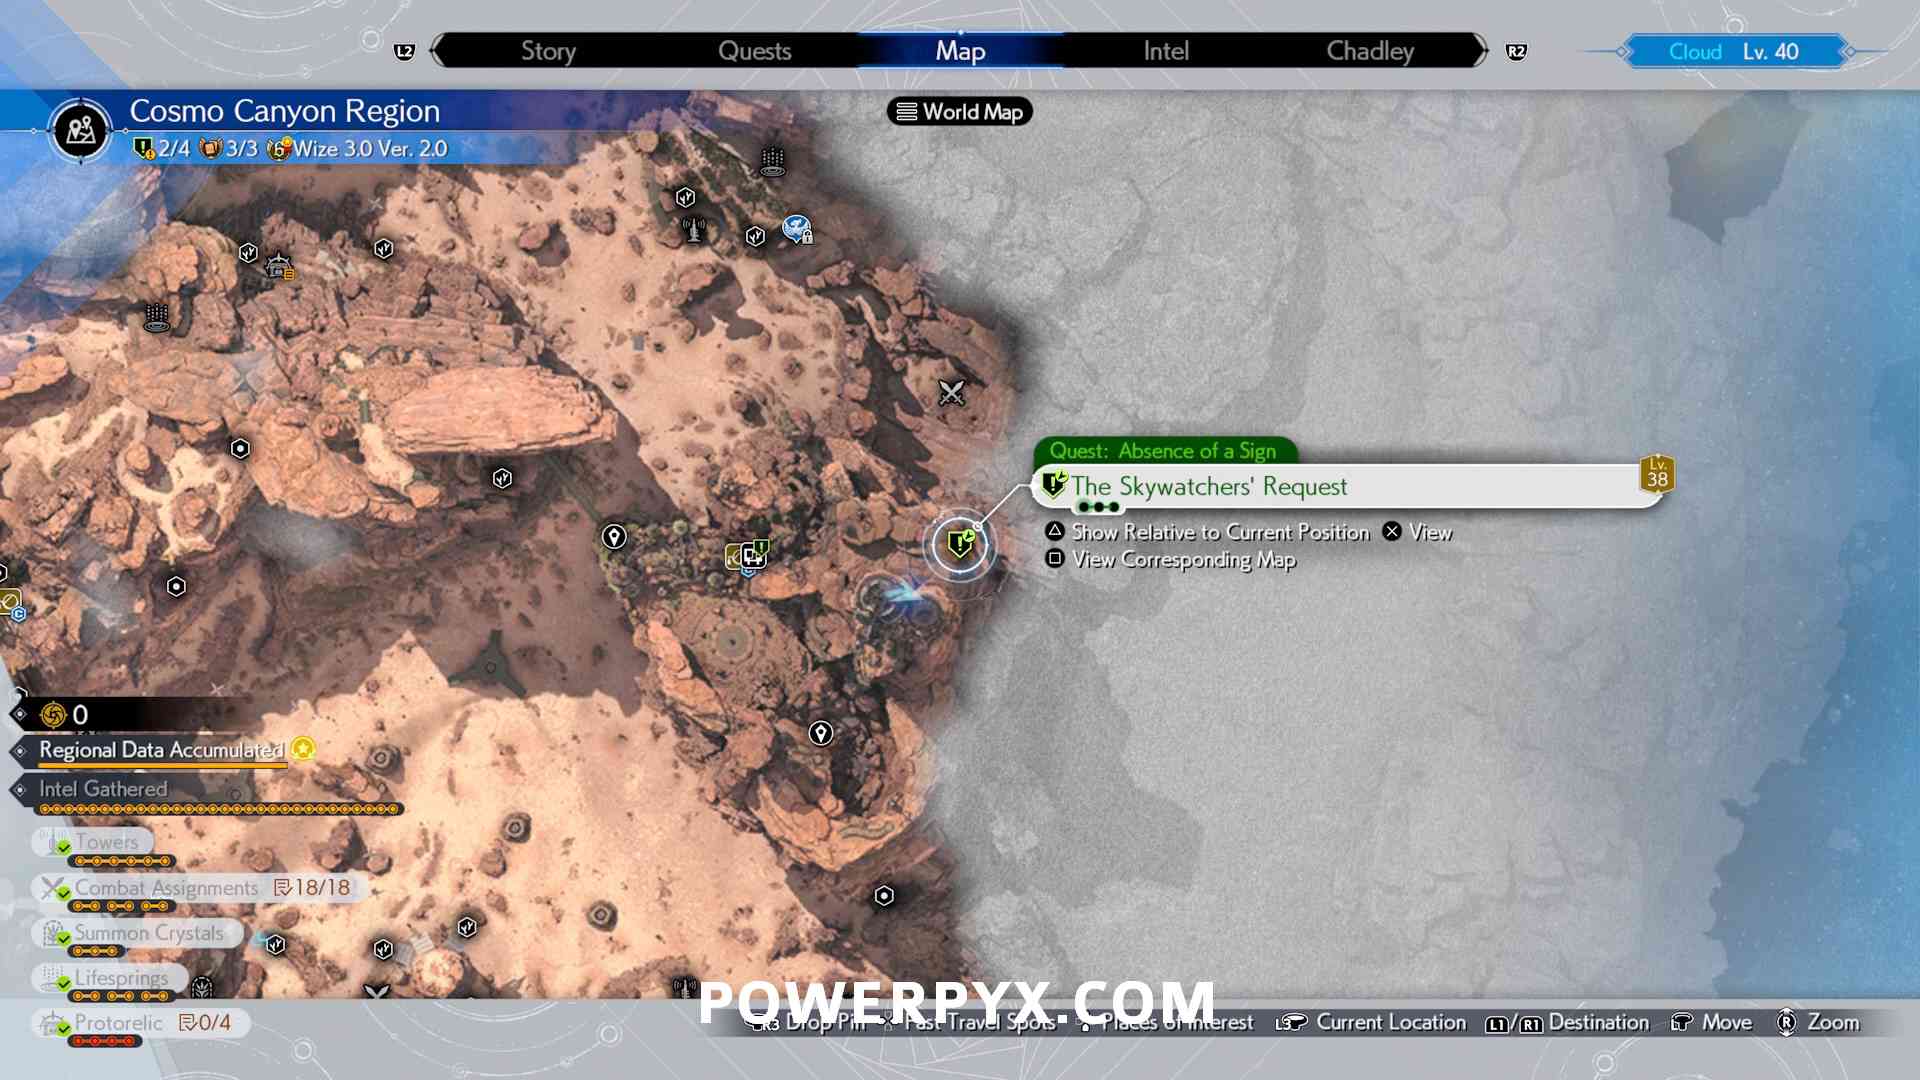
起始地点:没有标志(Skywatcher 的要求)
快速前往宇宙峡谷村的“行星学大会”寻找这个任务给予者。或者,您也可以从城镇入口附近的任务布告栏接受它,然后前往任务提供者处。


拍摄天象(1/3)
你的任务是前往宇宙峡谷地区周围的三个天象地点,并在拍摄天空照片之前击败强大的恶魔。
对于第一个地点,快速前往该地区西南部的机场。机场稍东边有一条上坡路,沿着这条路走。


在那里你会发现一种名为“Reapertail”的大蝎子敌人。它对冰的能力较弱,因此可以使用冰晶石(暴风雪法术)快速施压并使其错开。战斗结束后,系统会提示您拍照。
Use  to cycle through the photos until you get to Note 1/3 (the one with the archway and stars in the top-right corner). You can press
  for a closer look. Then, press
  to enter camera mode and use and
  to zoom in and out until the image is 80% and the outline turns green, then press
  to take it.
You’ll need to aim at the archway.

Photograph celestial phenomena (2/3)
The next marker is further south-east of the Airstrip. To get to this area, you can either take the elevator in Cosmo Canyon town’s marketplace and then head west, or get the chocobo from Side Quest: Bonds of Trust and then fly down the ramp at Kamaria’s Ranch.


Approach the location from the east, go up the hill path. At the very top you find another Reapertail Scorpion. Use Ice Materia to pressure and quickly stagger it.
After the fight, use to cycle through the photos until you get to Note 3/3 (the one with two hills and stars in the top center). You can press for a closer look. Then, press to enter camera mode and use and to zoom in and out until the image is 80% or above and the outline turns green, then press to take it.
You must aim slightly below the bottom star of the constellation and just a tiny bit to the right of it. Start by putting the cursor on the bottom star, aim downward in a straight line until the % is at the highest, then very slightly aim to the right and zoom in until it goes to 80%.

Photograph celestial phenomena (3/3)
The last photo is found on the plateau where Activation Intel 6 is.


If you already activated this intel you can fast travel there. If not, you must fly to it from Gliding Range No. 16 on a mountain top south-east of Activation Intel 6. Getting up there requires jumping over many gliding range ramps: to start, go directly south of Activation Intel 6 through the lower desert area until you reach the southern border of the map. When you hit the south end of the map turn left and you’ll see a path leading uphill. Follow this path and jump from one ramp to the next until you reach the top, then glide over to the tower. The map below shows the path. From the Activation Intel Tower you can head north, and jump into a gust of wind to fly up to the photo location. Another Reapertail awaits there, defeat it.

Look at Note 2/3 and pull out the camera. You need to aim slightly above the left mountain peak and very slightly to the right of it.

Report to Caeser
Head back to the Planetology Assembly and speak to Caesar to complete the quest.
After completing the third course, dialogue will take place and the quest will automatically conclude.

For all other Side Quest Walkthroughs, check out our complete Final Fantasy 7 (VII) Rebirth Walkthrough.